Slow Cooker Chocolate Peanut Clusters – No-Fuss Treat
Slow Cooker Chocolate Peanut Clusters – No-Fuss Treat

Hey — Adrienne Here
I’ll be honest with you — I didn’t grow up calling anything a “cluster.” It wasn’t a word we used in the kitchen. But somewhere between bake sales, potlucks, and those strange little tins that show up every December, I picked up a serious soft spot for these glossy little chocolate-peanut piles.
They’re the kind of treat that feels humble but hits hard. You don’t need special gear. You don’t need candy-making confidence. You just need a slow cooker, some decent chocolate, and a little patience. And while I’ve made plenty of complicated desserts in my time, these? These are the ones people always ask for again.
So let’s talk about the why and the how — and why the slow cooker makes this absurdly easy, but still completely worth doing the long way.
- Foreword – The Oddly Perfect Candy You Didn’t See Coming
- What Chocolate Peanut Clusters Actually Are — And What They Aren’t
- Adrienne’s Method — The Way She Actually Cooks It
- The Chocolate Matters — And Not All of It Melts the Same
- Peanuts, Salting, and When to Break the Rules
- Shaping, Cooling, and Storage Tricks
- Swaps and Twists — From Trail Mix to Pretzel Crunch
- FAQ — Chocolate Peanut Clusters in the Slow Cooker
- Closing Thoughts
Foreword – The Oddly Perfect Candy You Didn’t See Coming
There’s something about chocolate peanut clusters that slips under the radar. They don’t get the spotlight like truffles or the nostalgia treatment like fudge. They’re not baked, they’re not piped, they’re not “elevated” or “deconstructed.” They just sort of appear — at the end of cookie platters, in wax paper wrappers, in the bottom of candy tins where someone thought they were safe to forget. Until you eat one. And then suddenly, they’re the only thing you want.

What I love most about them is how unassuming they are. They don’t demand technique. They don’t hinge on precision. They’re the kind of candy that gets made in church basements and school kitchens, from hand-scrawled recipe cards or off the back of a chocolate chip bag. And yet, when they’re good — when the chocolate’s properly melted and the salt’s where it should be — they’re as satisfying as anything a pastry chef could dream up.
The slow cooker, believe it or not, only makes them better. It’s a gentle heat, which means no scorched chocolate and no stressing over timing. It’s also kind of the perfect metaphor for how these clusters work: low-maintenance, surprisingly reliable, and better the longer you let them hang out. You stir, you scoop, you cool. It’s candy stripped down to its best parts.
But there’s another reason I keep making them. They feel like sharing food. They go into gift bags and lunchboxes, get dropped on coworkers’ desks, get passed around without pretense. No forks, no plates — just fingers and a napkin and that little crunch-snap as you break one in half. They’re not impressive. They’re comforting. They taste like something someone made for you, not to impress you.
So yeah, they’re simple. But don’t let that fool you. These are the kind of treats that sneak into traditions, show up every December, and stay in your kitchen way longer than you planned.
What Chocolate Peanut Clusters Actually Are — And What They Aren’t
First off: chocolate peanut clusters are not fudge. They’re not bark. They’re not brittle, bonbons, or ganache. They’re not a shortcut to something fancy — they are the thing. And once you stop trying to compare them to every other kind of candy, you start to see how they stand on their own.
What makes a cluster a cluster is the ratio — not just of chocolate to peanut, but of smooth to rough, solid to melt. The whole idea is that you’re not pouring chocolate over peanuts, you’re mixing them together until every nut is coated and clinging to a few neighbors. Then you scoop out little misshapen piles and let them firm up into that perfect soft-crunch bite. There’s no swirling. No slicing. No tempering. They’re not meant to snap. They’re meant to give.
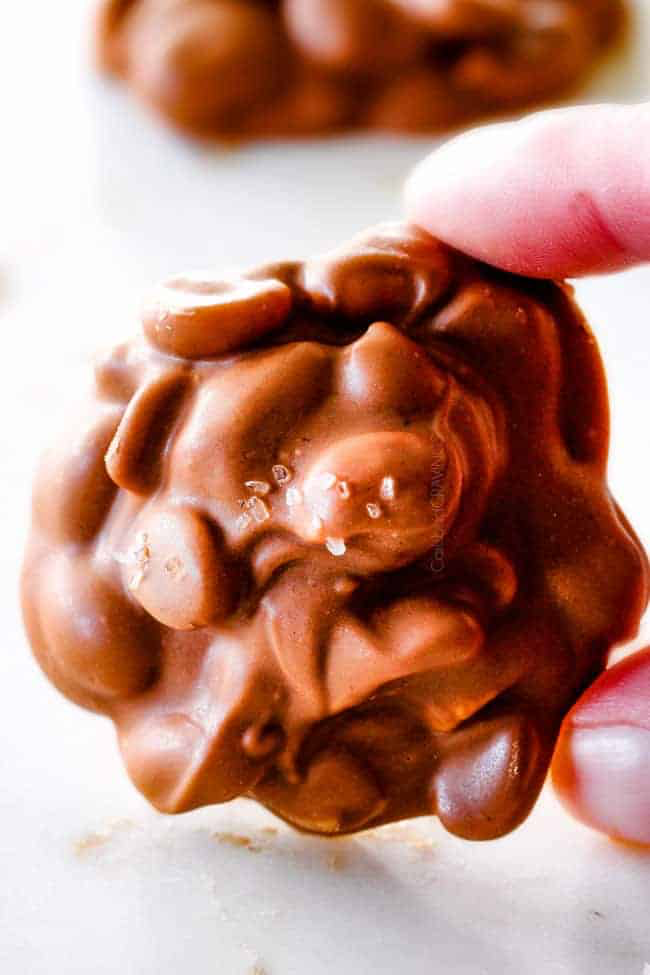
Texture-wise, a good cluster is firm but not brittle. It should break with your teeth, not shatter. The chocolate shouldn’t bloom (that dusty film you get from poor storage or bad melting), and it shouldn’t melt in your hands in two seconds either. It should hold its shape on a tray, but soften just enough in your mouth to make you pause. You should taste the chocolate first, then the salt, then the peanut — in that order.
Visually? They’re humble. Lumpy. No two the same. You don’t roll them into balls or pipe them into shells. You drop them from a spoon or a scoop, and that’s it. Which is part of the charm — they look handmade because they arehandmade. They’re not trying to be sleek. They’re trying to be eaten.
And most importantly, they’re not blank slates. They’re not “chocolate candy with stuff in it.” They’re very specifically chocolate and peanut. You can riff — and we will — but the base flavor? That nutty, roasty, chocolatey, salty-sweet combo? That’s the identity. If you lose that, it’s something else entirely.
So if you’re making them, make these. Not truffles. Not clusters with twelve add-ins and a gold leaf. Just the classic, a little dialed-in, and a lot easier than they taste.
Adrienne’s Method — The Way She Actually Cooks It
There’s a kind of trap people fall into with this recipe — assuming it’s too simple to mess up. Chocolate, peanuts, slow cooker. What could go wrong? Well… lots. Burnt chocolate. Seized chocolate. Oily separation. Gritty texture. Chocolate that sets too soft or blooms in the fridge. It’s still easy — but only if you treat it like candy, not cereal mix.

I start by chopping my chocolate. Even if I’m using chips or disks, I like to add a bar or two of a better-quality dark chocolate just to round out the flavor. No one will know exactly what’s in it, but they’ll taste the difference. I do about 2 parts dark, 1 part milk, and a chunk of something creamy — usually candy coating, almond bark, or even a few squares of white chocolate. The candy coating gives structure. The dark gives bite. The milk keeps it friendly. It’s a little Frankenstein, but it works.
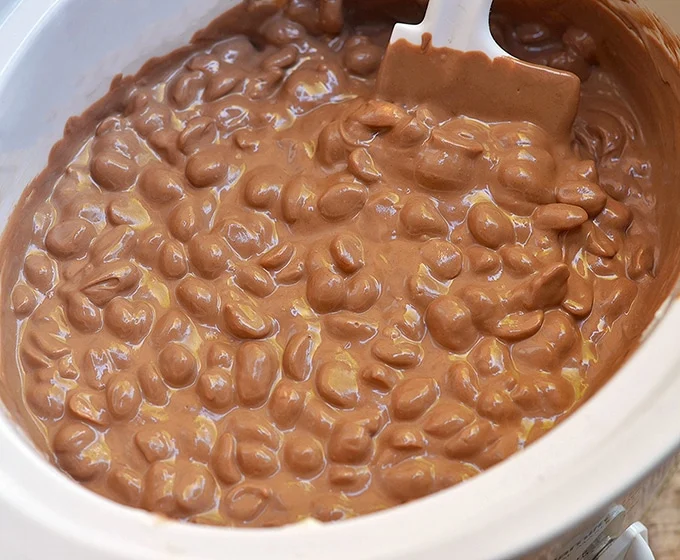
Then I layer it. Not just dump it. Chocolate first — the stuff that melts slower — and peanuts on top. Why? Because chocolate in contact with the slow cooker base can get scorched if you’re not careful. With peanuts on top, the heat disperses more evenly. I cover the pot and set it to low — never high — and I check after about 30 minutes. Not to stir yet. Just to look. Once the edges are glossy and starting to puddle, I give it a very gentle stir.
From there, I stir every 10 to 15 minutes, just enough to keep things melting evenly. You don’t want to whip air in — just fold. It takes about an hour total to melt and combine fully. If it’s been sitting too long and the oils start to separate, you’ve gone too far. Don’t panic — just stir more briskly and cool it faster when you scoop.
Once it’s smooth and everything’s coated, I turn off the heat and let it sit uncovered for about 10 minutes. That lets the mixture thicken just a little — which helps when you scoop. If it’s too runny, your clusters will sprawl. If it’s just right, they’ll drop in mounds and hold their shape.
I use a 1½ tablespoon cookie scoop for consistency. You can also use two spoons, but you’ll get blobs. Which is fine! Just… rustic. I scoop onto wax paper, not parchment — wax paper peels cleaner and doesn’t trap condensation underneath. I don’t chill them unless I’m in a rush. Just leave them out at room temp for 1 to 2 hours until firm.
If I’m feeling fancy, I press on a little flaky salt or crushed pretzels before they set. Sometimes I go wild and do crushed toffee or a peanut butter drizzle. But most days? I leave them plain. Because when you get the base right, you don’t need much else.
They last a week at room temp, longer in the fridge, and even longer in the freezer — but good luck keeping them around that long.
The Chocolate Matters — And Not All of It Melts the Same
The first time I tried to make clusters, I used whatever chocolate was left in the pantry — half a bag of chips, some dusty holiday bark, maybe a few broken bars from the freezer door. I figured it would all melt down and taste fine. Spoiler: it did not.
Chocolate’s picky. Some of it melts clean and smooth. Some of it turns into a grainy, oily mess the second you look at it wrong. The kind you choose here changes everything — not just the flavor, but the texture, the way it sets, how it holds up in storage, and whether it blooms into that chalky gray film two days later.
Let’s start with the basics: chips vs bars. Chocolate chips are made to hold their shape. They’ve got stabilizers that keep them from fully melting — great in cookies, not great in clusters. If you’re using all chips, your melt will be thicker, slower, and prone to weird separation. That’s why I use chips sparingly — maybe as part of a blend, not the whole thing.
Bars and blocks, on the other hand, are made to melt. Baking bars, couverture chocolate, or even those big bricks of dark chocolate you find in the bulk aisle — they break down smoother and re-solidify more cleanly. No chalkiness, no waxy mouthfeel. If I had to choose just one chocolate to use, I’d go with a chopped-up bar of 60% dark, every time.
Then there’s the candy coating crowd: almond bark, melting wafers, white candy melts. These are the structural engineers of cluster-making. They’re not “real” chocolate, technically — most don’t have cocoa butter — but they melt like a dream and set firm without any bloom. I always add a little to my base. Not too much — just enough to keep everything glossy and snappy at room temp.
Here’s the rough blend I stick to:
- 2 parts dark chocolate bar or wafers (60–70%)
- 1 part milk chocolate chips or bar
- ¼ part almond bark or candy melts
You can fudge that ratio, but if you go too heavy on the milk or too light on the structure, you’ll end up with soft, greasy clusters that melt in your hand before they reach your mouth.
Oh — and don’t skip the salt. A pinch of kosher salt in the mix brings out the cocoa and rounds out the sweetness. It’s not a garnish. It’s a necessity.
Melt matters. Use chocolate that behaves, and your clusters will follow suit.
Peanuts, Salting, and When to Break the Rules
You’d think the chocolate is the hard part. But when clusters go wrong — too dry, too soft, too sweet, too bland — it’s usually the peanuts. The type, the roast, the salt level, and how much you pack in. You don’t just dump a jar and call it a day. You choose.
Let’s start with the obvious: salted vs unsalted. Salted peanuts — the kind you find in snack canisters — work great, but they’re unpredictable. Some batches are barely seasoned. Others taste like brine. If you’re using them, taste before you dump. If they’re super salty, go lighter on the added salt in the chocolate. If they’re bland, treat them like unsalted.
Dry-roasted peanuts add more flavor than raw ones, hands down. They bring depth and toast and a bit of edge that raw peanuts just don’t have. If you’re using raw, consider toasting them first — even ten minutes in a 325°F oven changes everything. Warm, just-roasted nuts soak up chocolate better too.
Then there’s volume. A cup of whole peanuts isn’t the same as a cup of crushed or halved — the smaller the pieces, the more space they take up. I go by weight when I can: about 1½ to 2 cups (roughly 10–12 oz) per pound of chocolate base. More than that, and your clusters get dry. Less, and they’re just chocolate mounds with a peanut surprise.
Want to mix it up? Here’s when to break the peanut rule — and how to do it well:
- Cashews: buttery and soft, better in small amounts and paired with something sharp (like dark chocolate and salt).
- Pecans: rich and toasty, but oily. Toast first, and don’t overdo.
- Almonds: slivered or whole, they hold their crunch but feel firmer in the bite. Good in white chocolate blends.
- Trail mix: dangerous territory. Great textures, but way less predictable. If you use it, pick one with minimal dried fruit or you’ll get weird chewy patches in your clusters.
- Candied bacon bits or chili peanuts: not classic, but incredible. You only need a tablespoon mixed into the batch to change the whole vibe. Goes best with milk chocolate and a pinch of smoked salt on top.
And no — you don’t have to stick to peanuts forever. But they’re here for a reason. They give crunch without fighting the chocolate, and that roasty, salty base is what makes these clusters feel like candy, not just trail mix in disguise.
Shaping, Cooling, and Storage Tricks
The biggest lie about chocolate peanut clusters is that once the mix is melted and stirred, you’re done. Technically, sure — you could start scooping and hope for the best. But if you want clusters that actually look like clusters — not flat blobs or weird brittle towers — this is where the details matter.
First, the scoop. I use a 1½ tablespoon cookie scoop. It’s not just for looks — it gives you consistent portions that set at the same rate and stack neatly if you’re boxing them up. You can use two spoons if you’re going rustic, but expect a little chaos. There’s no wrong here, just a tradeoff between aesthetics and speed.
The scooping surface matters more than people think. I always go for wax paper, not parchment. Wax paper peels off cleaner, doesn’t wrinkle under moisture, and doesn’t leave behind a weird texture on the bottom of the clusters. If I’m doing a big batch, I lay sheets on the back of baking trays so I can move them around without disturbing the candy.
Before scooping, I let the mix rest in the slow cooker for 10–15 minutes with the lid off. This thickens it up just enough that it doesn’t run all over the paper. You want it to mound — not puddle.
Let them cool at room temperature if you can. It keeps the chocolate from dulling or blooming, and it gives the clusters that nice soft bite. If you’re in a rush, you can refrigerate — just know they’ll set harder and faster, which can lead to cracks or a waxier texture. Still edible, still delicious, just slightly less polished.
Once they’re firm, store them in an airtight container, layered with wax paper or parchment between rows. They’ll keep at room temp for about 7 days, in the fridge for 2–3 weeks, and in the freezer for months — though they rarely make it that far. If you freeze them, let them come back to room temp slowly to avoid condensation.
A few other small but weirdly useful tricks:
- If your kitchen’s warm, store the finished clusters in a cool pantry or basement — not the fridge, if you can help it. The fridge messes with the texture if you’re in and out constantly.
- If gifting, don’t wrap them in plastic — it traps moisture. Use cellophane bags or paper boxes.
- Don’t stack them until they’re fully set. Even a little softness leads to “choco-fusion” — which sounds cooler than it is.
This part of the process isn’t flashy. It’s just where you decide if your candy looks like a mess or like something worth sharing. Either one works — but I know which one disappears faster at a holiday table.
Swaps and Twists — From Trail Mix to Pretzel Crunch
Once you’ve made the classic chocolate peanut version a couple times — and you’ve watched the last one disappear off a plate in under five minutes — it’s pretty tempting to start experimenting. And honestly? You should. Clusters are forgiving. They love a remix. But the trick is knowing what actually works, and what just sounds cool until you’re stuck chewing a dried apricot welded to a pistachio and wondering where it all went wrong.
So, let’s start with a loose framework. My go-to cluster “formula” is this:
Chocolate base + crunch + surprise + finisher
The chocolate base stays the same: dark, milk, or white — or a mix — depending on what vibe you’re going for. Then comes the crunch, which can be peanuts, but doesn’t have to be. The surprise is your wildcard — dried fruit, crushed candy, flaky salt, chili flakes, even espresso powder. The finisher is optional — a drizzle, a dusting, something on top that gives it visual pop or a final punch.
Some combinations I’ve tried — and keep coming back to:
- Dark chocolate + pistachios + dried cherry + flaky sea salt
Think trail mix, but luxurious. The cherry cuts through the richness and the salt wakes everything up. - Milk chocolate + pretzels + toffee bits + white chocolate drizzle
This one tastes like something from a gourmet snack aisle. Sweet, salty, crunchy, and showy without being fussy. - White chocolate + roasted almonds + matcha powder + sesame seeds
Unexpected and a little earthy. The matcha keeps it from being too sweet, and the sesame gives a subtle nuttiness that plays well with the almond. - Dark chocolate + candied bacon + smoked salt
Not for everyone, but unforgettable. Make sure the bacon is crispy and well-drained before you stir it in, or you’ll end up with sad, chewy bits. - Semi-sweet chocolate + chili-dusted peanuts + crushed cinnamon cereal
A little heat, a little crunch, a little nostalgia. This one tastes like a gas station snack got a chef’s blessing.
Want to go simple? Try swapping:
- Peanuts → cashews, pecans, slivered almonds, sunflower seeds
- Chocolate → butterscotch chips, white baking chips, peanut butter chips
- Surprise → mini marshmallows, crushed graham crackers, coconut flakes, dried banana
Just remember: every add-in changes the balance. Sticky things can mess with setting. Powdery things can make the chocolate clump. Too much salt throws everything off. Try one new thing at a time, and you’ll figure out fast what makes a cluster work — and what makes it fall apart.
Because at the end of the day, this isn’t just candy. It’s edible instinct. Once you trust your gut, you’ll start making versions no one else thought of — and they’ll be gone before they cool.
FAQ — Chocolate Peanut Clusters in the Slow Cooker
Clusters are simple, but the questions sneak in as soon as you try to scale, swap, or store them.
Can I use just chocolate chips? How do I keep them from blooming? What happens if I double the batch? Most of these aren’t dealbreakers — but knowing the answers can turn a decent candy into one that people hoard and ask you to “just bring again” every holiday from now on.
Can I use only chocolate chips?
You can, but I wouldn’t. Chips are made to resist melting, so they often stay thicker and can split or seize if overheated. If they’re all you have, go low and slow, and stir often. Add a little almond bark or candy coating to help smooth things out.
What’s the best chocolate-to-nut ratio?
For a balanced bite, I go with 10–12 oz of peanuts per 1 pound of chocolate. That gives you enough crunch without turning it into nut bark. Too many peanuts and the chocolate can’t bind the cluster properly — they’ll crumble.
Can I make these dairy-free?
Yes — just watch your chocolate. Use dairy-free dark chocolate and skip anything with milk solids (most milk chips and white chocolate have them). Also skip almond bark unless it’s labeled dairy-free. Use coconut oil for gloss if needed.
How do I keep them from melting at room temp?
Use a little candy coating or almond bark in your base. It stabilizes the chocolate and helps it hold firm. Also: store them in a cool spot, away from sunlight or warm countertops. Room temp means 65–70°F — not a sun-warmed kitchen island.
Can I double the recipe?
Absolutely — but only if your slow cooker can handle it. A double batch should still stay under ⅔ full to melt evenly. You’ll need more stirring and more scoop trays. Also: it’ll take longer to cool and set.
What if my slow cooker runs hot?
Use a heat diffuser under the base, or just turn it off earlier and let the residual heat do the work. You can also melt the chocolate on the stove and just keep it warm in the slow cooker for scooping. Don’t be afraid to adjust.
Why are my clusters chalky or streaky?
That’s bloom — either fat or sugar separating during cooling. Usually from overheating, poor-quality chocolate, or rapid temperature changes. It still tastes fine but looks dull. Avoid it by melting slowly and letting them cool at room temp.
Can I freeze them?
Yes. Just layer them between wax paper in a container and seal tight. They’ll keep for 2–3 months. Let them thaw in the fridge or at room temp in the container — unopened — to avoid condensation.
These aren’t fussy candies, but they reward a little attention.
You don’t have to do everything perfectly. But when you hit the right balance of chocolate, crunch, and shape — and you don’t scorch the batch — these things somehow feel like more than the sum of their parts. And that’s when they disappear before the tray hits the table.
Closing Thoughts
There are recipes that show off, and then there are recipes that stick. Chocolate peanut clusters fall in that second camp. They don’t ask for ceremony or flair — just a bowl, a spoon, and maybe a little wax paper if you’re feeling organized. But somehow, they always land. People lean in for seconds. They wrap a few in napkins “for later” that somehow vanish on the drive home. They don’t ask what’s in them — they just want to know if you’ll make more.
What I love about these isn’t just that they’re easy. It’s that they feel generous. You don’t plate them. You pile them. You make a bunch, not just a few. You hand them out without thinking. They’re candy for sharing, not impressing.
And using a slow cooker? It’s not a hack. It’s a choice that makes the process calmer, the result more consistent, and the whole experience — dare I say — kind of soothing. There’s no rush. No snapping to attention with a hot sugar thermometer. Just chocolate melting slowly while you do something else, and then, eventually, candy that tastes like it came from somewhere thoughtful.
Which, in its own way, it did.