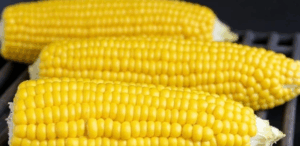
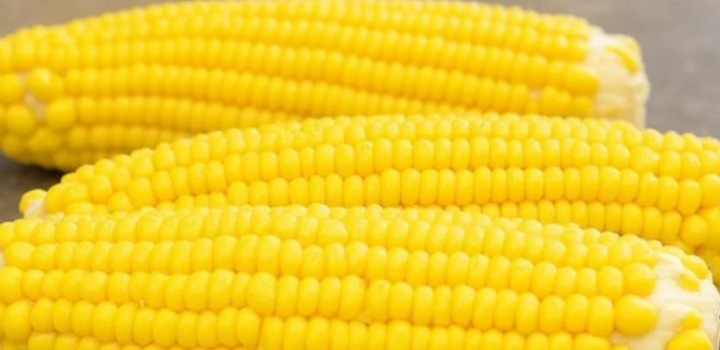
Roasted Corn on the Cob: Easy Oven Method

Oven-roasted corn on the cob is one of those simple and versatile dishes that never go out of style. People love it for its rich flavor, satisfying texture, and aroma that brings back summer memories—even in colder months. Roasting in the oven gives the kernels a perfect balance of tenderness and caramelization, without the need for a grill or a pot of boiling water.
Why do more and more people choose the oven method? First, it’s convenient—no need to step outside or set up special equipment. Second, the oven helps preserve the natural sweetness of the corn while delivering consistent results: no burnt edges or undercooked spots. This method is perfect for a quick weeknight dinner or a festive table.
Why I Choose Oven Roasting for Corn on the Cob
Speaking as someone who has cooked corn dozens of different ways—grilled, boiled, steamed, even over hot coals—the oven has become my go-to method both at home and in professional kitchens. Roasting brings out the deep, sweet flavor of the kernels and gives them a satisfying texture with slight caramelization. No other method offers the same level of consistency and control.
Advantages of the Oven Method
No Special Equipment Needed
One of the biggest advantages: simplicity. You don’t need a grill, steamer, or even a large pot. A regular oven and baking tray are all it takes. This is especially important when I’m teaching cooks or catering events with limited gear. At home, I just turn on the oven and let it work for me.
Year-Round Availability
Grilling is great in summer—but what about winter or rainy autumn days? The oven solves that problem. No matter the season, I can prepare corn the same way, with no dependence on weather. This is crucial in a restaurant setting where consistency across the menu matters all year.
Better Moisture Retention
Boiled corn often loses some of its natural juice, while grilled corn can dry out if slightly overcooked. The oven, on the other hand, heats evenly and allows me to roast corn in foil or husk to trap moisture. The result: juicy, tender kernels without the risk of sogginess or dryness.
Here’s a quick comparison based on moisture retention:
| Cooking Method | Moisture Retention | Risk of Drying Out |
| Boiling | Moderate | Low |
| Grilling | Low | High |
| Oven Roasting | High | Low |
That’s why I always recommend oven roasting—especially when you want flavorful, foolproof results every time.
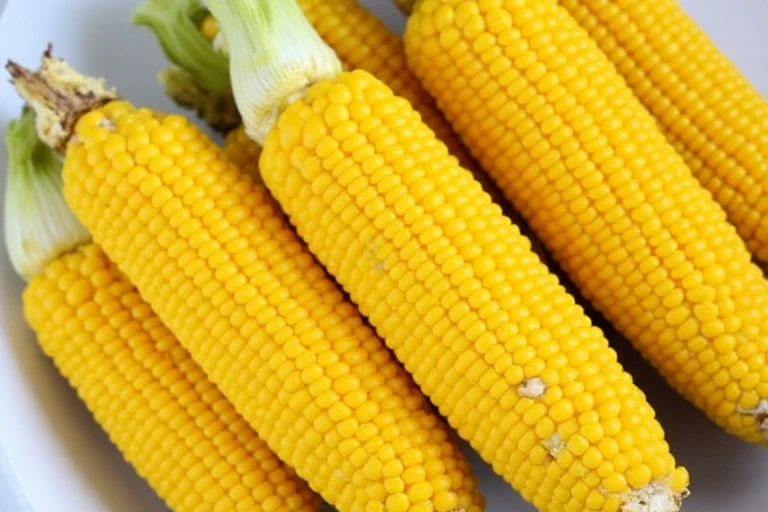
Selecting and Preparing Corn
As a chef, I’ve learned that the outcome of a dish is only as good as the quality of your ingredients—especially with something as simple and natural as corn. Oven roasting will highlight the corn’s natural sweetness and texture, but only if you start with good ears and prep them the right way. Here’s how I approach selection and prep in both professional kitchens and at home.
Choosing the Right Corn
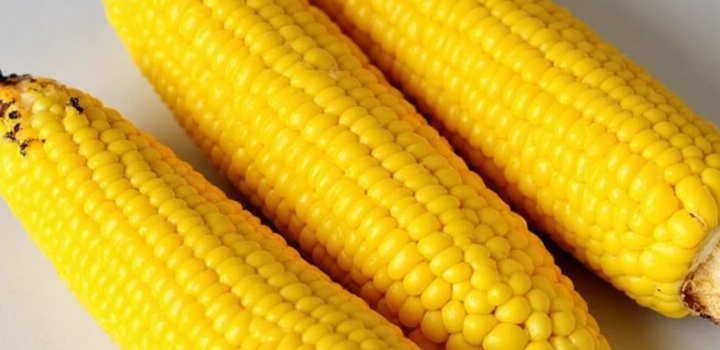
How to Pick Fresh Ears
When selecting corn on the cob, I always look for three things: color, weight, and husk condition. The husk should be bright green, snug against the cob, and slightly damp to the touch. That means it was picked recently and hasn’t dried out in transport. I run my fingers over the husk to make sure the kernels underneath feel full and plump—no gaps or soft spots.
The silk (those strands sticking out the top) should be light brown and slightly sticky. If it’s black or dry, it means the corn is old. I also give the cob a quick sniff. Fresh corn smells faintly sweet, even through the husk.
What to Avoid at the Store
Stay away from corn with yellowed, dry, or brittle husks—it likely sat on the shelf too long. If the silk is matted or moldy, that’s a red flag. Kernels that feel irregular or patchy under the husk can indicate poor pollination or drying out. And never buy pre-shucked corn unless it’s been freshly packaged that same day.
Preparing the Ears
With Husk
If I’m roasting with the husk on, I gently pull back the outer layers—just enough to remove the silk—then fold the husk back up and soak the whole cob in water for 15–20 minutes. This keeps the husk from burning and adds a gentle steaming effect inside the oven, which locks in moisture beautifully.
Without Husk
If I’m going husk-free, I remove the husk and silk completely, rinse the cob under cool water, and pat it dry. This method is best when I want the corn to get golden and slightly crisp on the outside. I often brush it with oil or butter and season it right before roasting.
Trimming and Cleaning Tips
At the base of each cob, there’s usually a thick stalk stub—I trim it slightly so the cob lies flat on a baking sheet. I also cut off any stringy or overly dry parts at the tip. If the cob has lots of silk trapped between kernels, I use a damp paper towel to wipe it gently in a downward motion—it pulls the strands out without damaging the kernels.
Proper selection and prep aren’t just about looks—they dramatically affect flavor, moisture, and even cooking time.
Ingredients You’ll Need
When it comes to oven-roasted corn on the cob, less is truly more. You don’t need a long list of ingredients—just a few high-quality basics to bring out the natural sweetness of the corn. But if you’re like me and love to experiment, there’s plenty of room to play with flavors. Here’s what I always keep on hand when roasting corn, both in my restaurant kitchen and at home.
Core Ingredients
For a classic and satisfying roast, you really only need the essentials:
- Fresh corn on the cob – Always the star of the show. Look for firm, plump kernels.
- Butter or oil – I personally prefer melted unsalted butter for its rich flavor, but a neutral oil like grapeseed or avocado works well too.
- Salt – Kosher salt is my go-to; it’s coarse enough to cling to the kernels and enhances the corn’s natural sweetness.
These three simple ingredients create a base that’s both traditional and crowd-pleasing. I often serve this version just as it is—it’s that good.
Optional Add-Ons for Flavor
Now, when I want to elevate things or surprise guests with bold combinations, I turn to a few favorite add-ons:
- Black pepper – Adds a subtle kick. Freshly ground is a must.
- Smoked paprika – For a touch of warmth and color.
- Grated Parmesan – Melts slightly on hot corn and adds salty depth.
- Fresh herbs – Chopped cilantro, parsley, or chives can brighten the entire dish.
- Lime juice or zest – A squeeze of acidity cuts through the richness and enhances sweetness.
- Garlic powder or minced garlic – I use this sparingly when pairing corn with meat-heavy mains.
- Mayonnaise or sour cream – Especially in Mexican-style versions like elote.
These extras allow you to shift the profile of the dish—from rustic and comforting to vibrant and bold—without complicating the process. I recommend starting with the basics, then building up once you’ve nailed the technique.
Core Roasting Methods
There’s no single best way to roast corn in the oven—it all depends on the texture and flavor you’re after. As a chef, I’ve tested every variation you can think of, and I return to three reliable methods. Each has its own strengths and suits different moods and menus. Whether you’re after deep char, juicy bite, or rustic aroma, there’s a method for you.
Method 1 — Roasting in Foil
Step-by-Step Guide
- Preheat your oven to 220°C (425°F).
- Shuck the corn completely and remove all silk.
- Brush each ear with melted butter or oil and sprinkle with salt.
- Wrap individually in aluminum foil, sealing tightly.
- Place on a baking sheet and roast for 20–25 minutes, turning once halfway through.
Pros and Cons
| Advantage | Disadvantage |
| Retains moisture very well | Less browning or char on kernels |
| Easy cleanup | Foil can trap too much steam |
| Great for flavored butters | No smoky or roasted aroma |
This method is my go-to when I want foolproof, juicy results or when prepping large batches ahead of time.
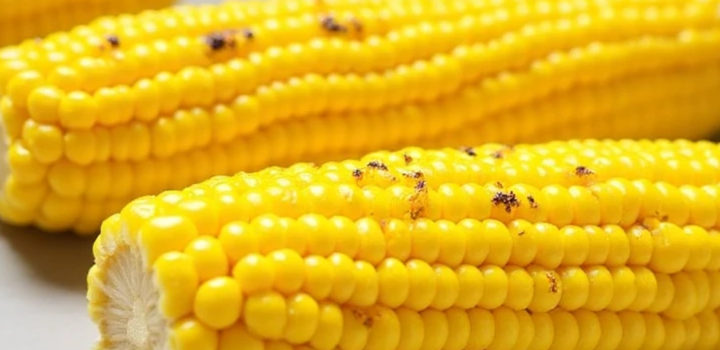
Method 2 — Roasting Without Foil
Step-by-Step Guide
- Preheat the oven to 200°C (400°F).
- Shuck the corn, removing husk and silk completely.
- Coat with oil or butter, then season.
- Place directly on a baking sheet or roasting rack.
- Roast uncovered for 25–30 minutes, rotating once or twice.
Tips for Even Browning
- Make sure the corn is fully dry before seasoning—this encourages caramelization.
- A wire rack allows air to circulate for even color on all sides.
- If browning is uneven, finish under the broiler for 1–2 minutes, watching closely.
This method is ideal when I want texture—light char, golden edges, and a slightly chewy bite.
Method 3 — Roasting in the Husk
Step-by-Step Guide
- Preheat oven to 175°C (350°F).
- Trim the ends of each ear and remove any loose outer leaves.
- Soak the corn in cold water for 15–20 minutes. This prevents the husk from burning and creates steam inside.
- Place directly on the oven rack or baking tray.
- Roast for 30–35 minutes, turning once halfway through.
- Let cool slightly, peel back the husk, and season if desired.
Preserving Natural Aroma
Roasting in the husk adds a unique earthy fragrance I can’t get from any other method. The natural steam inside the husk helps cook the corn gently while infusing it with a slightly grassy note that’s nostalgic and perfect for rustic meals.
This is the method I use when I want the corn to speak for itself—with minimal interference and a strong connection to how it was grown.
Seasoning Ideas and Flavor Variations
Seasoning corn is where I get to be creative. Oven-roasted corn is like a blank canvas: sweet, tender, and ready to soak up flavor. I always say that seasoning is the bridge between technique and identity—it tells the story of the meal, the culture, and even the mood. Below are some of my go-to combinations, both classic and global, that I’ve served everywhere from backyard cookouts to upscale tastings.
Classic Combinations
These are the flavors most people expect—and love. They work because they highlight the natural sweetness of corn without overpowering it.
- Butter + Salt: You can’t go wrong with this. I use unsalted butter to control seasoning and add a sprinkle of flaky sea salt just before serving.
- Garlic Butter + Black Pepper: Melted butter mixed with minced garlic, finished with freshly ground pepper. It’s aromatic and familiar.
- Parmesan + Olive Oil: A great combo when I want something savory and nutty. I drizzle good olive oil and grate Parmigiano-Reggiano over hot corn so it melts slightly.
These are perfect when you want simplicity, speed, or are cooking for a crowd with mixed tastes.
Creative and International Styles
When I’m building menus or cooking themed dinners, I often bring in international profiles. These add excitement, surprise, and layers of complexity.
Mexican Elote
This is one of the most iconic corn preparations in the world. I discovered it while working at a Latin street food event, and it’s been a favorite ever since.
What I use:
- Mayonnaise (or crema)
- Crumbled cotija or feta cheese
- Chili powder or Tajín
- Lime juice
- Fresh cilantro (optional)
I brush roasted corn with mayo, roll it in cheese, sprinkle it with spice, and finish with a squeeze of lime. It’s messy, bold, and unforgettable.
Japanese Miso Butter
This one came from my time in a fusion kitchen, where we blended Asian ingredients with Western techniques.
What I use:
- White or yellow miso paste
- Unsalted butter
- A touch of soy sauce
- Optional: toasted sesame seeds or scallions
I mix softened butter with miso and soy sauce, then brush it onto hot corn right after roasting. The umami is deep and balanced—salty, sweet, and rich.
Indian Masala Corn
This version is spicy, tangy, and bright—perfect as a side dish for grilled meats or as a vegetarian appetizer.
What I use:
- Melted ghee or oil
- Garam masala or chaat masala
- Red chili powder
- Lemon or lime juice
- Salt
I brush the corn with ghee, sprinkle generously with spices, then finish with citrus. It hits every note: warm, spicy, sour, and a little smoky.
Each of these variations adds personality to the dish, and I recommend trying them one by one to find your favorite.
Unique Questions and Alternatives
Every kitchen has its challenges—trust me, I’ve seen everything from power outages to last-minute menu changes. Over time, I’ve developed go-to solutions that keep the corn roasting no matter what. Whether your oven breaks down, you’re cooking from frozen, or feeding a group of twenty, here’s how I handle those situations as a professional chef.
What If My Oven Breaks?
When the oven is out of commission, I shift to these reliable backup methods. They don’t just save the day—they can still deliver excellent results.
Microwave Method
- How I do it: Wrap each shucked ear in a damp paper towel and microwave on high for 3–5 minutes. Let it rest for a minute before unwrapping.
- My tip: Add butter and salt right after microwaving so the heat helps everything soak in. It’s not as complex in flavor, but surprisingly satisfying in a pinch.
Skillet Steaming
- How I do it: Place corn in a large skillet with a splash of water, cover with a lid, and steam over medium heat for 10–12 minutes.
- Why it works: It’s gentle and evenly cooks the kernels. I sometimes finish with a quick sauté in butter to add flavor.
Pressure Cooker Adaptation
- How I do it: Add a cup of water to the cooker, insert a trivet or steam basket, and place the corn inside. Cook on high pressure for 2–3 minutes with quick release.
- Ideal for: Busy kitchens or bulk prep where time is tight. I use this in catering when ovens are tied up.
Can You Use Frozen Corn on the Cob?
Absolutely. I’ve relied on frozen corn many times—especially during off-season months when fresh produce isn’t available.
Thawing and Safety
- Preferred method: Thaw in the fridge overnight. If you’re in a hurry, place the corn in a sealed bag and submerge in cold water for 30–45 minutes.
- Avoid: Microwaving frozen ears directly before roasting—it can make the kernels rubbery and unevenly heated.
Adjusting Cook Time and Temperature
Here’s a quick adjustment table I use in my kitchen:
| Corn Type | Oven Temp | Time |
| Fresh (no husk) | 200°C | 25–30 min |
| Frozen (thawed) | 200°C | 30–35 min |
| Frozen (not thawed) | 220°C | 35–40 min |
You’ll need a few more minutes, but the flavor payoff is still solid—especially with added butter and seasoning.
Cooking for a Crowd
When I host big events or cook for large family gatherings, corn is often on the menu. It’s budget-friendly, filling, and universally loved.
Large-Batch Roasting Tips
- Use two racks in the oven for airflow. Rotate trays halfway through cooking.
- Wrap in foil if you want to prep in advance and reheat quickly.
- Keep ears uniform in size so everything finishes at the same time.
For very large groups, I sometimes partially roast the corn ahead, store it, and finish under the broiler right before serving.
Keeping Corn Warm Until Serving
This part is crucial when you’re feeding more than a few people.
- Use a covered tray or chafing dish lined with foil.
- Wrap each ear in foil and store in a pre-warmed cooler lined with towels (great trick for outdoor events).
- Avoid microwaving to reheat—it dries the corn out fast.
Whether you’re solving a problem or scaling up, there’s always a method that works if you plan like a chef.
Nutrition and Health Benefits
Corn on the cob isn’t just delicious—it’s also surprisingly nutritious. As a chef who works closely with nutritionists when designing menus, I appreciate when flavor and health line up naturally. Oven-roasted corn keeps its nutritional value intact better than boiling, and when you skip heavy toppings, it’s a clean, wholesome food option.
Nutritional Profile
Calorie and Macronutrient Chart
Here’s a breakdown of what you’re getting in one medium ear of corn (about 90–100g), roasted without butter or toppings:
| Nutrient | Amount per ear |
| Calories | ~100–110 kcal |
| Carbohydrates | 22–25 g |
| Protein | 3–4 g |
| Fat | 1–2 g |
| Fiber | 2–3 g |
Add a tablespoon of butter, and you’re adding around 100 extra calories—but also a rich flavor that might be worth it for a special meal.
Fiber and Antioxidants
Corn is a solid source of dietary fiber, which helps with digestion and makes meals more filling. It also contains antioxidants like lutein and zeaxanthin, which help neutralize harmful free radicals. Roasting helps preserve these compounds, especially compared to boiling, which can leach them into the water.
Health Benefits
Gluten-Free Friendly
As someone who often cooks for clients with celiac disease or gluten sensitivity, I can confirm: corn is naturally gluten-free. Oven-roasted corn makes a great side dish or snack that’s safe for anyone avoiding wheat, and it pairs easily with other gluten-free ingredients like herbs, spices, and cheese.
Good for Eye Health
The antioxidants in corn—particularly lutein and zeaxanthin—are known for supporting eye health. These carotenoids accumulate in the retina and help protect against damage from blue light and age-related degeneration. This makes corn not just a tasty food, but a smart long-term choice, especially when prepared without excessive fat or sugar.
In my kitchen, I love finding ingredients that please the palate and serve a purpose for the body. Corn hits both marks, especially when roasted properly.
Presentation and Serving Suggestions
As any chef will tell you, taste matters—but so does the way a dish looks when it hits the table. Corn on the cob might be humble, but with a little attention to presentation, it can feel elegant, festive, or downright fun. Whether I’m serving guests at a formal event or plating for a backyard cookout, here’s how I bring visual appeal and practicality into the mix.
Garnishing and Plating Ideas
The right garnish can elevate corn from side dish to centerpiece. I often choose garnishes that either contrast the color of the corn or highlight its golden sweetness.
- Chopped herbs like parsley, cilantro, or chives add freshness and color. Sprinkle them lightly just before serving.
- Crumbled cheese (cotija, feta, or Parmesan) not only adds flavor but looks great melted over the surface.
- Chili flakes or smoked paprika give a pop of red and signal heat or smokiness.
- Lime wedges are excellent visually and functionally—guests can squeeze juice to balance richness.
For plating, I avoid piling ears in a heap. Instead, I line them in neat rows on a large serving tray, drizzle any sauce in a zigzag for flair, and finish with a touch of garnish. On individual plates, one ear laid diagonally with a small garnish at the corner works well for fine dining service.
Corn Holders and Serving Hacks
Corn can be messy to eat, so I always consider how to make serving cleaner and more enjoyable—especially at casual or family-style meals.
- Corn holders: These simple two-pronged tools attach to either end of the cob and make handling hot corn easy. I prefer wooden-handled versions—they’re more comfortable and look rustic on the plate.
- Mini skewers or chopsticks: When holders aren’t available, these can be inserted to give the same grip and avoid burned fingertips.
- Foil wraps or parchment sleeves: For picnics or food stalls, I wrap the bottom half of each ear for a clean grip—practical and attractive.
- Pre-cut corn “ribs”: Slice whole cobs into quarters lengthwise before roasting. These “ribs” are easier to hold, cook faster, and work great for dipping or sharing.
A bit of thought into how corn is served transforms the eating experience from basic to memorable.
Storage and Reheating
Even the best meals leave leftovers sometimes—and roasted corn on the cob is no exception. As a chef, I never like seeing good food go to waste, so I always store and reheat corn with the same care I give to freshly cooked dishes. With the right techniques, yesterday’s corn can taste just as good (if not better) the next day.
How to Store Leftovers Properly
The key to storing roasted corn is to keep moisture in and air out. Here’s how I do it:
- Cool completely before storing. Sealing hot corn can create condensation, which leads to sogginess or spoilage.
- Wrap each ear individually in foil or plastic wrap. This helps retain flavor and prevent the kernels from drying.
- Use airtight containers if you’ve already cut the corn from the cob. Add a small pat of butter or a few drops of oil to help preserve texture.
- Refrigerate immediately and keep for up to 3 days.
For longer storage, corn can be frozen—though I only recommend this if you plan to cut it off the cob first. Whole frozen cobs tend to lose texture when thawed.
Best Ways to Reheat without Drying
Corn dries out quickly if reheated incorrectly. Here are the techniques I’ve found to work best, both at home and in restaurant prep:
- Oven method (recommended): Wrap each ear in foil and reheat at 180°C (350°F) for about 10–12 minutes. This gently brings back moisture and flavor without overcooking.
- Microwave method: Wrap in a damp paper towel and heat on medium power for 1–2 minutes. Check for even warmth and rotate if needed.
- Skillet steam method: Add a splash of water to a pan, place corn inside, cover, and steam over low heat for 5–6 minutes. I often finish with butter for a fresh glaze.
Avoid reheating corn uncovered in a dry oven or microwave—this is the fastest way to make it rubbery or shriveled.
With these simple techniques, leftover corn stays tender, sweet, and satisfying—ready to enjoy again or even repurpose in soups, salads, or fritters.
Final Thoughts
After years of experimenting with different ways to prepare corn, oven-roasting remains my favorite. It delivers reliable results with minimal fuss, and it gives me the freedom to be creative with flavor while keeping the natural sweetness of the corn front and center. Whether I’m cooking at home or in a professional kitchen, this method never fails to impress.
Why This Method Stands Out
What makes oven-roasting unique is its balance of simplicity and quality. You don’t need fancy tools, precise timing, or constant supervision. Just a few fresh ears of corn, some heat, and a bit of seasoning—and you’ve got something delicious.
- It’s consistent: every ear cooks evenly.
- It’s customizable: roast with or without husk, foil, spices, or butter.
- It’s accessible year-round: no weather or grill required.
- It’s nutritious: no boiling water to strip flavor or nutrients.
In my experience, this method is also one of the most beginner-friendly. Anyone can do it, and once you’ve nailed the basics, the variations are endless.
Encouragement to Experiment with Flavors
My biggest advice? Don’t stop at salt and butter. Corn is versatile—it pairs well with heat, tang, umami, herbs, even sweet glazes. Try the global flavors I shared earlier, or invent your own. You might discover a new house favorite.
Think of roasted corn as a foundation, not a finished product. Play with toppings, try flavored butters, add crushed nuts or seeds, or even serve it cold the next day in a salad. The oven makes it easy to start simple and build flavor without stress.
Once you master the method, it becomes second nature—and a go-to for meals that feel comforting, colorful, and completely satisfying.
FAQ
How long does it take to cook corn on cob in oven at 400°F?
Based on my experience, roasting corn at 400°F (200°C) takes about 25–30 minutes. I always rotate the ears once halfway through for even browning. If the corn is particularly large, add 5 extra minutes.
Can I cook corn on cob in oven without foil?
Yes, and I often do this when I want more caramelization. Just brush the corn with oil or butter and roast it directly on a baking sheet. Expect crispier edges and deeper flavor.
What’s the best way to cook corn on cob in oven if it’s frozen?
Thaw it first for the best texture. If cooking straight from frozen, increase the temperature to 425°F (220°C) and roast for 35–40 minutes. Brush with oil or butter halfway through to prevent dryness.
Should I boil corn before I cook corn on cob in oven?
No, and I recommend against it. Boiling before roasting removes natural sugars and softens the kernels too much. Go straight to the oven to preserve texture and flavor.
Can I cook corn on cob in oven using the husk?
Absolutely—it’s one of my favorite rustic methods. Soak the corn in water for 15–20 minutes, then roast at 350°F (175°C) for 30–35 minutes. The husk traps steam, keeping the corn juicy.
Do I need to soak corn before I cook corn on cob in oven?
Only if you’re roasting it in the husk. Otherwise, there’s no need. If the corn is particularly dry, a quick soak can help, but it’s optional.
What seasonings work best when you cook corn on cob in oven?
I start with butter and salt, then build from there. Smoked paprika, chili powder, grated Parmesan, or garlic butter are great options. Miso paste mixed with butter also works wonders.
Can I cook corn on cob in oven ahead of time?
Yes, and I often do this for catering events. Roast it, wrap in foil, and keep warm in an insulated cooler or chafing dish. You can also reheat wrapped in foil at 350°F for 10 minutes.
Is it healthier to cook corn on cob in oven than boil it?
Yes—roasting preserves more nutrients like lutein, zeaxanthin, and fiber. Boiling can leach vitamins into the water. Oven-roasting also lets you control added fats more precisely.
What type of corn is best to cook corn on cob in oven?
Use fresh sweet corn with tight green husks and sticky silk. Avoid corn with dry or browning husks. White, yellow, or bi-color varieties all work well in the oven.
Do I need to use butter when I cook corn on cob in oven?
No, but it enhances flavor and helps with browning. You can use oil for a lighter version, or skip it completely and add toppings afterward. Just don’t skip seasoning.
Can kids help cook corn on cob in oven?
Yes, with supervision. Kids can shuck the corn, brush on butter, or help with seasoning. I keep them away from the hot oven but let them participate in prep—it’s safe and fun.
How do I store leftovers after I cook corn on cob in oven?
Cool completely, then wrap each ear in foil or place in an airtight container. Refrigerate up to 3 days. You can reheat in foil at 350°F for 10 minutes without drying it out.
Can I cut the kernels off after I cook corn on cob in oven?
Definitely. I often do this to use the corn in salads, soups, or salsas. Let the corn cool slightly, then slice downward with a sharp knife—roasted kernels are sweet and easy to cut.
Why is it better to cook corn on cob in oven than grill it?
The oven gives you precise temperature control and even cooking. Grilling can burn or dry out the corn if not watched closely. For consistency and moisture, the oven wins every time.