How to Cook Chuck Steak
How to Cook Chuck Steak: Complete Guide for Beginners

Arianne Nemna
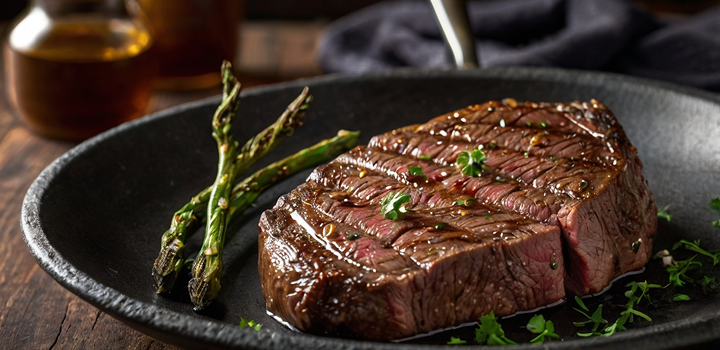
Chuck steak isn’t a fancy restaurant cut, but when treated right, it transforms into something deeply satisfying—rich, beefy, and surprisingly tender. This is the kind of steak that rewards patience and good technique. It’s affordable, widely available, and forgiving enough for home cooks still getting comfortable with a skillet or Dutch oven. Whether you’re braising it low and slow or reverse searing it for a juicy interior and seared crust, learning how to cook chuck steak opens the door to bold flavors and hearty meals with minimal waste. This guide walks you through every step—from butcher counter to carving board—with the kind of detail that ensures success the first time you try it.
- What Is Chuck Steak, Really?
- Choosing the Best Chuck Steak at the Butcher
- Prep Work Before Cooking
- Choosing Your Cooking Method
- Cooking Times and Temperature Targets
- Mastering Doneness & Tenderness
- Common Problems and How to Fix Them
- Flavor Boosters and Sauce Ideas
- Resting, Slicing & Presentation
- Budget-Friendly Meal Ideas Using Cooked Chuck
- 15+ FAQs About Cooking Chuck Steak
What Is Chuck Steak, Really?
Where It Comes From on the Cow
Chuck steak is cut from the upper shoulder area of the cow, just ahead of the rib section. This part of the animal sees a lot of movement, which means the muscles here are loaded with flavor—but also plenty of connective tissue. The result is a cut that’s muscular, marbled, and naturally tougher than something like a ribeye or tenderloin. That toughness isn’t a flaw—it’s an opportunity. With the right approach, those connective tissues break down into gelatin, creating incredible texture and richness.
Why Chuck Is Flavorful but Tough
What makes chuck steak so desirable for slow cooking—and increasingly popular for grilling and searing—is its intramuscular fat. The marbling isn’t as dense as a premium steak, but it’s enough to baste the meat from within as it cooks. The downside is that the abundant collagen and grain structure need to be handled properly. If you rush the process, the meat will stay chewy. But when you give it time or apply the right tenderizing methods, the payoff is a robust, meaty bite that puts leaner cuts to shame.
Types of Chuck Cuts (Eye, Top Blade, Flat Iron, Mock Tender)
Not all chuck steaks are the same, and the type you choose determines how you’ll want to cook it. Chuck eye steak comes from the same area as ribeye and can be grilled or seared with good results. Top blade steak, when trimmed correctly, becomes the popular flat iron steak, one of the most tender cuts from the shoulder—ideal for quick-cook methods. The mock tender looks like a tenderloin but is misleadingly tough unless braised. Understanding which version you have makes all the difference in whether you cook it fast and hot or low and slow.
Choosing the Best Chuck Steak at the Butcher
What to Look For in Quality Chuck Cuts
At the meat counter, chuck steaks can vary wildly in quality depending on the cut, age, and handling. Look for steaks that are evenly marbled with fine strands of fat running through the muscle. The fat should be creamy white, not yellow or waxy. The surface of the meat should be firm and deep red—not brown or wet. A slightly thicker cut, about 1.25 to 1.5 inches, is easier to control during cooking and holds moisture better. If the steak looks excessively trimmed with no fat or marbling, it may dry out or become chewy.
Understanding Butcher Labels & Alternate Names
Chuck cuts often come with confusing labels, especially in grocery stores. A “chuck steak” might also be sold as a “shoulder steak,” “chuck eye,” or “boneless chuck filet.” These aren’t always interchangeable. The chuck eye is closer to the ribeye and cooks like a premium steak. The top blade is excellent if the gristle is removed, while the cross-rib steak includes connective tissue and benefits from braising. Flat iron is the exception—cut properly, it’s tender enough for the grill and doesn’t need long cooking. When in doubt, ask the butcher what part of the chuck the steak came from. This information alone can tell you whether to pan sear, grill, or braise.
Prep Work Before Cooking
Trimming, Scoring & Tenderizing
Before any seasoning hits the meat, preparation starts with trimming and shaping. Most chuck steaks benefit from a quick trim to remove thick outer fat or any silver skin. Leaving some fat along the edges is fine—it helps retain moisture and adds flavor during cooking—but dense, chewy sections won’t render and should be taken off. For thicker or uneven cuts, especially those with gristle pockets, I sometimes score the surface lightly with a sharp knife in a crosshatch pattern. This helps with even cooking and gives marinades a bit more penetration.
Tenderizing can be done in a few ways depending on the cut. For tougher pieces like mock tender or thick shoulder steaks, mechanical tenderizing with a meat mallet or jacquard tool helps shorten the muscle fibers. For more forgiving cuts like flat iron or chuck eye, the natural marbling does enough if you cook them right.
Marinating vs Dry Brining – What Works Best
Marinating and dry brining each serve a different purpose, and your cooking method should guide the choice. Marinades, which combine acid (like vinegar, citrus juice, or wine) with oil and spices, work well when you plan to grill or pan-sear. They don’t penetrate deeply, but even a couple of hours can help round out beefy flavors and tenderize the outer layers.
Dry brining, on the other hand, is ideal for any chuck steak going into a hot pan or reverse sear. It’s simple: just sprinkle kosher salt evenly over the surface of the meat and let it rest uncovered in the fridge for 8 to 24 hours. This draws out moisture, which is then reabsorbed, carrying salt deeper into the muscle fibers. It creates better crust and internal seasoning without adding moisture that would interfere with searing.
Seasoning Strategies Based on Cooking Method
How you season a chuck steak depends largely on how you intend to cook it. For braising, keep things basic—salt, black pepper, and maybe a dusting of garlic or paprika. The liquid you cook in will add much of the flavor.
For high-heat methods like searing or grilling, bolder seasoning works. I rely on kosher salt, coarse pepper, and sometimes ground mustard or smoked paprika for extra depth. If using marinades, make sure the steak is patted dry before it hits the pan or grill, or you risk steaming instead of searing. For reverse sear, I salt early and save any spice blends or pepper until right before the final sear to avoid bitter flavors from burned seasonings.
Choosing Your Cooking Method
Low and Slow: Braising for Fall-Apart Results
Braising is the most forgiving method and best suited to tougher chuck cuts like shoulder steak, chuck roast slices, or mock tender. The principle is simple: low heat, extended time, and moisture. As the steak simmers in a covered pot, collagen melts, and the meat fibers gently break down into something soft enough to cut with a spoon.
Oven, Slow Cooker, and Pressure Cooker Options
Each tool for braising has its own strengths. The oven gives the most control and allows even heat from all sides. I use a Dutch oven at 300°F, partially submerged in broth or wine, for 2.5 to 3.5 hours depending on thickness. The slow cooker works great for set-and-forget convenience—on low for 6 to 8 hours, or high for 3.5 to 5 hours.
The pressure cooker, including modern electric models like Instant Pot, excels in time-saving. A tough chuck steak can be fork-tender in 40 to 60 minutes under pressure, followed by a natural release.
Here’s a comparison of the three:
| Method | Time (avg) | Liquid Needed | Texture Outcome | Best For |
| Oven Braising | 2.5–3.5 hours | 1.5–2 cups | Deep flavor, thick sauce | Thick steaks, even browning |
| Slow Cooker | 6–8 hrs (low) | 1 cup | Ultra tender, softer | Meal prep, minimal effort |
| Pressure Cooker | 40–60 mins | 1 cup | Juicy, fast result | Weeknight meals, tight time |
Reverse Sear for Medium-Rare Steakhouse Style
Chuck eye steak and flat iron, with proper marbling, handle a reverse sear beautifully. The idea is to cook the steak gently at low heat to the desired internal temp, then finish with a quick, high-heat sear to create crust. This approach keeps the inside evenly pink and prevents overcooked edges.
Oven vs Sous Vide vs Smoker
In the oven, I set it to 250°F and place the seasoned steak on a wire rack set over a baking tray. For a medium-rare finish, I remove the steak when it hits 115°F internally, then sear it in a hot skillet until the surface browns and the final internal temp climbs to 130–135°F.
Sous vide allows precise control. I seal the steak in a bag with herbs and butter, cook it in a water bath at 129°F for 2 to 3 hours, then sear briefly. The texture is incredibly tender without falling apart, with zero guesswork.
On the smoker, reverse sear also works beautifully. I smoke the steak low at 225°F until it’s 115–120°F inside, then finish it over direct flame or on a hot griddle for that crusty finish.
Fast Cooking: Pan Searing & Grilling for Chuck Eye
Chuck eye steak and properly trimmed flat iron are perfect candidates for high-heat methods. They behave more like ribeye or NY strip than typical chuck cuts—especially when cut to 1.25″ thickness and well-marbled.
Cast Iron Pan with Basting Butter
I start with a dry, hot cast iron skillet. Once the steak hits the pan, I don’t touch it for 2–3 minutes per side. During the final minute, I baste with butter, garlic, and a sprig of thyme. This adds both richness and aroma. The key is to let the crust develop fully before flipping—no nudging or peeking.
Gas Grill vs Charcoal Grill
For gas grills, I preheat all burners, then turn off the center to create indirect heat. The steak starts over indirect heat until it reaches 115–120°F, then finishes directly over the hottest burner.
Charcoal adds that irreplaceable smoky edge. I bank coals to one side for two-zone cooking. Chuck eye steaks take on beautiful char when seared for about 2 minutes per side after warming up gently on the cooler zone. No need to overthink it—just control the heat and trust a thermometer.
Cooking Times and Temperature Targets
Braising Temperature and Liquid Ratios
When braising chuck steak, temperature and liquid are two factors you can’t guess at. Too high a temperature and the meat contracts quickly, squeezing out moisture. Too little liquid and the surface dries before the collagen has a chance to melt. For oven braising, I always aim for 300°F. At this range, the meat cooks gently and the liquid stays below a simmer. If you go lower—around 275°F—you can extend the cooking time for even silkier texture.
As for the liquid, enough to reach halfway up the side of the meat is all you need. That usually means 1 to 1.5 cups for a standard 2–3 lb steak. I prefer low-sodium beef broth with a splash of red wine or vinegar for brightness. The liquid shouldn’t cover the steak fully unless you’re aiming for a stew.
Braising Time Chart by Cut & Size
| Cut Type | Weight/Thickness | Oven Temp | Braise Time | Texture Result |
| Chuck Eye | 1.5–2 lb, 1.5″ thick | 300°F | 2.5 to 3 hours | Tender, sliceable |
| Shoulder Steak | 2–3 lb, 2″ thick | 300°F | 3 to 3.5 hours | Pull-apart soft |
| Mock Tender | 1.5–2 lb | 300°F | 3.5 to 4 hours | Fully broken down, shreddable |
| Flat Iron (braised) | 1.5″ thick | 300°F | 2 to 2.5 hours | Soft, rich, keeps shape |
These numbers also translate well to slow cookers on LOW (6–8 hours) or HIGH (3.5–5 hours). In a pressure cooker, most chuck steaks reach fork-tender stage in 40–55 minutes, depending on thickness.
Reverse Sear Temperature Goals
The key to nailing a reverse sear lies in precision. You want the inside to slowly reach just below your final target temp, then finish it off with a blazing-hot sear. For chuck eye or flat iron steaks, I use the following guide:
- Pull from the oven, smoker, or sous vide at 115°F for rare, 120°F for medium-rare, and 125°F for medium.
- After searing, the carryover heat brings the final internal temperature up by 10–15°F.
- Never let the interior exceed 145°F unless you’re intentionally going for well-done.
This controlled two-step process gives you that edge-to-edge pink center with a deeply browned crust that tastes like it came off a steakhouse broiler.
Pan Sear & Grill Timing for 1″ to 2″ Steaks
Chuck eye steaks around 1 to 1.25 inches thick behave similarly to ribeyes or NY strips. When using cast iron or a hot grill, timing matters—but so does your ear and nose. I usually do:
- For a 1-inch steak: 3 minutes per side for medium-rare, with a 1-minute butter baste finish.
- For a 1.5-inch steak: 4–5 minutes per side with an additional minute of basting and finishing on low heat.
If using indirect grilling, you’ll need about 12–14 minutes total cook time, starting low and finishing high. Always check with a thermometer—time is a guide, but temperature is the truth.
Mastering Doneness & Tenderness
Internal Temp for Rare, Medium, Well Done
No matter the method, internal temperature determines doneness. Here’s a reliable breakdown:
| Doneness Level | Target Temp (Pull) | Final Temp (Post-Sear) | Texture Expectation |
| Rare | 115–120°F | 125°F | Bright red center, soft |
| Medium-Rare | 120–125°F | 130–135°F | Pink center, very juicy |
| Medium | 130–135°F | 140–145°F | Slight pink, firmer bite |
| Medium-Well | 140–145°F | 150–155°F | Mostly cooked, slight tenderness |
| Well-Done | 150°F+ | 160°F+ | Brown throughout, minimal juice |
Chuck, due to its grain and collagen, tastes best between medium-rare and medium. Beyond that, you’re better off braising than searing.
Resting Time and Carryover Cooking
After any form of cooking—grilling, roasting, searing—the steak needs a few minutes to rest. This pause allows the juices to redistribute and the internal temperature to rise slightly. For steaks under 1.5 inches, rest for 5 to 7 minutes, loosely tented with foil. For braised or reverse-seared chuck, 10 to 15 minutes resting gives the best texture and sliceability.
Carryover cooking raises the temp by 5 to 10 degrees, depending on thickness and sear intensity. That’s why it’s essential to pull the meat before your actual target temperature. Once rested, you’ll find it easier to cut clean slices without losing all the moisture onto the cutting board.
Cutting Against the Grain for Juiciness
One final step—too often overlooked—is slicing the meat correctly. Chuck steak has long, defined muscle fibers. If you cut with the grain, each bite is chewy and rope-like. When you cut against the grain, you shorten those fibers, making the meat more tender and easier to chew.
To find the grain, look at the steak before cutting—it runs in lines. Turn the steak so those lines run left to right, then slice perpendicular to them with a sharp chef’s knife. For grilled or seared chuck, slice in ¼ to ⅓-inch thick strips. For braised chuck, pull into larger chunks or shreds if it’s too soft to slice cleanly.
Common Problems and How to Fix Them
Why Is My Chuck Steak Still Tough?
When chuck steak stays tough after cooking, it’s almost always one of two issues: either it wasn’t cooked long enough at low temperature (if braised), or it was cooked too quickly at high heat without time for collagen breakdown. Chuck is loaded with connective tissue, and that needs time to convert into gelatin. If you pulled your braised steak at the two-hour mark and it was still chewy, give it at least another 30 to 60 minutes. The transformation often happens in that final stretch.
For quick-sear cuts like chuck eye or flat iron, toughness can also come from slicing incorrectly. If you cut with the grain rather than across it, even a perfectly cooked steak can chew like jerky. Always slice across the fibers for tenderness.
Burnt Outside, Raw Inside: What Went Wrong?
This usually happens during pan searing or grilling when the heat is too high and the steak is too cold. A cold steak straight from the fridge takes longer to cook through, so the outside burns while the center remains underdone. To prevent this, let the steak rest at room temperature for at least 30 minutes before cooking. Also, don’t overload the pan—overcrowding drops the temperature and leads to uneven searing.
When using a grill or cast iron, make sure to establish two heat zones: one for searing, and one for gentler cooking. That way, you can move the steak off the high heat once the crust is formed and finish cooking it more slowly without charring.
Dry Texture After Cooking – Solutions
Dryness in chuck steak can come from overcooking, especially with dry heat methods like grilling or pan frying. If your steak reaches 150°F or more internally, expect the moisture to be mostly gone unless the meat has very high marbling.
Another cause is lack of resting time. When you cut into a hot steak right off the grill, the juices spill out instead of staying inside. Letting it rest for 5 to 10 minutes helps keep it moist.
Finally, if your chuck cut is lean (such as mock tender or shoulder steak) and you didn’t baste or cook it in liquid, dryness is hard to avoid. In these cases, finish the dish with a sauce or slice thinly across the grain to improve mouthfeel.
Flavor Boosters and Sauce Ideas
Compound Butters and Pan Glazes
After searing, nothing elevates chuck steak more than a knob of compound butter melting across the top. I often blend softened butter with fresh herbs, garlic, and a pinch of coarse salt. Let it chill into a log, then slice and apply just as the steak comes off the heat. The residual warmth melts the butter slowly, enriching every bite.
Pan glazes are another trick. After searing steak in a skillet, I deglaze the pan with a splash of broth, red wine, or even vinegar. I scrape up the fond with a wooden spoon, reduce it for a few minutes, and swirl in cold butter off the heat to create a glossy, intensely flavored glaze. It clings perfectly to sliced chuck steak and adds depth without heaviness.
Chimichurri, Red Wine Sauce, and Gravy Tips
Chimichurri—an Argentine herb sauce with parsley, garlic, vinegar, and olive oil—is one of the brightest, most versatile pairings for grilled chuck. It cuts through the richness and complements the meaty flavor.
Red wine sauce works well for braised chuck. I reduce a mix of braising liquid and dry red wine with shallots and thyme until syrupy, then whisk in cold butter to finish. It’s bold, velvety, and ideal over slices or shreds.
If you’re braising with broth, turn that cooking liquid into gravy by straining it, skimming the fat, then simmering it with a cornstarch slurry or roux until thickened. Season at the end with salt and a splash of vinegar to balance.
| Sauce Type | Best With | Key Ingredients | Finish Timing |
| Compound Butter | Pan-seared chuck | Butter, garlic, herbs | Right after cooking |
| Chimichurri | Grilled chuck | Parsley, vinegar, garlic | After slicing |
| Red Wine Reduction | Braised chuck | Wine, shallots, broth | Before serving |
| Classic Gravy | Oven/slow cooker | Braising liquid, thickener | Simmered before plating |
When to Apply Sauce for Best Absorption
Timing makes or breaks how sauce interacts with the meat. For compound butter or pan glaze, apply immediately after cooking while the steak is still hot—this helps the flavors melt in. For chimichurri, wait until the steak is sliced; it will absorb better through the exposed interior.
With gravies or reductions, ladle them over just before serving or serve on the side. Avoid soaking the meat too early, especially if you plan to rest or slice it later—early saucing can cause sogginess and dilute crust texture.
Resting, Slicing & Presentation
How Long to Let Chuck Rest
Whether it’s grilled, pan-seared, or braised, chuck steak benefits greatly from a proper rest period. Once off the heat, internal juices are still active and need time to redistribute. For grilled or seared chuck cuts like chuck eye or flat iron, I recommend letting the steak rest uncovered or loosely tented with foil for at least 5 to 10 minutes. Thicker braised pieces like mock tender or shoulder steaks benefit from a longer rest of 10 to 15 minutes, especially if you’re slicing rather than shredding.
This resting period not only preserves moisture but also stabilizes the temperature, making carving cleaner and more precise.
How to Slice for Steaks, Sandwiches, or Shreds
How you slice chuck depends entirely on the way it was cooked and what you plan to serve it with. For reverse-seared or grilled chuck eye steak, the goal is even slices about ¼ to ½ inch thick, always against the grain. This shortens the muscle fibers, making each bite easier to chew.
For sandwiches, slice thinner—closer to deli-style. I chill the meat slightly to firm it up, then use a long slicing knife to get uniform cuts.
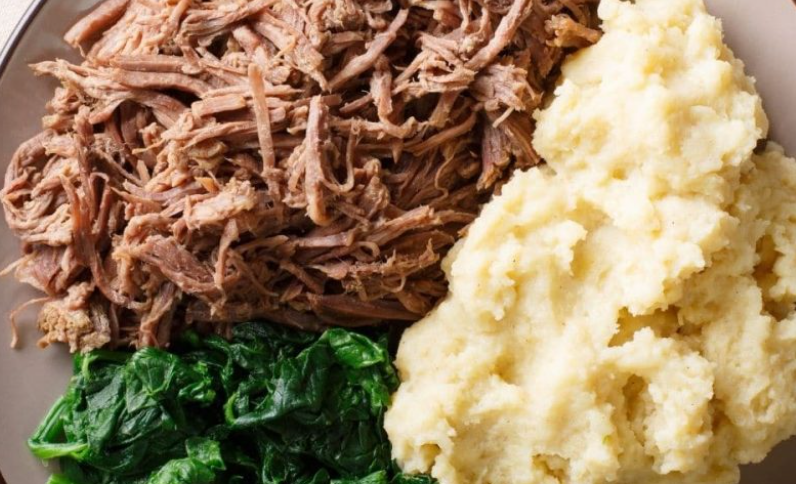
For braised cuts like mock tender, top blade, or shoulder steaks, the meat often becomes so soft that slicing gives way to shredding. In these cases, I use two forks to gently pull the fibers apart, or cut large chunks with a chef’s knife for stews and rice bowls.
Serving Suggestions with Vegetables or Grains
Chuck steak pairs naturally with hearty, earth-toned sides. For grilled or pan-seared versions, I plate alongside roasted root vegetables like carrots or parsnips and a scoop of mashed or smashed potatoes. Add a drizzle of pan sauce or compound butter for richness.
Braised chuck works beautifully over creamy polenta, brown rice, or even egg noodles. I also like pairing it with slow-cooked lentils or spiced couscous to stretch the meal further. Flat iron and chuck eye steaks do well with crisp green vegetables like broccolini or grilled asparagus and a sharp vinaigrette to contrast the fattiness of the meat.
Budget-Friendly Meal Ideas Using Cooked Chuck
Using Leftover Chuck in Bowls, Sandwiches, Pasta
Chuck steak is a dream when it comes to repurposing leftovers. I often cook double portions just to build out future meals.
For grain bowls, layer shredded chuck over warm rice or farro, then add sautéed greens, a soft-boiled egg, and a drizzle of chimichurri or tahini dressing.
In sandwiches, thin-sliced or shredded chuck makes an excellent filling. I toast a crusty roll, layer in the meat, add provolone or Swiss, and warm it until melty. Add mustard, pickled onions, or horseradish for brightness.
For pasta, I like to toss pulled braised chuck into wide noodles like pappardelle with a bit of reserved sauce and parmesan. You can even use it as a stuffing for ravioli if you’re feeling ambitious.
Freezing and Reheating Tips for Meal Prep
Chuck steak holds up well to freezing, especially when portioned and stored with some cooking liquid or sauce. Here’s a basic guide I follow:
| Storage Format | Method | Shelf Life | Reheating Tips |
| Whole cooked steak | Wrap in foil + freezer bag | Up to 2 months | Thaw overnight, reheat at 300°F in foil |
| Shredded with liquid | Store in airtight container | Up to 3 months | Microwave or simmer in sauce until hot |
| Sandwich slices | Vacuum seal or double wrap | Up to 1 month | Quick pan-sear or toaster oven at 350°F |
Avoid microwaving thick whole pieces directly—it tends to dry out the meat. Instead, reheat gently using low oven temperatures, or use steam if you’re working with sauced braised chuck.
15+ FAQs About Cooking Chuck Steak
1. What is the best way to make chuck steak tender?
The most reliable way is low and slow braising. Cook the steak in a small amount of liquid (like broth or wine) at a low temperature—around 275–300°F—for several hours. This allows the tough connective tissues to break down into gelatin, giving you a fork-tender result. Reverse searing also works well if the steak has good marbling.
2. Can you grill chuck steak?
Yes, but it depends on the cut. Chuck eye steak grills beautifully and tastes similar to ribeye when marbled. Grill it hot and fast, finishing with a rest and slicing against the grain. Avoid grilling lean or heavily connective cuts like shoulder steak unless you marinate and cook them indirectly or sous vide first.
3. Is chuck steak the same as chuck roast?
They’re from the same primal section of the cow, but not identical. A chuck roast is usually larger and thicker, intended for braising or roasting whole. Chuck steak is a smaller, thinner cut sliced from the roast—better for stovetop or grill cooking in single portions.
4. Do I need to marinate chuck steak before cooking?
Not always, but marinating helps when you’re grilling leaner cuts. Acid-based marinades (with vinegar or citrus) can help tenderize, while spice rubs and dry brining (salt overnight) improve flavor and surface crust. For braising, marinades aren’t necessary—season well and let the low heat do the work.
5. How long does chuck steak take in a slow cooker?
On LOW, 7–8 hours is typical for a 2–3 lb piece. On HIGH, plan for about 4 hours. If it’s still tough, cook longer—it’s hard to overcook chuck in a moist environment. Always check that it shreds easily with a fork before calling it done.
6. What internal temperature should I cook chuck steak to?
It depends on the method. For braising, you want it to reach 195–205°F for shreddability. For reverse-searing or grilling, aim for 125°F for medium-rare or 135°F for medium before resting. Use a meat thermometer to be sure—it’s more accurate than guessing by time alone.
7. Why is my chuck steak dry even after braising?
Dryness can happen if you didn’t use enough liquid or the lid wasn’t sealed well, allowing moisture to escape. It can also result from overcooking in a dry oven or slicing too early. Always let the meat rest before cutting and store it with a bit of braising liquid if you’re making it ahead.
8. Can I cook chuck steak from frozen?
Technically yes, especially in a pressure cooker or slow cooker. But flavor and texture improve if you thaw it first. A frozen steak won’t sear properly, and seasonings can’t penetrate deeply. Always allow time for a proper thaw in the fridge overnight if you want the best results.
9. What’s the difference between flat iron and chuck eye steak?
Flat iron steak is cut from the top blade muscle and is very tender, great for quick searing. Chuck eye is closer to the ribeye section and has more marbling and richness, ideal for grilling or reverse searing. Both come from the chuck, but have different textures and cooking needs.
10. Is chuck steak good for meal prep?
Absolutely. Braised or grilled chuck steak stores well and gets better with time. I portion leftovers into containers with sauce or broth, then freeze or refrigerate. It reheats easily and works in tacos, pasta, rice bowls, and sandwiches.
11. Can I use chuck steak for stir-fry?
Only if it’s sliced very thinly and marinated to tenderize. Otherwise, it can turn out too chewy. Choose flat iron or chuck eye for this, slice against the grain, and stir-fry over high heat for no more than 2–3 minutes.
12. Does chuck steak need to be cooked well done?
Only if you’re braising or stewing it. When grilling or pan-searing marbled cuts like chuck eye, it’s best cooked to medium-rare or medium. Leaner cuts with less fat become tough when cooked rare, so aim for at least medium in those cases.
13. What herbs and spices go best with chuck steak?
I often use rosemary, thyme, smoked paprika, black pepper, and garlic. For braised dishes, bay leaves and allspice deepen the flavor. Chuck’s richness can handle bold seasoning, including spice blends like Cajun or chimichurri-style marinades.
14. Should I sear chuck steak before braising?
Yes. Searing builds a deep flavor base through the Maillard reaction. Brown the steak on all sides before adding it to the braising liquid. You can also sauté onions, garlic, and vegetables in the same pan before deglazing for even more depth.
15. What’s the best pan to cook chuck steak in?
For stovetop methods, I prefer a heavy cast iron skillet—it retains heat evenly and creates a great crust. For braising, a Dutch oven with a tight-fitting lid works best. A slow cooker is ideal for set-it-and-forget-it meals, but it won’t build the same crust unless you sear first.