How to Cook a Thick Steak

How to Cook a Thick Steak: Guide from Chef

Arianne Nemna
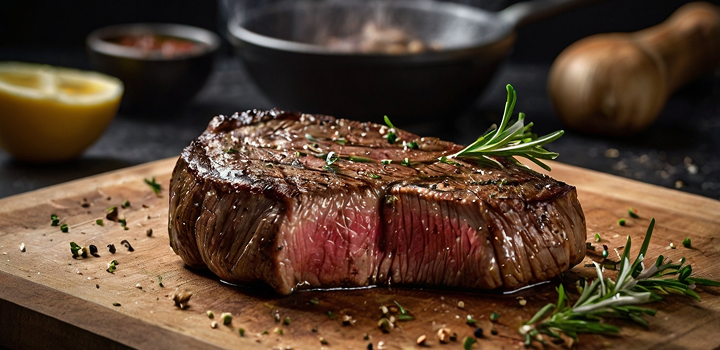
A thick steak commands respect in the kitchen. It’s not a quick dinner—it’s a culinary project that rewards attention, patience, and method. Unlike thin cuts that can go from raw to overcooked in seconds, a steak two inches thick offers more room to control doneness, build flavor, and create the kind of crust that defines steakhouse quality. But that margin for perfection only exists when the cook understands how heat moves, how fat behaves, and how to make time and temperature work together. Whether you’re working with a bone-in ribeye, a porterhouse, or a thick New York strip, this guide walks you through every phase—selection, prep, cooking, and resting—so that your thick steak comes out exactly how you imagined: caramelized on the outside, tender and juicy in the middle, and deeply satisfying from edge to edge.
Choosing the Right Thick-Cut Steak
Thick steak isn’t just a larger version of a thin one—it’s a different cooking challenge altogether. Its size demands better temperature control, more patience, and smarter preparation. Before the pan hits the heat, choosing the right cut is the first step to success. Not all steaks hold up well at two inches thick. The structure of the meat, the way fat is distributed, and even how long the beef has been aged will all affect how it cooks.
Best Cuts for Thickness
Not every cut of beef benefits from being thick. You need something with natural marbling, firm muscle structure, and enough surface area to sear properly without overcooking the interior.
The ribeye is one of the most popular choices for thick cuts. Its generous marbling and natural tenderness make it forgiving on the grill or in a pan, even at two inches thick. The bone-in version, often called a cowboy or tomahawk ribeye, adds visual impact and helps retain moisture around the bone.
The strip steak—also called New York strip—has a firmer texture and less internal fat than ribeye, but it cooks evenly and develops a crisp crust with ease. It’s especially good when dry-aged, which deepens its flavor and tenderizes the grain.
Then there’s the porterhouse. This cut combines two muscles—the tenderloin and the strip—separated by a T-bone. At thick sizes, it’s essentially two steaks in one. It requires slightly more finesse during cooking because the tenderloin side cooks faster than the strip, but when done right, it’s one of the most satisfying steaks you can make.
Each of these cuts performs well at thicknesses between 1.5 and 2.5 inches. Beyond that, the cook time becomes harder to manage with traditional methods unless you’re using techniques like reverse sear or sous-vide.
Marbling & Aging Explained
Marbling—those white streaks of intramuscular fat—isn’t just for looks. It plays a central role in both flavor and moisture retention. As the steak cooks, this fat melts into the surrounding muscle fibers, basting the meat from the inside and adding depth to every bite. Steaks with high marbling are not only juicier but more forgiving if the temperature slightly overshoots your target.
The USDA grading system in the U.S. helps as a guide: Prime has the highest marbling, followed by Choice, then Select. For thick steaks, especially if you’re pan-searing or grilling, Prime or high-Choice grades are worth the investment.
Aging adds another layer of complexity. Beef can be either wet-aged (vacuum sealed for several weeks) or dry-aged (exposed to air under controlled humidity). Dry aging intensifies flavor and breaks down enzymes in the muscle, leading to a more tender, nutty, and rich-tasting steak. Most dry-aged steaks are cut thick to showcase their quality and stand up to bold searing.
When you combine good marbling and dry aging, you get a thick steak that cooks evenly, retains juices, and tastes extraordinary even with minimal seasoning.
Preparation Techniques That Make a Difference
Cooking a thick steak successfully depends as much on the preparation as the method. From the moment you take it out of the fridge, every step plays a role in texture, doneness, and crust. Rushing the prep can lead to an undercooked center or an uneven sear. Taking your time sets the foundation for a steakhouse-level result at home.
Thawing & Room Temperature Rest
If your steak has been frozen, it must be completely thawed before hitting the heat. A half-frozen center won’t cook evenly, and the exterior will burn long before the inside reaches a safe or palatable temperature. The best way to thaw is in the refrigerator over 24 to 48 hours. For a 2-inch-thick ribeye, plan on a full day in the fridge. Avoid thawing at room temperature for extended periods—this creates food safety risks and uneven thawing.
Once thawed, let the steak rest on the counter for about 30 to 60 minutes. This room temperature rest helps bring the internal temp closer to ambient, which promotes even cooking. A cold steak placed directly in a hot pan will seize on the outside while staying raw in the center. The closer the meat’s starting temperature is to the target doneness, the smoother the cook.
Drying, Seasoning & Optional Brining
A thick steak must be dry to sear properly. Moisture is the enemy of crust. After removing it from packaging, pat the surface thoroughly with paper towels—don’t be shy. Any residual surface water will steam the meat instead of browning it.
For seasoning, simplicity wins. A generous coating of kosher salt and freshly cracked black pepper on all sides is usually enough. Apply salt at least 40 minutes before cooking to allow it to penetrate the outer layer and begin breaking down muscle fibers. If you don’t have that much time, season immediately before cooking to avoid drawing out moisture.
Some chefs take it a step further and use a dry brine. That means salting the steak and leaving it uncovered in the fridge on a wire rack for 12 to 24 hours. This technique improves flavor penetration and helps develop an even deeper crust.
Ideal Oil and Seasonings According to Experts
For thick steaks, neutral oils with high smoke points are best. Avocado oil, grapeseed oil, and refined sunflower oil are excellent choices. These oils can withstand the high temperatures needed for proper searing without burning or imparting off flavors.
Butter, while flavorful, is best added at the end for basting, not for initial cooking—it burns quickly and creates bitter notes if used too early. Once the crust forms, adding a knob of butter along with crushed garlic, rosemary, and thyme can elevate the flavor during the final minute or two.
As for seasoning, avoid marinades—they rarely penetrate thick cuts and can introduce unwanted moisture. If you want to build a crust with more character, mix smoked paprika or a touch of ground coffee with your salt and pepper blend. Just keep the mix dry and coarse to help with caramelization.
Cooking Methods for Thick Steaks
Getting the interior just right without burning the outside is the central challenge of thick steak cooking. That’s where the method matters more than the meat. Some techniques build heat slowly from within, others focus on fast crust development followed by a gentle finish. Your tools—cast iron, grill, or sous vide—help determine which approach suits your setup. The following are the most reliable, flavor-focused methods I’ve used in both home and professional kitchens.
Pan Searing & Butter Basting
A thick steak responds beautifully to the high, even heat of a cast iron skillet. Pan searing gives you full control over surface contact, heat retention, and timing. The goal here is to build a crust first, then baste the steak with fat and aromatics to deepen its richness.
Start with a preheated cast iron pan over medium-high heat. Add a neutral high-smoke-point oil and lay the steak down gently—it should sizzle immediately. Press it down lightly with tongs to ensure full contact. After a few minutes, a crust forms on the underside. Flip, sear the other side, and then reduce the heat slightly.
Butter comes in at this point—not before. Add a thick pat of butter, a crushed garlic clove, and a sprig or two of fresh thyme or rosemary. Tilt the pan and use a spoon to scoop the melted, aromatic butter over the steak repeatedly. This process doesn’t just flavor the exterior—it speeds gentle cooking while keeping the surface moist and glossy.
Step by Step Butter Basted Cast Iron Method
Place a dry, room-temperature steak into a hot cast iron pan with a splash of neutral oil. Sear the first side for 2 to 3 minutes without moving it, then flip and sear the other side for the same amount of time. Once a brown crust forms, reduce heat to medium-low, add butter and aromatics, and begin basting. Continue basting and flipping every minute or two until the steak’s internal temperature approaches your target doneness. Remove the steak just before it hits final temp and let it rest on a warm surface.
This approach works best for steaks between 1.5 and 2 inches thick. Anything thicker benefits from starting in the oven or switching to a reverse sear method.
Reverse Sear Method
For steaks thicker than 2 inches, the reverse sear delivers unmatched control. Instead of blasting heat upfront, this method slowly raises the internal temperature first, then finishes with a high-heat crust. The result is a perfectly even doneness from edge to center and a caramelized surface that doesn’t risk overcooking the middle.
Begin by seasoning the steak and placing it on a wire rack over a baking sheet. Cook in a 250°F oven or indirect grill setup until it’s within 10–15°F of your target doneness. Then, move the steak to a blazing hot skillet or grill to sear for 1 to 2 minutes per side.
This low-and-slow-to-hot-and-fast sequence is especially helpful when you want a true medium-rare with zero grey banding. You cook with confidence, knowing the steak will reach temp gradually, without overshooting.
Reverse Sear on Grill vs Oven vs Sous Vide
Each platform brings its own benefits. The oven is the most accessible: reliable, even, and simple to control. Just place the steak on a wire rack, roast low, then sear in cast iron.
The grill adds smoke and char if done with the lid closed and indirect heat. You’ll need a cooler zone and a hot zone. Start the steak on the cooler side, lid down, then finish directly over the flame.
Sous vide, on the other hand, offers absolute precision. Vacuum-seal the steak and cook it in a water bath at your exact target temperature (e.g., 130°F for medium-rare), then dry it thoroughly and sear hot in a pan or over fire. Sous vide takes longer overall, but the consistency is unbeatable.
High Grate or Indirect Grilling
When using a charcoal or gas grill, you can take advantage of vertical distance or indirect zones to gently heat a thick steak. Place the steak on the highest grate, away from direct flame, and close the lid to create convection heat. Once the internal temperature climbs to just under target, finish by moving it over direct fire for a quick sear.
This method works particularly well for bone-in steaks, which benefit from slow heat conduction through the bone. With a smoker, you get the bonus of wood-fired aroma, turning the steak into a full-flavor experience.
Patience is key—don’t rush the internal climb. Watch your thermometer, and be ready to sear only when the center is nearly there.
Mastering Doneness and Temperature Control
The margin between a perfect medium-rare and a disappointing medium-well is slim, especially with thick steaks. Mastering internal temperature is what separates a good cook from a great one. Whether you use tools or touch, accuracy is what counts.
Doneness Levels & Internal Temp Chart
Each level of doneness corresponds to a precise internal temperature. The center should hit this number just before resting, allowing a small buffer for carryover cooking.
Here’s a reference you can rely on:
| Doneness | Internal Temp (Remove at) | Final Temp After Rest |
| Rare | 120–125°F | 125–130°F |
| Medium-Rare | 130–135°F | 135–140°F |
| Medium | 140–145°F | 145–150°F |
| Medium-Well | 150–155°F | 155–160°F |
| Well Done | 160°F+ | 165°F+ |
Always insert the probe into the thickest part of the steak, away from bone or fat pockets.
Using Thermometers & the Finger Test Method
The gold standard for consistency is a digital instant-read thermometer. It gives you confidence, especially when using reverse sear or pan-to-oven transitions. Insert the probe from the side, not the top, to measure at the steak’s center.
If you prefer the traditional approach, the finger test can work, but it takes practice. A rare steak feels like the fleshy base of your thumb when your hand is relaxed. As the doneness increases, the steak firms up—just like when you press your thumb and different fingers together. Still, nothing beats a thermometer for precision.
Dealing with Carryover Cooking & Resting Times
The moment you remove a steak from heat, it doesn’t stop cooking. Heat trapped inside continues moving toward the center, raising the internal temperature by as much as 5°F. This is called carryover cooking, and you should always account for it when planning your pull temperature.
Letting the steak rest for 5 to 10 minutes after cooking allows juices to redistribute evenly throughout the meat. If sliced too early, those juices escape onto the cutting board, leaving the steak dry and less flavorful.
Place the steak on a warm plate, tent it loosely with foil, and wait. That brief pause is the final step toward steak perfection.
Common Problems & Smart Fixes
Thick steaks have their own rhythm. They respond well to method but punish shortcuts. From too much browning on the outside to dry centers or soggy crusts, most mistakes can be traced to a misunderstanding of heat, moisture, or timing. The good news is that each issue has a clear fix, and once you understand the mechanics, consistency becomes second nature.
Over Browning vs Undercooked Interior
This is one of the most common challenges. The outside looks perfectly seared, but the inside remains raw—or worse, still cold. The problem lies in too much surface heat too soon. When the pan or grill is blazing hot and the steak is thick and cold, the exterior finishes cooking long before the interior even begins to rise in temperature.
The fix starts before the steak hits the heat. Letting the steak come to room temperature helps create a thermal balance. Starting with a slightly lower searing temperature or using the reverse sear method allows the inside to heat slowly and evenly. Then, a final blast of high heat gives you the crust without overcooking the outer layer.
It’s also worth noting that over-browning isn’t always bad—when managed well, it creates flavor. But when it masks an undercooked center, it becomes a problem of sequencing, not surface temperature.
Avoiding Dry or Tough Meat
Dryness and toughness often go hand in hand. The steak may have good sear and color but still chew like cardboard. This happens when the internal proteins are overcoagulated due to prolonged or excessive heat. It also happens when the meat is carved too soon and loses its juices to the board.
Timing is everything. Remove the steak from the heat just before it hits the final target temperature. Allow it to rest properly so that moisture can redistribute. Never skip the rest phase—even two minutes too early can drain the center of its flavor.
Cold starts also contribute to toughness. A steak straight from the fridge reacts poorly to high heat—it tenses up fast, sears unevenly, and releases more liquid. That’s why temperature management before and after cooking matters as much as the time over the fire.
Soggy Crust & Moisture Issues
A soggy crust is always disappointing, especially when the steak is thick and well-marbled. The culprit is almost always excess surface moisture or too much crowding in the cooking environment.
The steak must be patted bone-dry with paper towels just before cooking. Even a small amount of surface water turns to steam, softening the exterior instead of crisping it. The pan or grill must be hot enough to instantly sear the surface, creating the Maillard reaction. And the cooking environment must not be crowded—two thick steaks in a small pan will release steam and fight for heat, leading to pale, limp exteriors.
Fat management also plays a role. Too much butter too early will burn and create a bitter coating. Timing is critical: sear first, then baste. Balance your oil quantity, let the steak breathe, and keep the heat consistent throughout the process.
Resting, Carving, and Serving
The final steps are often treated as afterthoughts—but they matter just as much as the sear or the seasoning. A thick steak continues to evolve after it leaves the pan. If you rush through resting or slice it the wrong way, you lose the texture, juiciness, and integrity you worked so hard to build.
How Long to Rest for Maximum Juiciness
Resting gives the meat time to reabsorb and redistribute internal juices. Without it, those juices spill onto the cutting board the moment your knife goes in. For thick steaks, five minutes isn’t enough.
A two-inch steak benefits from a full 8 to 10 minutes of rest time, depending on thickness and cooking method. Place the steak on a warm plate or wooden board, and tent it loosely with foil to retain some warmth while avoiding steam buildup. If you’re cooking multiple steaks, stagger the timing so each gets its proper rest without holding too long.
The result is meat that’s easier to slice, more flavorful, and consistent in texture from edge to center.
Proper Slicing Against the Grain
Carving isn’t just about presentation—it changes how the meat feels in your mouth. Thick steaks should always be sliced against the grain, which means cutting perpendicular to the direction the muscle fibers run. This shortens each strand, making the bite tender and easy to chew.
After resting, place the steak on a clean board. Identify the grain—on a strip steak, it usually runs lengthwise. Cut across it in deliberate, confident strokes, using a sharp carving or chef’s knife. For thick steaks, half-inch slices work best. They hold heat, show off the interior color, and give enough surface area for flavor to shine through.
Arrange the slices slightly overlapped on a warm platter and spoon over any resting juices or finishing butter. That final touch completes the journey from raw cut to steakhouse-worthy result.
Flavor Enhancements & Serving Suggestions
A perfectly cooked thick steak doesn’t need much, but thoughtful finishing touches can elevate it from excellent to unforgettable. Whether it’s a pat of compound butter melting over the crust or a quick pan sauce made while the meat rests, the final flavors round out the dish and tie it all together. And when you match the steak with the right sides, you build a plate that’s not only balanced but deeply satisfying.
Compound Butters & Finishing Oils
Compound butter is one of the simplest ways to introduce layered flavor to a hot steak. As it melts, it coats the surface and slips into the crevices, enhancing richness without overpowering the meat. I often prepare a garlic-parsley butter with unsalted butter, roasted garlic paste, chopped flat-leaf parsley, lemon zest, and a pinch of salt. Rolled in plastic wrap and chilled, it slices neatly into rounds that sit beautifully atop a finished steak.
For a more aromatic option, herb butters with thyme, rosemary, and tarragon blend well with the natural flavor of dry-aged beef. A dollop right after slicing allows the butter to soften and mingle with the resting juices.
Finishing oils work similarly but add a sharper edge. A drizzle of extra-virgin olive oil infused with black garlic or chili delivers a different profile—one that complements leaner cuts like strip steak. Use sparingly, and only at the end when the steak is hot enough to carry the aroma but not so hot that the oil scorches.
Simple Pan Sauces from Drippings
If you’ve cooked the steak in a pan, the fond left behind is culinary gold. With just a few ingredients and five minutes, you can turn those browned bits into a sauce that adds depth and brightness.
Once the steak is removed and the pan is still warm, pour off excess fat, leaving about a tablespoon behind. Add minced shallots and deglaze with a splash of dry white wine or cognac, scraping up the caramelized bits. When the wine reduces by half, stir in cold cubes of unsalted butter, whisking constantly to create an emulsion. A teaspoon of Dijon mustard or a dash of Worcestershire can round out the flavor, depending on your steak’s profile.
The result is a silky, restaurant-style sauce that clings to each slice, bringing acidity, richness, and contrast without overpowering the meat.
Ideal Sides to Pair with Thick Steak
The sides you serve with a thick steak should enhance the meal, not compete with it. I always start with texture and temperature—something hot and crisp to contrast the steak’s deep warmth and softness.
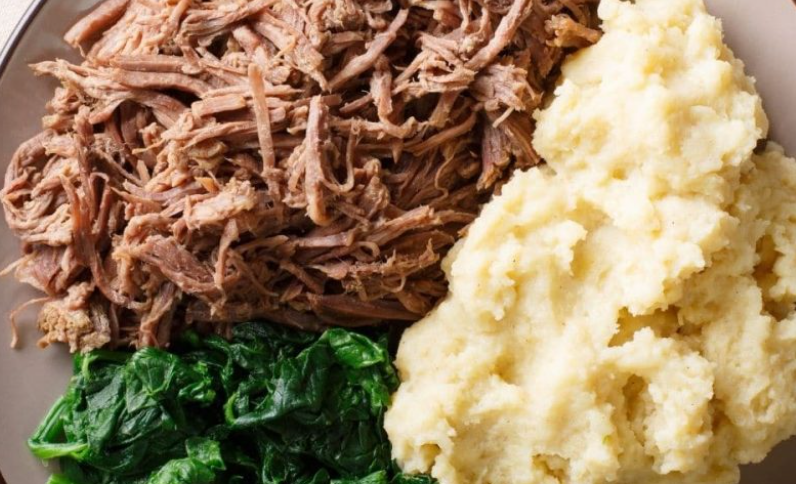
Roasted potatoes with a crackling exterior and creamy center are a natural pairing. Yukon Golds, smashed and crisped in duck fat or olive oil, soak up pan sauces beautifully. Grilled asparagus or charred broccolini add a slight bitterness that balances the richness of the meat. Even a simple arugula salad with shaved Parmesan and lemon vinaigrette can brighten the plate and reset the palate between bites.
If you’re serving a crowd, creamed spinach or truffled mashed potatoes offer steakhouse nostalgia. For summer grilling, sweet corn or marinated tomato salad complement a crusty ribeye straight off the coals. The goal is to frame the steak—not to steal its spotlight—but a well-chosen side can enhance the experience in quiet, essential ways.
15+FAQs About Thick Steak Cooking
1. How thick should a steak be for best results?
The ideal thickness for serious steak cooking is between 1.5 and 2.5 inches. This range gives you enough control over the doneness level while still allowing for a beautifully browned crust. Anything thinner can overcook before the crust develops, while thicker cuts (like tomahawk ribeyes) may require special techniques like sous vide or extended oven time for even results.
2. Can I cook a thick steak straight from the fridge?
Technically yes, but it’s not recommended. A cold steak placed directly into a hot pan will cook unevenly—searing too fast on the outside while the interior stays raw. Letting the steak rest at room temperature for 30 to 60 minutes helps it cook more evenly and reduces the shock when it hits the pan or grill.
3. What’s the best method for cooking thick steak indoors?
The combination of reverse sear and cast iron finishing works best indoors. Start the steak in a 250°F oven on a rack until it reaches about 10–15°F below your target doneness, then finish with a hot pan sear and butter basting. This approach balances interior temperature and outer crust without setting off smoke alarms.
4. Should I oil the pan or the steak before searing?
Either works, but for thick cuts, oiling the steak directly gives better coverage and avoids excess smoke. Use a neutral, high smoke point oil like avocado or grapeseed. You can then add a small amount to the pan if needed, followed by butter later for flavor.
5. How do I know when a thick steak is done without cutting into it?
Use a digital instant-read thermometer. Insert it into the thickest part of the steak from the side—not the top—for the most accurate reading. For medium-rare, remove at around 130–135°F, then let it rest. Cutting into it prematurely will release juices and alter texture.
6. Can I reverse sear on a grill instead of an oven?
Absolutely. Use two heat zones: place the steak on the cooler side with the lid down to cook slowly, then finish with a direct high-heat sear. This method adds a smoky element and works especially well with bone-in cuts like porterhouse or cowboy ribeye.
7. What if the crust forms too early but the inside is still raw?
This usually means the heat is too high or the steak is too cold. You can move the steak to a cooler part of the pan or oven to allow the interior to catch up. Alternatively, remove it from the pan and let it rest covered for a few minutes, then finish gently in a moderate oven.
8. How do I keep the steak from drying out?
Don’t overcook it and don’t skip the rest. Thick steaks continue cooking after removal from heat, so pull them about 5°F before your target. Then rest them for 8 to 10 minutes. This locks in moisture and prevents that dry, fibrous texture.
9. Is sous vide worth it for thick steak?
If precision is your priority, yes. Sous vide allows you to set the exact internal temperature and hold it there indefinitely. Once cooked, a quick sear finishes the steak. It’s ideal for entertaining or high-value cuts where consistency matters most.
10. Should I salt the steak ahead of time or right before cooking?
Both work, but dry brining—salting the steak and leaving it uncovered in the fridge for 12–24 hours—draws out moisture and then reabsorbs it, leading to better flavor and a drier surface for crust development. If short on time, season just before cooking.
11. What herbs and aromatics go best with thick steak?
Garlic, rosemary, thyme, and shallots are classics. Add them during the butter basting phase—not before—to avoid burning. Their oils infuse the butter and coat the crust with subtle depth and complexity.
12. Can I slice the steak immediately after cooking?
No. Slicing too soon allows juices to escape, drying out even the most well-prepared cut. Always let the steak rest under a foil tent for at least 8 minutes to allow internal moisture to redistribute.
13. What’s the best way to slice a thick steak for serving?
Always slice against the grain and aim for half-inch thickness. This shortens the muscle fibers and makes each bite more tender. Use a long, sharp knife and make clean strokes—don’t saw back and forth.
14. What sides pair best with thick steak?
Look for balance: rich, crispy roasted potatoes or buttery mash; grilled greens like asparagus or broccolini; and something bright like a lemony arugula salad. The idea is to contrast the meat’s richness, not add to it.
15. How do I reheat leftover thick steak without drying it out?
Reheat gently in a covered skillet with a splash of broth or butter over low heat. Avoid microwaving unless using short, low-power bursts. Alternatively, slice the steak and serve cold in sandwiches or steak salads—it often tastes better that way the next day.