Cooking Chicken Legs in an Air Fryer
Cooking Chicken Legs in an Air Fryer: Crispy, Juicy Results Every Time

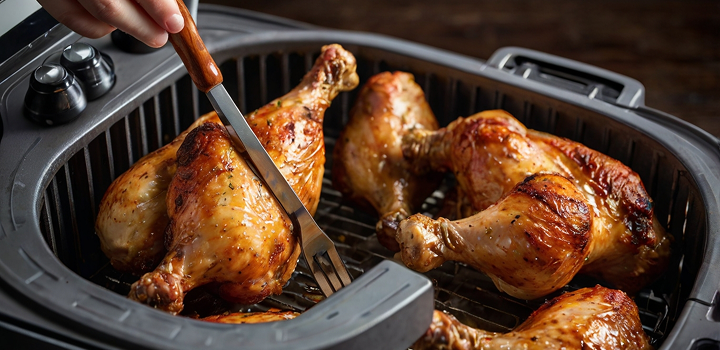
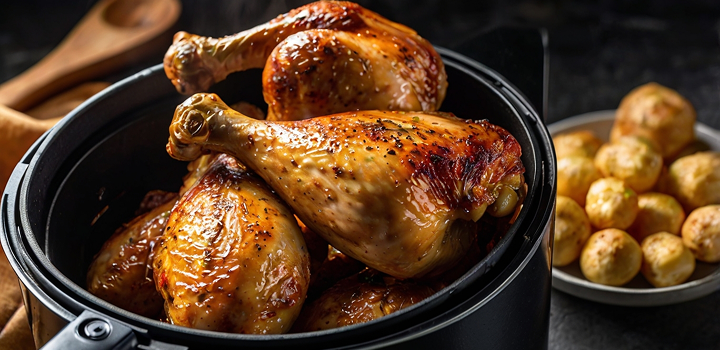
Chicken legs are made for the air fryer. With the right approach, they come out with a golden, crackly skin and tender, juicy meat in under 25 minutes—no splatter, no flipping trays in a hot oven. The air fryer circulates heat in a compact space, allowing fat to render from the skin while locking in the natural moisture of the dark meat below. It’s one of the easiest and most rewarding ways to cook chicken legs, especially when you’re short on time but still want something that feels like comfort food. This guide covers every step, from choosing the right drumsticks to seasoning, air frying, and troubleshooting. If you’ve struggled with rubbery skin or uneven cooking, this method changes everything.
Why Chicken Legs Shine in the Air Fryer
The air fryer creates conditions that are perfect for chicken legs. Because the heating element is close to the food and the fan pushes hot air directly over the surface, you get fast browning and crisping without drying out the inside. Chicken legs have enough internal fat to stay juicy under high heat, and the skin crisps beautifully when properly dried and spaced.
Skin-On vs. Skinless Legs
Using skin-on chicken legs is the best way to achieve that classic crispy finish. The skin acts as a barrier that protects the meat during cooking, allowing it to self-baste as the fat renders out. As the skin cooks, it bubbles and tightens, creating a savory, crackly texture that can’t be replicated with skinless cuts. Even if you’re watching fat intake, the rendered skin sheds most of its surface fat during cooking, leaving behind crisp texture and deep flavor.
Skinless chicken legs can work, but they need extra attention. Without the protective layer, the meat is more prone to drying out. To compensate, they should be lightly coated in oil and possibly marinated in advance to retain moisture. They also benefit from a slightly lower temperature to avoid overcooking the exterior before the center is done.
Ideal Size & Spacing for Even Cooking
Uniformity makes all the difference. If you’re working with chicken legs of varying size, expect uneven cooking unless you stagger their start times. The ideal legs for air frying are medium-sized and similar in shape, allowing heat to circulate and penetrate evenly.
The placement inside the basket is just as important. The legs should sit in a single layer, not stacked or touching too closely. This allows airflow to reach all surfaces, ensuring both browning and even doneness. Halfway through the cook, flipping or rotating the legs helps crisp all sides and promotes balanced color. In smaller baskets, you may need to work in batches—but the reward is crisp skin and no soggy spots.
Prepping for Perfection
Great air-fried chicken legs start before they ever enter the basket. The prep phase determines how well the skin crisps, how deeply the seasoning penetrates, and whether the meat cooks evenly. Skipping or rushing through this step is the most common reason for disappointing results.
Patting Dry & Optional Dry-Brine
Moisture is the enemy of crisp. Even a light film of surface water can prevent the skin from browning properly. After removing the chicken legs from their packaging, they should be blotted thoroughly with paper towels. Work around the joint and under the skin flap if possible. The drier the surface, the better the Maillard reaction when heat hits the skin.
If time allows, dry brining adds another layer of benefit. This involves salting the chicken generously and letting it sit uncovered in the refrigerator for several hours—or ideally overnight. During this time, salt draws moisture to the surface, which then reabsorbs into the meat, carrying flavor and helping tighten the skin. When done right, dry-brined chicken legs cook faster, brown deeper, and stay juicy even after resting.
Seasoning Blends & Oil Coating
The simplest seasoning often delivers the best results. A combination of kosher salt, smoked or sweet paprika, garlic powder, and a touch of black pepper creates a savory, well-balanced crust. The key is applying the seasoning evenly and in the right order. After drying, rub the legs with a light coat of neutral oil—avocado oil or olive oil work well. This not only helps the seasoning stick but also promotes crispness by aiding heat transfer.
Avoid wet marinades right before cooking; they add moisture and inhibit browning. If you do use a marinade, let the legs drain and dry thoroughly before going into the air fryer. Spice blends with sugar should be added cautiously, as sugar can burn in the high, direct heat environment. For sauces like BBQ or honey glaze, it’s best to apply them halfway through or near the end of cooking to prevent scorching.
Air Frying Techniques
The air fryer brings powerful convection heat that cooks chicken legs quickly, but getting that perfect combination of crispy skin and juicy interior depends on temperature control, placement, and a good read on doneness. Small adjustments in timing or technique can mean the difference between dry and succulent, or pale and deeply browned.
Preferred Temperature & Timing
Chicken legs cook best in the air fryer when set between 380°F and 400°F. This range allows the skin to crisp without overcooking the inside. At 380°F, expect to cook for 22 to 24 minutes, flipping once midway. At 400°F, you can reduce time to 18 to 20 minutes, but you’ll need to monitor closely to prevent charring, especially if you’re working with smaller drumsticks.
Thickness and bone structure affect cook time. A meatier leg takes slightly longer to reach target temperature. If in doubt, err on the side of 380°F and extend the time—lower, longer heat promotes better rendering of fat beneath the skin.
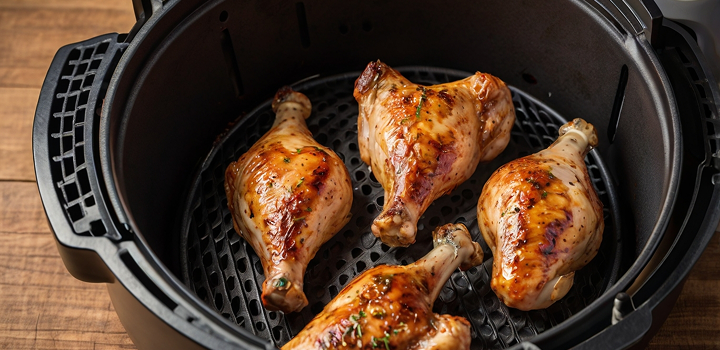
Flipping & Basket Arrangement
Even though air circulates around the basket, placement still matters. Chicken legs should sit in a single layer, spaced apart with the thickest parts facing the perimeter of the basket where airflow is strongest. Overlapping or stacking legs traps steam and results in soggy skin and uneven doneness.
Halfway through cooking—around the 10-minute mark—turn each leg with tongs. This helps both sides brown evenly and gives the hot air a chance to crisp the underside. In a tightly packed basket, some legs may need to be rotated more than once for uniform color. If you’re cooking in batches, keep finished legs warm in a low oven while the rest cook through.
Using Thermometer & Resting
Doneness isn’t about time alone—it’s about internal temperature. Insert an instant-read thermometer into the thickest part of the leg, avoiding the bone. A safe internal temperature for chicken legs is 165°F, but don’t stop there if you want an ultra-tender result with crispy skin.
Letting the temperature climb slightly to 175°F or even 190°F softens the connective tissue and gives a more fall-off-the-bone texture. Dark meat is forgiving, so you won’t risk dryness by going a little higher—especially if the leg is meaty and well-oiled.
Once cooked, let the legs rest for 5 minutes before serving. This allows juices to redistribute and helps the skin retain its crisp without steaming on the plate.
Troubleshooting Common Issues
Even with good prep and planning, air fryer cooking sometimes goes sideways. Most of the issues with chicken legs—rubbery skin, overdone meat, or kitchen smoke—come from overlooked details that are easy to fix once you know what to watch for.
Soggy Skin?
The number one reason for soggy skin is moisture—either from surface water or from overcrowding the basket. If the legs aren’t dried properly before seasoning and oiling, they’ll steam instead of crisp. Skin needs to be bone-dry going in, especially if you’re cooking skin-on drumsticks. Blot thoroughly with paper towels and let them sit uncovered in the fridge for an hour or two if you have the time.
The second cause is stacking or crowding. Even the best air fryer can’t overcome trapped steam. Legs must sit in a single layer with air circulating all around them. If you’re feeding a group, cook in batches or invest in a larger basket. The crispness is worth the extra 20 minutes.
Dry Meat or Over-Browning
If your chicken legs come out with dry meat or charred skin, the likely cause is excessive heat or extended cook time. The fix is simple: reduce your air fryer temperature slightly and monitor the timing more closely. Going from 400°F to 380°F slows down surface browning and gives the interior more time to cook through without becoming tough.
Another trick is adjusting oil levels. Too little oil won’t allow even browning, while too much can trap heat and cause burning. Aim for a light, even coat—just enough to help the skin crisp, not so much that it pools in the basket.
Smoke or Splatter in Basket
Smoke in the air fryer usually comes from one of two sources: excess fat from the chicken dripping onto a hot element, or food residue burning from a previous batch. To reduce smoke, add a tablespoon or two of water to the bottom tray below the basket. This helps prevent rendered fat from reaching smoking temperature.
If you’re cooking multiple batches, wipe down the basket and tray between rounds. Built-up grease not only smokes but affects flavor and crispness. A clean air fryer always performs better—especially when dealing with high-fat cuts like chicken legs.
Next-Level Flavor Variations
Once you’ve mastered the basic technique, it’s the seasoning and finishing touches that turn air-fried chicken legs into something truly memorable. The air fryer’s dry heat environment creates a blank canvas for bold spices, glazes, and international flavor profiles that cling, caramelize, and intensify during cooking.
Halfway Sauce Glazing
One of the most effective ways to elevate air-fried chicken legs is to brush on a sauce halfway through cooking. Doing this too early will cause sugars to burn, but waiting until the skin is set allows the glaze to adhere and caramelize without scorching. Classic BBQ sauce creates a sticky-sweet shell that pairs perfectly with crisp skin. For something sharper, a honey-mustard glaze adds a tangy note with just enough bite to cut through the richness of the meat. If you prefer heat, spicy blends made from gochujang, sriracha, or chili paste bring a punch of flavor with minimal effort. The key is applying the sauce after the flip—around the 10- to 12-minute mark—then finishing the final 6 to 8 minutes uncovered to let it tack on and form a glaze.
Spice Rubs & Marinating Options
Dry spice rubs are ideal for air frying because they don’t introduce excess moisture and develop a crust as they cook. A Cajun blend with smoked paprika, garlic, onion, thyme, and cayenne gives a bold southern profile that pairs well with dipping sauces or mashed potatoes. For a Mediterranean twist, an Italian-style rub with oregano, rosemary, and fennel seed works beautifully with a lemon-garlic aioli on the side. If you’re prepping ahead of time, marinating the legs for a few hours before drying and oiling them can infuse deeper flavor. Asian-style marinades with soy sauce, sesame oil, ginger, and rice vinegar are especially good if you plan to finish with a glaze or garnish with scallions and sesame seeds. Just remember: marinated legs must be patted dry before entering the air fryer or they’ll steam instead of crisp.
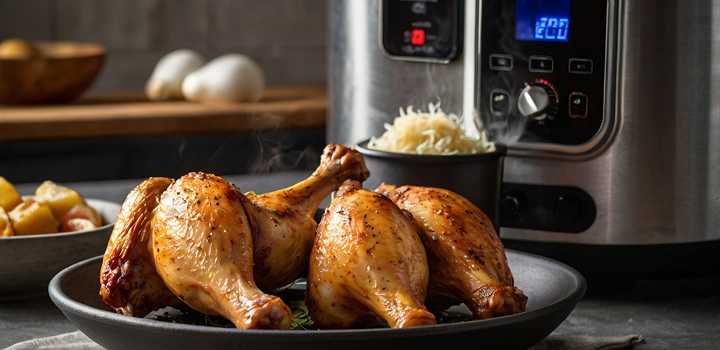
Serving & Storage Best Practices
Fresh out of the air fryer, chicken legs are at their peak—but knowing how to serve them properly and store leftovers can make the meal even better. Whether you’re prepping for a family dinner or cooking in batches for weekday lunches, these final steps help keep flavor and texture intact.
Rest Time & Crust Revival
Resting chicken legs after cooking is essential, even if the urge is to dig in right away. Giving the meat five minutes on a wire rack or plate allows juices to redistribute and the surface to re-set, preventing the crust from going soggy. If you’re serving immediately, a brief rest is enough to bring out the best in both flavor and mouthfeel. For legs that have been sitting or held warm, a quick return to the air fryer at 350°F for 3 to 5 minutes revives crispness without overcooking the interior. This is especially helpful if you’ve cooked in advance or served with a sauce that softened the skin.
Storing & Reheating Leftovers
Leftover air-fried chicken legs store well and reheat beautifully if handled properly. Once cooled, transfer the legs to an airtight container and refrigerate for up to 4 to 5 days. For longer storage, wrap them in parchment or wax paper before placing in a freezer-safe bag or container. They’ll keep for up to 3 months without significant loss of texture or flavor.
To reheat, avoid the microwave unless you’re only after speed—it softens the skin and leaves uneven texture. Instead, return the legs to the air fryer at 350°F for 6 to 8 minutes, or until heated through and crisp on the outside. A light mist of oil before reheating can help restore golden color and revive the crust.
15+ FAQs About Air Fryer Chicken Legs
1. Do I need to preheat the air fryer before cooking chicken legs?
Preheating isn’t always necessary, but it does make a difference in how quickly the skin starts to crisp. Starting with a hot air fryer gives you better surface browning from the first minute and helps maintain more accurate cook times. If your air fryer heats fast, preheating for 3 to 5 minutes at 380°F is enough.
2. Can I stack chicken legs in the air fryer to save time?
Stacking is not recommended. It restricts airflow and causes uneven cooking. Legs that overlap or touch too closely won’t crisp where they meet and may remain undercooked in thicker spots. Always cook in a single layer with space between each piece. If needed, cook in batches and keep the first batch warm in a low oven.
3. How do I know when chicken legs are done?
Use a meat thermometer to check the internal temperature at the thickest part, away from the bone. The minimum safe temperature is 165°F, but legs benefit from going slightly higher—to 175–190°F—to soften the connective tissue and deepen tenderness without drying out. Juices should run clear, and the meat should pull easily from the bone.
4. Should I use parchment paper or foil in the air fryer basket?
You can use perforated parchment designed for air fryers to reduce mess, but foil is less ideal. It blocks airflow and can affect crisping, especially on the underside of the chicken. If you use parchment, ensure it’s weighed down by the chicken before turning on the machine so it doesn’t blow into the heating element.
5. Can I cook frozen chicken legs directly in the air fryer?
Yes, but expect longer cook times and slightly less crisp skin. Start at a lower temp—around 360°F—to gently thaw the surface, then increase to 380–400°F to finish. Cooking from frozen can take 10–15 minutes longer than thawed legs, and flipping becomes more important for even color and texture.
6. How much oil should I use when air frying chicken legs?
You only need a light coating—just enough to help the seasoning stick and encourage browning. About ½ to 1 teaspoon of oil per leg is more than enough. Using too much can lead to greasy skin and increase smoke production. The oil should be applied after drying the legs but before adding seasoning.
7. Why is my air fryer smoking when cooking chicken legs?
Smoking usually comes from fat dripping onto the hot heating element or into the lower tray. To minimize this, add a tablespoon or two of water to the base under the basket before cooking. Also make sure the air fryer is clean—built-up grease from previous batches will burn and create smoke quickly.
8. Can I marinate the chicken legs before air frying?
Yes, but make sure you dry the surface well after marinating. Excess moisture from a wet marinade prevents the skin from crisping and can cause steaming. Let the legs drain on a rack or pat them dry with paper towels before oiling and seasoning. Marinades work best when used as a pre-step, not a substitute for dry rubs.
9. How long do I rest the chicken legs after cooking?
A short 5-minute rest is ideal. It allows juices to redistribute and helps the skin set without steaming. Place the legs on a wire rack or plate with a bit of airflow around them. Covering tightly traps moisture, which softens the crust—leave them uncovered for best results.
10. Can I air fry drumsticks and thighs together?
It’s possible, but timing gets tricky. Thighs tend to be meatier and may need more time. If you’re mixing pieces, place the thicker ones around the edge of the basket and monitor internal temperatures carefully. You may need to pull the drumsticks a few minutes earlier and return the thighs to finish.
11. Do I need to flip the chicken legs during cooking?
Yes. Flipping halfway ensures even browning and prevents one side from overcooking while the other stays pale or underdone. At about the 10- to 12-minute mark, use tongs to turn each leg. In tight baskets, rotating positions can also help equalize color and doneness.
12. Is baking powder good for crispier skin in the air fryer?
Baking powder can help, especially when dry brining overnight. It changes the pH of the skin slightly, promoting faster browning and blistering. Use a small amount mixed with your dry seasoning—about ¼ teaspoon per pound of chicken. Avoid using baking soda, which can taste metallic.
13. What’s the best way to reheat leftover air-fried chicken legs?
Use the air fryer again. Set it to 350°F and cook for 6 to 8 minutes, checking once halfway through. The air fryer revives the crispness better than a microwave and prevents soggy skin. If reheating from frozen, allow 12 to 14 minutes, depending on size.
14. Can I use a glaze and still get crispy skin?
Yes, if the glaze is applied at the right time. Add it only during the last 5 to 7 minutes of cooking—after the initial crisp has formed. Applying too early causes the glaze to burn before the chicken is done. Finishing with the glaze gives you a sticky, flavorful coating that enhances rather than softens the skin.
15. Are air-fried chicken legs healthier than deep-fried?
Yes. Air frying uses significantly less oil—usually less than a tablespoon total—compared to deep frying, which soaks the food in fat. The result is a lower-calorie, lower-fat meal with less mess and fewer cleanup steps. You still get the crisp texture and golden finish, but without the heavy, greasy feel.