Best Way to Cook Beef Chuck
Best Way to Cook Beef Chuck: Guide from Chef

Arianne Nemna
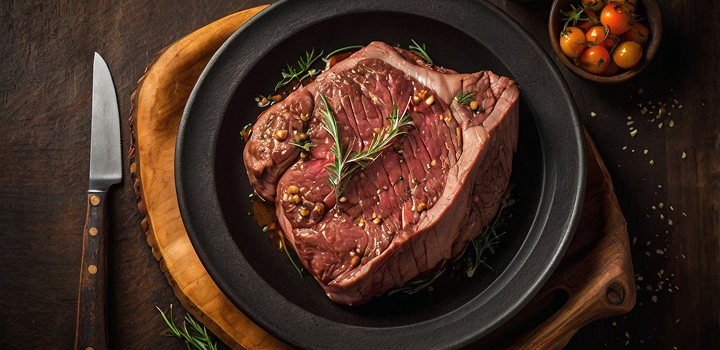
Beef chuck isn’t a glamorous cut—but it’s one of the most rewarding. When cooked properly, chuck transforms from tough and fibrous to rich, fork-tender, and deeply flavorful. It holds up to bold seasonings, yields to long, slow heat, and absorbs flavor better than almost any other section of the cow. Whether you’re after a classic pot roast, shredded meat for tacos, or even steak-style slices from the chuck eye, the key lies in choosing the right method for the cut. Chuck is forgiving, affordable, and versatile—but it requires a little guidance to get the most out of it. This guide walks you through how to understand, prepare, and cook beef chuck to bring out its full potential.
What Makes Chuck Unique
The chuck comes from the shoulder section of the cow, a hardworking group of muscles responsible for movement. That means it’s packed with connective tissue—primarily collagen—which takes time and heat to break down. What starts as toughness turns into juiciness when treated correctly. Chuck is naturally rich in beef flavor, thanks to the mix of lean muscle and intramuscular fat. It doesn’t have the instant tenderness of ribeye or tenderloin, but its potential for depth and succulence is unmatched when cooked the right way.
Chuck Cuts Explained
Understanding the different forms of chuck helps you choose the best cooking method. The boneless chuck roast, often labeled as shoulder roast or chuck pot roast, is the most common. It’s ideal for braising and slow cooking because it has even marbling and breaks down into tender shreds. The bone-in chuck roast includes part of the shoulder blade and tends to retain moisture well during longer cooking times. That bone adds flavor to the cooking liquid, making it a top choice for stews and pot roasts.
Then there’s chuck steak, which is essentially sliced sections of the roast, sold in 1–1.5 inch portions. While not naturally tender like premium grilling steaks, chuck steaks can be cooked quickly if prepped correctly—especially when thinly sliced across the grain or finished with sous vide. Finally, the shoulder steak, sometimes sold as “arm steak,” has a leaner profile and less marbling, making it better suited for braising or marinating before grilling.
Each variation of chuck requires slightly different handling, but the foundation is the same: give it time, heat, and care, and it rewards you with comfort-food-level satisfaction.
Choosing the Right Cooking Method
Cooking beef chuck isn’t about rushing—it’s about control. Some cuts benefit from long braises; others respond better to low-temperature water baths or high-heat grilling when sliced properly. The structure of chuck means it excels in methods that allow connective tissue to slowly dissolve while preserving natural moisture. Picking the wrong method won’t ruin it, but the right one will make the most of its potential.
Low and Slow Braising for Melt-In-Your-Mouth Texture
Braising is the classic technique for chuck—and for good reason. The combination of slow, moist heat and time transforms chewy fibers into soft, spoonable strands. Start by searing the meat to build flavor, then transfer it to a covered pot with broth, wine, or another flavorful liquid. Let it simmer gently for several hours until the collagen melts into gelatin, creating both tenderness and body in the sauce.
The beauty of braising is that it doesn’t require expensive equipment or precise timing. It’s forgiving. Even if you go a little over, the meat remains juicy and flavorful, as long as there’s enough liquid and moderate heat.
Oven vs. Slow Cooker vs. Pressure Cooker – What Works Best?
The oven offers even, ambient heat from all directions. It’s great for traditional braising in a Dutch oven. The constant low temperature and enclosed environment help maintain moisture, especially if the pot is tightly sealed.
The slow cooker (or Crock-Pot) is set-it-and-forget-it braising. While it doesn’t develop much browning unless you sear first, it maintains consistent low heat, making it ideal for chuck roasts cooked over 8–10 hours. The downside is a slightly flatter flavor if you skip the initial sear.
The pressure cooker—including Instant Pots—cuts the cook time drastically while still breaking down collagen. A chuck roast that takes 3 hours in the oven might take just 45 minutes under pressure. It’s ideal when time is short, though you sacrifice a bit of the complexity that comes from slower reductions.
All three work. The choice depends on your schedule, equipment, and how much flavor layering you want to build.
Quick Steaks from Chuck – Reverse Sear & Sous Vide
Although chuck is known for braising, certain cuts from the shoulder can be coaxed into steak-like performance with the right methods. This includes chuck eye, top blade, and even flat chuck steaks. These aren’t tender by nature—but with techniques that tenderize without overcooking, they become surprisingly satisfying.
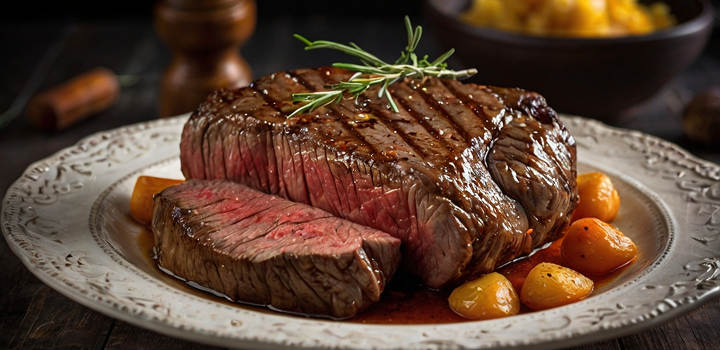
Reverse Sear Chuck Roast for Steak-Style Slices
The reverse sear method begins with low, controlled heating to gently raise the internal temperature, followed by a hot sear to develop crust. For chuck roasts trimmed to a 1.5–2 inch thickness, this works beautifully. Start in a 250°F oven or grill until the center reaches about 120–125°F, then finish with a sear in cast iron or over high flame.
The result is a steak-like piece of chuck that’s medium-rare from edge to center, with a crisp, browned exterior. It doesn’t slice like filet—it’s more rustic—but the flavor is deeper, and the texture, when sliced against the grain, is more than satisfying.
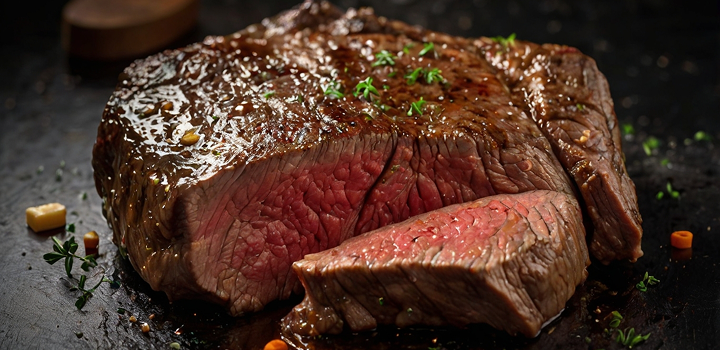
Sous Vide Chuck Steak: Tenderized by Precision
Sous vide allows you to tame the natural toughness of chuck with time and temperature control. By sealing the steak in a vacuum bag and cooking it at 130°F for 24–36 hours, you soften the fibers slowly without losing any moisture. After cooking, dry the surface thoroughly and sear in a hot pan or with a torch to build crust.
This method brings steakhouse-style results to a budget-friendly cut. The texture becomes fork-tender, almost like prime rib, but with the concentrated flavor of a well-aged roast. For thick chuck steaks, sous vide is hands-down the most reliable way to make them sliceable and juicy.
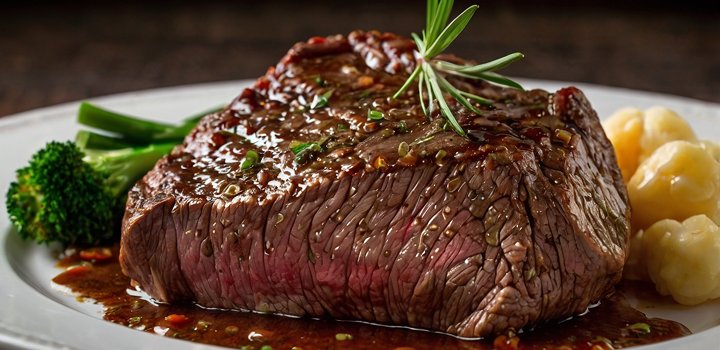
Grilled or Pan Seared Chuck Steaks (Top Blade, Cross Rib Cuts)
Some parts of the chuck—like the top blade or cross rib—are suitable for quicker, high-heat cooking, but only with proper prep. These steaks must be sliced across the grain and often benefit from marinating or pounding to tenderize the connective tissue. A ¾-inch chuck steak, seasoned well and grilled over medium-high heat, can develop a beautiful charred crust in just a few minutes per side.
Pan-searing works the same way. Use a hot cast iron pan and sear until a deep crust forms, then reduce heat to finish cooking through. For best results, rest the steak after cooking and slice it thinly. While these won’t mimic filet mignon, they deliver rich, beefy character that holds up well to bold sauces or chimichurri.
Preparation Tips for Every Method
No matter how you plan to cook beef chuck—braised, grilled, reverse-seared, or sous vide—preparation is where success begins. This cut needs support to reach its best form. That means trimming the right way, seasoning thoughtfully, and building a foundation of flavor before the main cook even starts.
Trimming, Tying & Dry Brining Before Cooking
Chuck often comes with excess fat, connective tissue, or uneven edges. Trimming isn’t about removing all fat—some of it is essential for flavor—but you want to cut away thick surface layers and any silver skin that won’t render down. For roasts, trimming also helps the meat absorb seasoning evenly and brown without burning.
Tying the roast with butcher’s twine creates uniformity. This helps the meat cook more evenly, especially in the oven or sous vide bath, where consistent thickness matters. Even for irregular-shaped roasts, a few loops of twine can make all the difference.
Dry brining is the next step. That means salting the surface generously and letting the meat rest uncovered in the refrigerator, ideally overnight. The salt begins to draw moisture out and then reabsorbs it, carrying flavor deeper into the muscle and drying the exterior—a key factor in achieving a deep, crisp sear later.
Seasoning Strategies: Salt, Marinades, and Rubs
For beef chuck, salt is not optional. It’s the primary driver of both flavor and texture. Coarse kosher salt penetrates slowly, making it ideal for long-cook cuts. Add cracked pepper just before searing or roasting so it doesn’t scorch.
Marinades can be helpful, especially for thinner steaks from the chuck shoulder. Acidic components like vinegar or citrus juice break down muscle fibers over time, while ingredients like garlic, soy sauce, and Worcestershire enhance umami. Just be cautious: too much acidity for too long can make the meat mushy.
Rubs add a different kind of depth. A mix of smoked paprika, ground coriander, dried thyme, and brown sugar can build a flavorful bark during long braising or oven-roasting. For grill or pan methods, keep rubs dry and spice-forward to avoid burning sugars.
Searing to Build Flavor and Prevent Sogginess
Searing is the great equalizer in chuck cooking. Whether you’re braising in broth or finishing sous vide steak, that initial crust-building step is what transforms this humble cut into something special. High heat, dry surface, and patience are the three factors to get it right.
Start with a thoroughly dried roast or steak. Let the pan preheat fully—cast iron is ideal. Once the meat hits the surface, don’t move it for at least two to three minutes. You’re looking for deep, even browning, not just a faint color change. Rotate to brown each side evenly, including the edges if possible. This browning not only adds visual appeal but forms a flavor base that seeps into the rest of the dish.
Cooking Guidelines and Timing

Once the prep is dialed in, your cooking method will determine how the chuck transforms. Temperature, moisture, and time interact differently depending on whether you’re braising, grilling, or cooking sous vide. Timing can’t be guesswork—each degree matters more than most people think. These guidelines help you hit your texture and flavor goals with confidence.
Ideal Braising Temperatures & Liquid Ratios
Braising depends on slow, moist heat. The ideal internal cooking temperature for most chuck roasts is between 190°F and 205°F, which is where collagen breaks down and turns into gelatin. The key is reaching that temperature gradually, without boiling the meat, which toughens protein and dries it out.
Your braising liquid should come about halfway up the meat. This ensures even cooking without drowning the roast. Broth, wine, beer, or even tomato-based sauces can serve as a flavorful base. Cover the pot with a tight lid to trap steam and maintain steady moisture inside.
Temperature vs. Time Chart for Braising
Here’s a general guide for braising chuck roast based on weight and method:
| Weight | Oven Temp | Braising Time (Covered) | Final Internal Temp |
| 2–3 lbs | 300°F | 2.5 to 3.5 hours | 195–205°F |
| 4–5 lbs | 300°F | 3.5 to 4.5 hours | 195–205°F |
| 6–7 lbs | 300°F | 4.5 to 5.5 hours | 195–205°F |
Check doneness with a fork—the meat should fall apart under gentle pressure. If not, it needs more time.
Sous Vide Temperature Guide for Chuck Steak/Roast
Sous vide offers precision for tough cuts like chuck. Depending on how you want the final texture—sliceable like prime rib or shreddable like pot roast—you can adjust both temperature and cook time.
For steak-style chuck:
- 130°F for 24 to 36 hours gives a medium-rare result, tender enough to slice but with a pleasant chew.
- 135°F to 140°F for 24 hours softens the structure further, ideal for thicker steaks or medium doneness.
- 165°F for 18 to 24 hours creates a pot roast texture that shreds easily but still slices if rested well.
After sous vide, pat the surface dry and sear over high heat for 1 to 2 minutes per side. This step builds crust and adds complexity.
Grilling/Pan Sear Timing for Thickness and Doneness
Chuck steaks cooked hot and fast need attention to thickness and doneness. A ¾-inch steak over medium-high heat takes about 3 to 4 minutes per side for medium-rare. One-inch cuts take closer to 5 to 6 minutes per side. Always let the meat rest afterward to finish carryover cooking and retain juices.
Use a digital thermometer to track internal temperature:
- 125°F for rare
- 135°F for medium-rare
- 145°F for medium
- 160°F+ for well done
Anything above medium requires marination or pre-treatment to avoid toughness. When grilled properly and sliced thinly across the grain, chuck steaks can stand up to more expensive cuts in flavor—and sometimes exceed them in satisfaction.
Common Problems & Smart Fixes
Cooking beef chuck isn’t difficult, but it punishes guesswork. If the results are stringy, dry, or soggy, the problem usually traces back to a mismatch between heat, timing, and prep. Learning to spot these issues—and knowing how to correct them—can turn a mediocre chuck roast into a centerpiece dish.
Tough, Stringy Meat – Undercooked Collagen or Wrong Cut?
If the chuck roast comes out chewy and resists pulling apart with a fork, it’s almost always a sign that the collagen hasn’t broken down. That connective tissue needs time at 190°F or higher to turn into gelatin. If the meat is technically “cooked” but still stringy, it wasn’t cooked long enough at the right internal temperature. The fix is patience. Return the roast to low heat, add a bit more liquid if needed, and continue braising or pressure cooking until the fibers relax. In some cases, using a leaner shoulder steak instead of a chuck roast can also lead to toughness—it’s simply not the right cut for long, moist cooking.
Dry Exterior with Raw Center – Temperature Mismatch
This problem comes up most often when trying to grill or pan-sear a thick chuck steak. The outside looks charred and ready, but the inside is barely warm. That’s a heat imbalance. The solution is to slow down the cook—either with a two-zone grill setup or by starting in the oven before finishing in a pan. Bringing the meat to room temperature beforehand helps, too. Chuck isn’t a quick-cut steak like skirt or ribeye. It needs time to heat internally before being blasted on the outside.
Soggy Texture – Causes & How to Keep It Crisp or Juicy
Sogginess in chuck can show up during braising or pan cooking, especially if the meat isn’t dried properly or the heat is too low. Wet meat in a lukewarm pan steams instead of sears, creating a pale, flabby crust. Always dry the surface thoroughly with paper towels, then use a hot pan or grill to create direct, even browning. Overcrowding the pan is another culprit—it drops the temperature and traps steam. Even in braised dishes, start with a deep sear to lock in flavor and structure before adding liquid.
Finishing Touches & Serving Styles
Beef chuck isn’t just about cooking—it’s about how you serve it. Once the roast is done or the steak is seared, how you finish the dish makes the difference between a rustic meal and a restaurant-quality plate. From slicing to saucing to pairing with the right base, these final touches elevate the experience.
Resting, Shredding or Slicing – What to Do Post Cook
After cooking, chuck needs a moment to settle. If sliced too soon, juices escape and fibers tighten. For roasts, rest uncovered for 10 to 15 minutes before carving or shredding. If the goal is pulled beef, use two forks or gloved hands to separate the fibers once it cools slightly. For steak-style slices, always cut across the grain. This shortens the muscle fibers and maximizes tenderness, even in cuts that retain some chew.
Easy Pan Sauces & Gravy from Braising Liquid
Once the meat is out, the real flavor is in the pan. Braising liquid—especially one built from stock, wine, aromatics, and seared meat—becomes the base for an incredible sauce. Skim off excess fat, reduce the liquid over medium heat, and finish with a splash of vinegar or a knob of butter. Add a cornstarch or flour slurry if you prefer a thicker gravy. These sauces bring brightness and body, tying the dish together without overpowering the beef.
Serving Formats: Tacos, Sandwiches, Stews, Classic Roast
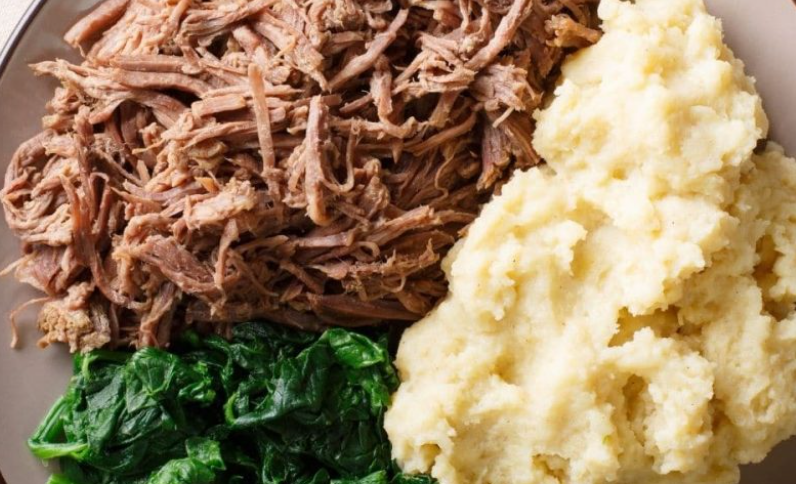
Chuck adapts to nearly any serving style. Pulled beef is perfect for tacos with pickled onions and salsa verde. For sandwiches, a warm roll with horseradish cream or barbecue sauce makes a complete lunch. Chuck also holds up in thick stews, where vegetables soak up its richness. But one of the simplest—and most satisfying—ways to serve it is sliced over creamy mashed potatoes with spooned pan sauce. When cooked and plated right, beef chuck proves that an inexpensive cut can deliver full-flavored, crowd-pleasing results.
15+ FAQs About Cooking Beef Chuck
1. Can you cook chuck to medium-rare like a steak?
Technically, yes—but it’s not ideal unless you’re using sous vide. Chuck contains a high level of connective tissue that needs time at higher internal temperatures to break down. Cooking it to 130°F and serving it like a ribeye will leave it tough and chewy. Only with a long sous vide (24–36 hours at 130°F) can you achieve a medium-rare chuck that’s tender enough to slice and enjoy like a steak.
2. What’s the difference between chuck roast and chuck steak?
Chuck roast is a larger, often more marbled cut meant for slow cooking, while chuck steak is sliced thinner across the grain, often with more connective tissue exposed. Chuck steak can be grilled or pan-fried when treated right, but chuck roast performs best when braised, slow-cooked, or pressure-cooked until fork-tender.
3. Is chuck good for shredding like pulled pork?
Yes, chuck is one of the best beef cuts for shredding. Once it reaches around 200–205°F internally and is allowed to rest, the collagen has fully broken down, allowing the fibers to separate easily. This makes it perfect for tacos, sandwiches, and bowls.
4. Why is my chuck roast still tough after hours of cooking?
If your chuck roast is still tough, it likely hasn’t reached the internal temperature where collagen melts. Time alone isn’t the only factor—heat matters too. Check the center with a meat thermometer. If it’s under 190°F, it needs more time. Keep it covered and moist, and give it at least another 30–60 minutes at low heat.
5. How long does cooked chuck last in the fridge?
Cooked beef chuck will keep in the refrigerator for about 3 to 4 days if stored in an airtight container. It’s best to cool it quickly after cooking and portion it into shallow containers so it doesn’t sit at unsafe temperatures for too long.
6. Can I freeze leftover chuck roast or steak?
Absolutely. Beef chuck freezes well after cooking. Let it cool completely, portion it into freezer-safe containers or bags, and remove as much air as possible before sealing. It can last up to 3 months in the freezer. Reheat gently in broth or sauce to retain moisture.
7. How do I reheat chuck without drying it out?
The best way to reheat chuck is low and slow, ideally covered in a bit of broth or gravy. A 300°F oven or a covered skillet on low heat works well. Avoid the microwave if possible, but if you use it, add a splash of liquid and reheat in short intervals at low power.
8. Can I skip the sear when braising chuck?
You can—but the flavor will suffer. Searing builds the Maillard reaction, which gives depth and complexity to the final dish. Even if you’re short on time, a quick browning on all sides before adding liquid pays off in taste and presentation.
9. Is chuck the same as shoulder roast?
Not quite, though they’re close. Chuck typically refers to the upper portion of the shoulder, which has more marbling and connective tissue. Shoulder roasts (sometimes called arm roasts) are slightly leaner and may cook a bit faster, but they can also dry out if not handled properly.
10. Should I cut up the chuck before braising?
It depends on your goal. Leaving the roast whole gives you more moisture retention and easier slicing or shredding later. Cutting it into chunks increases surface area for searing and reduces cook time, making it ideal for stews or chili where smaller bites are preferred.
11. What liquid is best for braising chuck?
Broth is the go-to, but wine, beer, or tomato-based sauces all work beautifully depending on the flavor profile you’re aiming for. The key is balance—enough acidity to brighten, enough body to carry the beef’s richness. Always add aromatics like onion, garlic, and bay leaf to round things out.
12. Do I need to let chuck rest after cooking?
Yes. Resting allows internal juices to redistribute, which prevents dryness and improves texture. Whether you’re slicing or shredding, give the meat 10–15 minutes uncovered or lightly tented with foil before serving.
13. What’s the best rub or seasoning for beef chuck?
Salt and cracked black pepper form the foundation. From there, paprika, garlic powder, onion powder, thyme, and a hint of cayenne or mustard powder can enhance depth. For longer cooks, go heavier on dry spices since they mellow during braising. Avoid sugary rubs unless you’re grilling or smoking, as they burn easily.
14. Can I smoke a chuck roast like brisket?
Yes—and it’s often called “poor man’s brisket.” Chuck roast smokes beautifully at 225–250°F until it reaches 200°F internal, then rests in foil or butcher paper. While it won’t slice exactly like brisket, it develops a bark and smoke ring, and it shreds beautifully for sandwiches.
15. Is beef chuck healthy?
Chuck is nutrient-dense and high in protein, iron, zinc, and B vitamins. It’s also higher in fat and calories than lean cuts, especially if left untrimmed. Choosing grass-fed chuck or trimming excess fat can improve the profile, and long cooking methods often allow fat to separate for skimming.