Akara Recipe: African Black-Eyed Pea Fritters from My Kitchen

I first learned to make Akara while cooking with a street vendor in Lagos—and I’ve been in love with these golden fritters ever since. Akara is more than a snack. It’s soul food, breakfast, street food, and celebration food, all in one. In this guide, I’ll show you how I make Akara in my kitchen: from soaking the peas to achieving that perfect crispy outside and airy center. Whether you’re new to African cooking or refining your craft, this recipe walks you through every detail.
- What Is Akara and Why It Matters
- Essential Ingredients for Akara
- Cooking Time and Method Comparison Table
- Traditional Frying Method for Perfect Akara
- How to Bake Akara in the Oven
- Akara in the Air Fryer: Crisp Without the Oil
- Regional Variations Across West Africa
- What to Serve with Akara: From Breakfast to Dinner
- Tips for Getting Akara Light and Fluffy
- Common Mistakes to Avoid When Making Akara
- Nutritional Value and Protein Content
- How to Store and Reheat Akara
- Akara for Parties, Catering, and Street Food
- Gluten-Free and Vegan Notes
- Cultural Significance and History of Akara
- Final Reflections from My Kitchen
- FAQ – Frequently Asked Questions About Akara
What Is Akara and Why It Matters
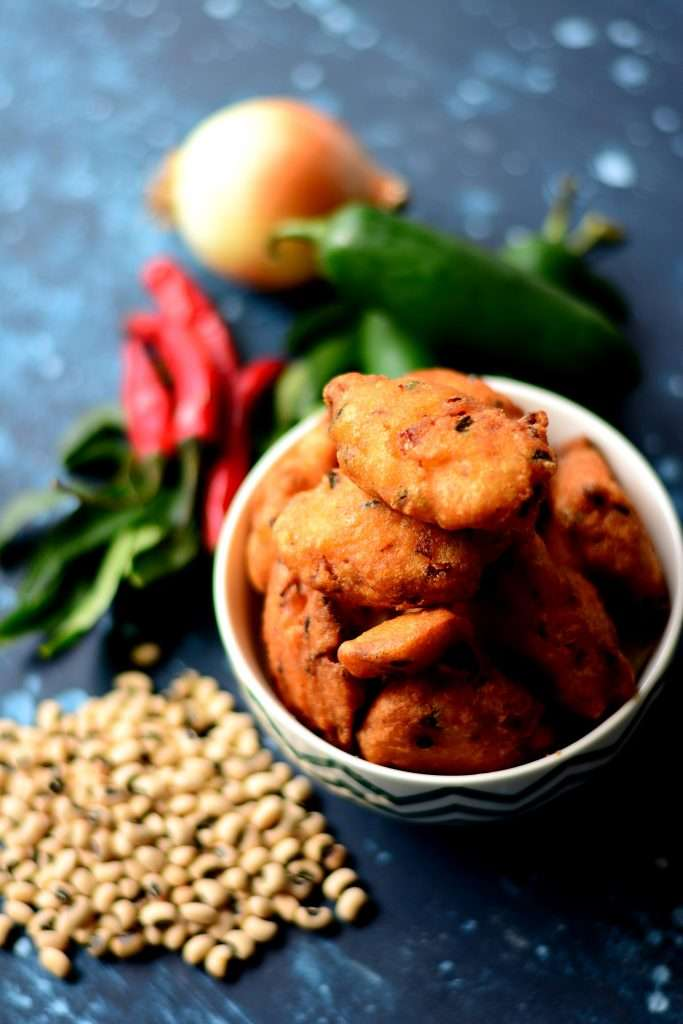
Akara (also known as kosai in Northern Nigeria) is a deep-fried fritter made primarily from black-eyed peas. These airy, golden bites are seasoned with onion, chili, and sometimes bell peppers or herbs. You’ll find them all over West Africa, especially Nigeria, Benin, and Sierra Leone, where they’re eaten for breakfast or sold piping hot on street corners.
As a chef, I’ve found Akara to be incredibly versatile—it’s gluten-free, high in plant-based protein, and a crowd-pleaser whether served as an appetizer or a full meal.
Much like Zimbabwean sadza with meat serves as a hearty foundation in Southern Africa, Akara is the base of many West African mornings—crispy on the outside, soft and savory inside.
Essential Ingredients for Akara
I always say that the secret to great Akara is in the peas—and the air. It starts with high-quality black-eyed peas and ends with a well-aerated batter. Here’s what I use in my base recipe:
- 2 cups dried black-eyed peas (or peeled peas, if available)
- 1 small red onion (chopped)
- 1–2 fresh chilies (scotch bonnet or habanero)
- 1 sweet bell pepper (optional, for balance)
- Salt to taste
- Water (just enough to blend)
- Vegetable oil for frying
Optional additions:
- Ground crayfish (adds depth)
- Chopped parsley or green onions
- A pinch of bouillon powder for extra umami
I always soak the peas for 8–12 hours, then rub or pulse them to remove the skins—this gives Akara its lightness and smooth texture.
Cooking Time and Method Comparison Table
This table outlines how I’ve tested Akara across traditional and modern methods. I recommend starting with stovetop frying for the most authentic experience, but alternatives can be useful.
| Method | Prep Time | Cook Time | Notes |
| Deep Frying | 12 hrs soak + 20 mins | 5–8 mins per batch | Crisp outside, fluffy inside—traditional and best |
| Oven Baked | 12 hrs soak + 25 mins | 25–30 mins | Healthier, less crisp but still satisfying |
| Air Fryer | 12 hrs soak + 20 mins | 10–15 mins | Crisp with minimal oil—great for modern kitchens |
| Microwave (reheat) | — | 1–2 mins | Only for reheating—does not cook raw batter |
| Slow Cooker | — | — | Not recommended—texture suffers from steaming |
I’ve had the best success with air frying when cooking for health-conscious guests, but nothing beats the texture from oil-fried Akara fresh from the pot.
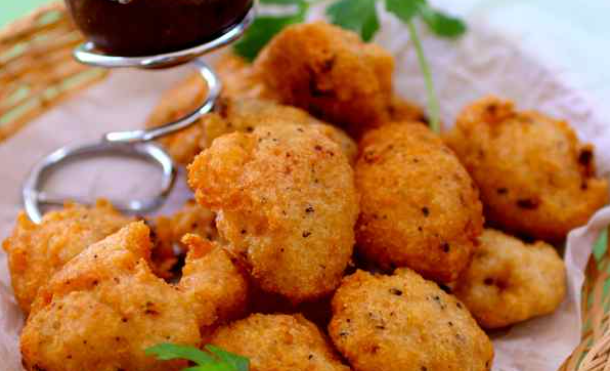
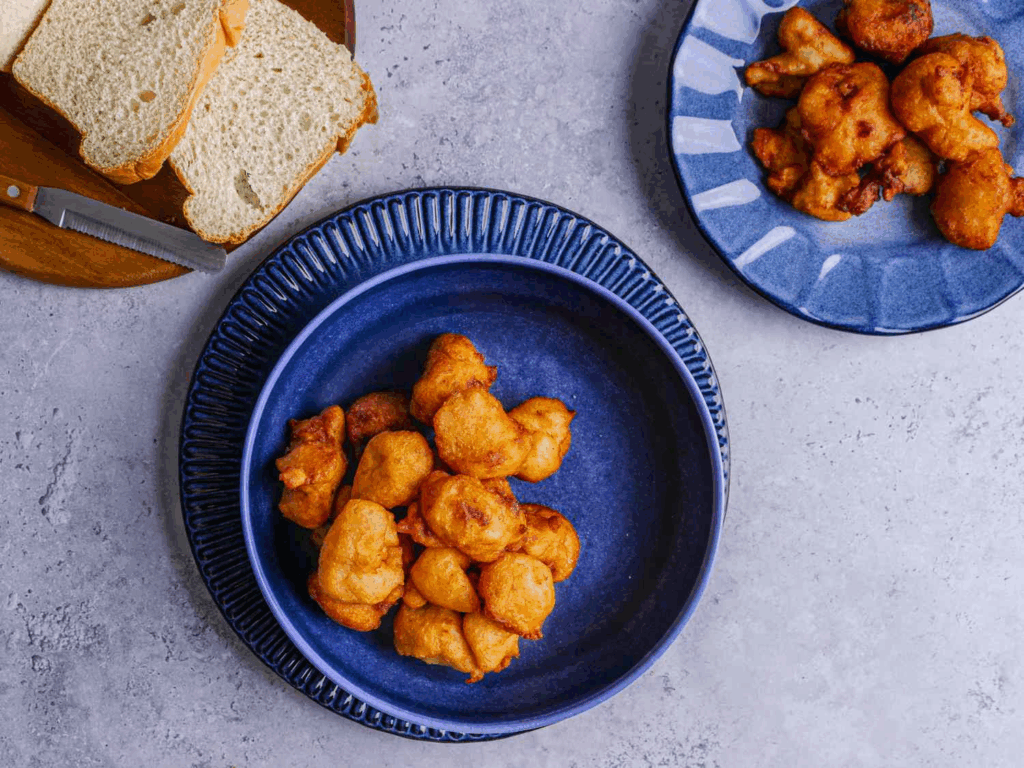
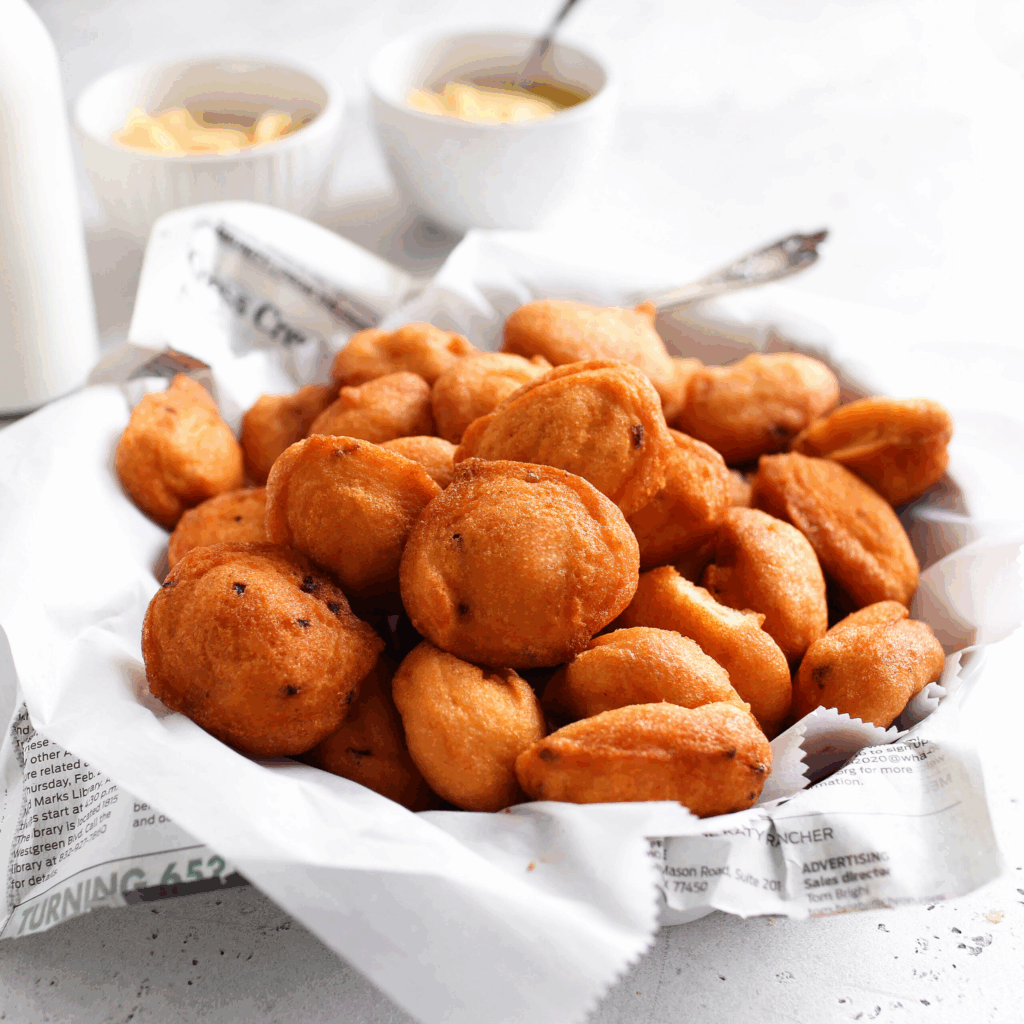
Traditional Frying Method for Perfect Akara
This is how I prepare Akara when I want the real deal—crispy, golden fritters that hold together beautifully and melt in your mouth.
First, I soak the black-eyed peas overnight. I then rub them in water or pulse in a food processor with short bursts to loosen and remove the skins. After rinsing thoroughly, I blend the peeled peas with onion, chili, and just enough water to move the blades—keeping the batter thick.
The secret is in beating the batter. I pour it into a bowl and whisk it vigorously for 3–5 minutes with a spoon or hand mixer. This incorporates air, helping the fritters puff during frying.
I heat neutral oil (like sunflower or canola) in a deep pan and spoon in the batter in small dollops. The fritters puff and turn golden within 5–7 minutes. I flip once, remove, and drain on paper towels.
Every time I serve these hot with a side of pap, garri, or spicy tomato sauce, they vanish in seconds.
How to Bake Akara in the Oven
When I’m preparing food for a larger group or looking for a lighter, less oily version, oven-baked Akara is my go-to. The taste and texture aren’t quite as crunchy as the traditional deep-fried version, but it’s still delicious—and much easier to clean up afterward.
I preheat the oven to 200°C (390°F) and line a muffin tin or baking sheet with silicone liners or lightly oiled parchment. I use the same blended batter as for frying—well-aerated and thick enough to hold shape.
I scoop the batter into the muffin cups (about halfway full), drizzle a tiny bit of oil over the top of each one, and bake for 25 to 30 minutes, turning once if needed. The tops brown nicely, and the insides cook through beautifully.
I tried this method for a weekend brunch and served the baked Akara with scrambled eggs and chili sauce. One guest told me it reminded them of a cross between a West African falafel and a soufflé. That’s the magic of baked Akara—it’s gentler, but still deeply satisfying.
Akara in the Air Fryer: Crisp Without the Oil
The air fryer is one of my favorite tools when cooking Akara for clients who want less oil but full flavor. I’ve tested several batches with different temperatures, and I’ve finally landed on the settings that deliver great texture.
I start with the regular Akara batter, preheated the air fryer to 200°C (390°F), and lightly oiled the basket. Using a spoon, I form small fritters and place them with space between each one.
I cook them for 12 to 15 minutes, flipping halfway through. The outside gets beautifully crisp, and the inside stays light. I usually mist the tops with a bit of oil before frying—this encourages that golden finish.
The air fryer is perfect for weeknight dinners or healthier breakfast platters. I’ve even used it for reheating leftover fried Akara, and it restores that signature crunch far better than a microwave ever could.
Regional Variations Across West Africa
Like so many African dishes, Akara has many local names and styles. During my travels, I’ve picked up some fascinating variations that each bring something new to the table:
- Nigeria (Yoruba regions) – Light and puffy, with plenty of onion and chili. Served with pap or bread rolls.
- Northern Nigeria (Kosai) – Often made spicier and served with spicy pepper sauce and millet porridge.
- Ghana (Koose) – Typically includes ginger, sometimes fermented slightly. Served with hausa koko (spicy millet porridge).
- Sierra Leone – Slightly flatter, served with cassava or fried plantain in the morning.
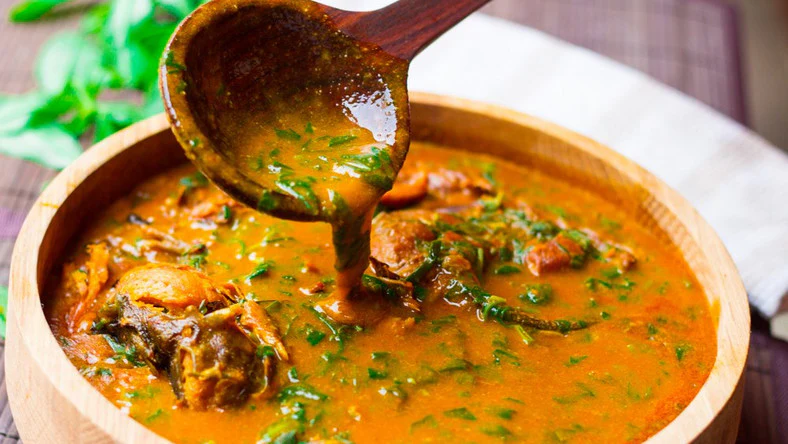
One cook I met in Freetown once added ground smoked shrimp to her batter—and it reminded me of the flavor depth in fish soup from Sierra Leone.
I encourage experimenting with spice levels, herbs, or local twists—Akara is adaptable, and every region’s version deserves a place at the table.
What to Serve with Akara: From Breakfast to Dinner
Akara is one of the most versatile dishes I’ve worked with—it fits into nearly any meal, from street breakfast to elegant appetizers. Here’s how I like to serve it across the day:
For breakfast:
- With ogi (fermented pap), warm and smooth
- Stuffed in a soft bread roll, known in Nigeria as Akara burger
- Alongside boiled yam or plantain and a pepper dipping sauce
As lunch or dinner:
- Paired with a spicy tomato stew or ata din-din
- Served with fried rice or jollof rice as a protein-rich side
- With salad and pickled vegetables for a modern plate
As a first course or snack:
- Mini Akara bites with avocado puree or tamarind chutney
- On a small platter with sliced bobotie, plantain chips, and a chili dip
No matter how you serve it, Akara invites sharing. I always plate it generously, because once people start eating, it’s hard to stop.
Tips for Getting Akara Light and Fluffy
If you’ve ever made Akara that turned out heavy or dense, you’re not alone. When I first started, mine were too thick and didn’t puff. Over time, I’ve refined my method to consistently achieve that crispy outside and airy inside. Here’s what I focus on:
- Skin the peas thoroughly – Skins make the batter gritty and weigh it down. Rinse until water runs clear.
- Don’t overblend – Just pulse enough to break down the peas. A smooth but thick texture is ideal.
- Add as little water as possible – Too much liquid leads to flat fritters. I blend with just enough to get things moving.
- Aerate the batter – This is critical. I beat the batter by hand or with a hand mixer for 3–5 minutes until it feels bouncy.
- Test the oil heat – Drop a small bit of batter in. If it sizzles and floats, you’re ready. If it sinks, wait.
With these habits in place, my Akara turns out consistent—even under pressure at food festivals and events.
Common Mistakes to Avoid When Making Akara
Through teaching cooking classes and mentoring younger chefs, I’ve seen certain mistakes appear again and again. Here’s what I warn my students about:
- Leaving skins on – It’s tempting to skip peeling, but the result is coarse, chewy Akara.
- Overloading the oil – Too many fritters at once drop the temperature and make them greasy.
- Underseasoning – Bland Akara is sad Akara. Salt, chili, and onion bring it to life.
- Too much water in the batter – A loose batter won’t hold shape and will soak up oil.
- Not beating the batter – This one changes everything. No air, no puff.
I once made a whole batch with unpeeled peas at a pop-up event in Johannesburg—the texture was so wrong I had to remake the entire tray. Lesson learned!
Nutritional Value and Protein Content
From a nutritional standpoint, Akara is a protein-rich, plant-based option that fits into many diets. One serving of about 4–5 fritters contains roughly:
- 200–250 calories
- 8–10g protein
- 10–15g fat (mostly from frying oil)
- 20g carbohydrates (mostly from the peas)
Black-eyed peas are packed with fiber, folate, magnesium, and iron. They’re also low in saturated fat and naturally gluten-free.
When I cater to vegan clients or health-conscious diners, I often bake or air fry Akara to reduce oil. It pairs especially well with leafy salads or grilled vegetables for a high-protein, balanced meal.
How to Store and Reheat Akara
Akara is best when fresh—but leftovers can absolutely be saved and enjoyed again if stored properly. Here’s how I do it in my kitchen:
- Refrigerating: I let them cool completely, then store in an airtight container lined with paper towels (absorbs moisture). Keeps well for 2–3 days.
- Freezing: I flash-freeze them on a tray, then transfer to freezer bags. They can last up to 1 month.
- Reheating: I avoid microwaving if I can—it softens the crust. Instead, I reheat in the oven at 180°C (350°F) for 5–7 minutes or in the air fryer for 3–4 minutes at 200°C (390°F).
When properly reheated, Akara regains its crisp edges and warm interior. I’ve even packed them into school lunchboxes with pepper dip, and they held up well.
Akara for Parties, Catering, and Street Food
Akara shines at every scale—from casual street corners to formal buffets. I’ve catered it at weddings, pop-ups, and cocktail events, and each time, it draws a crowd. Why? It’s naturally finger food. It’s hot, flavorful, and vegan-friendly.
For large batches, I prep the batter up to 24 hours in advance and store it in the fridge. Just before frying, I re-beat the batter to restore air. I fry in small, consistent scoops—uniformity matters when serving many guests.
At parties, I serve Akara:
- On skewers with dipping sauces
- In small cones with pickled slaw
- As sliders inside sweet bread rolls with chili mayo
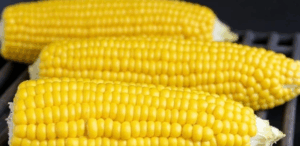
- Alongside grilled corn and tamarind glaze for a fusion twist
Akara’s versatility is like that of bobotie or sadza—it can be dressed up or down depending on the moment.
Gluten-Free and Vegan Notes
One of the reasons I love introducing people to Akara is that it’s naturally gluten-free and vegan without requiring substitutions.
- No flour or wheat
- No eggs or dairy
- Full of plant-based protein and fiber
Just black-eyed peas, onions, chili, and salt—that’s it at its core. It fits into gluten-free diets, West African plant-based menus, and high-protein vegan meal plans.
When I work with allergy-sensitive clients or vegan events, Akara is a staple. For extra protein, I sometimes add pureed chickpeas or mung beans. For color, beetroot or spinach powder gives vibrant, beautiful fritters that don’t compromise taste.
Cultural Significance and History of Akara
Akara isn’t just food—it’s memory, ritual, and celebration. In Nigeria and Benin, it’s made for breakfast, naming ceremonies, and funerals alike. It’s served to travelers, mourners, and wedding guests. It shows care.
The history goes deeper. Akara is believed to have originated among the Yoruba, and enslaved Africans carried it to Brazil, where it became acarajé—a sacred street food still sold by women in white lace, honoring deities of the Candomblé religion.
When I prepare Akara, I often reflect on this connection across continents. A humble ball of beans fried in oil becomes something bigger: identity, survival, and comfort.
Final Reflections from My Kitchen
Akara is a dish that has followed me from village kitchens to city restaurants. I’ve served it to kids, elders, food critics, and travelers. It never fails to impress—and it never fails to bring people together.
It’s deeply African, but universally loved. Light yet hearty. Simple, but full of technique. From peeling the beans to lifting that first golden fritter from the oil, Akara teaches patience, rhythm, and balance.
Soak, blend, season, beat, fry—Akara isn’t complicated, but it rewards care. And once you get it right, it becomes part of your kitchen forever.
FAQ – Frequently Asked Questions About Akara
Do I have to peel the black-eyed peas?
Yes, and I’ve tried skipping it—it didn’t go well. Unpeeled peas lead to a rough, gritty texture. Peeling gives Akara that smooth, tender bite. Take the time—it’s worth it.
Can I use canned black-eyed peas?
I’ve tested this, and while it works in a pinch, the texture isn’t the same. Canned peas are too soft and waterlogged. I recommend dried peas soaked overnight for the best result.
Can I blend everything at once, including the onion and chili?
Yes, that’s my usual method. I blend peeled peas, onion, and chili together. Just make sure not to over-blend or add too much water. Thick batter = fluffier fritters.
What oil is best for frying Akara?
I use neutral oils like canola, sunflower, or groundnut oil. Palm oil gives color and flavor but can be too heavy for some. I’ve even done a mix for a deeper taste.
Why did my Akara fall apart in the oil?
From my experience, this usually means the batter was too loose or not beaten enough. Add less water, beat longer, and use hot enough oil. You want it to sizzle, not sink.
How do I know when Akara is cooked through?
It floats and turns golden brown. I also press gently—if it bounces back, it’s done. Overcooking dries it out; undercooking leaves a raw taste.
Can I freeze Akara batter?
Yes, I’ve done this. Store it in a freezer-safe bag, press out the air, and freeze up to 1 month. Thaw overnight in the fridge, re-beat, and fry.
Is Akara spicy?
It can be—but you control the heat. I often use just one chili for aroma. For kids, I skip it entirely and add green onions instead.
Can I make Akara in advance?
Yes. I prep the batter, refrigerate it, and fry within 24 hours. Or fry and reheat in the oven or air fryer later. It reheats well with a little care.
How many Akara does this recipe make?
About 20–25 medium fritters. When I cater, I triple the recipe and use a scoop for consistency.
Can I serve Akara with soup?
Absolutely. I’ve paired it with ogbono soup, light tomato broth, and even fish soup from Sierra Leone. It holds up beautifully and soaks up flavor.
Why is my Akara greasy?
Likely because the oil was too cold. I always preheat oil and fry in small batches. Letting the batter rest before frying also helps absorb less oil.
Is Akara keto or low-carb?
Not quite. Black-eyed peas are legumes with carbs. That said, they’re high in fiber and protein. For strict keto diets, it’s best avoided or eaten in small amounts.
Can I bake Akara in silicone molds?
Yes! I’ve done this for brunch. Just grease lightly and bake at 200°C until the tops are golden. You won’t get a crispy edge, but they hold shape beautifully.
Can kids eat Akara?
Yes, and I serve them often. I reduce or skip chili, add a little parsley, and shape them small. Kids love the texture—especially dipped in ketchup or mild pepper sauce.