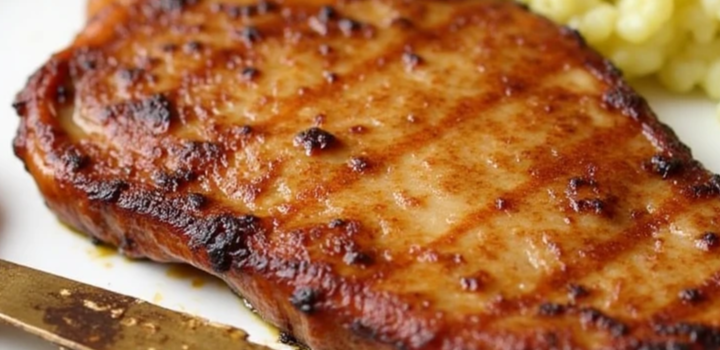
Best Way to Cook Thin Pork Chops: Juicy, Quick & Foolproof

Thin pork chops cook quickly, which makes them perfect for weeknight dinners—but also easy to overcook. In this guide, I’ll show you the best ways to prep, season, and sear them so they turn out juicy, flavorful, and never dry—whether you’re using a skillet, oven, or broiler.
- Why Thin Pork Chops Are Tricky (and Delicious)
- Choosing the Right Thin Pork Chop
- Prep Tips Before Cooking
- Cooking Time Guide
- Temperature Targets
- Step-by-Step Cooking Instructions
- Calorie & Nutrition Breakdown
- Flavor Variations to Try
- Storage & Reheating
- Understanding Pork Chop Thickness: Why Size Really Does Matter
- Common Mistakes to Avoid
- FAQ – Thin Pork Chops Edition
Why Thin Pork Chops Are Tricky (and Delicious)
Thin pork chops are a bit like high-wire cooking—you have to get in, get it right, and get out before they dry out. But when you do, they reward you with crisp edges, juicy centers, and incredible flavor in just minutes. Let’s look at what makes them so deceptively challenging—and why they’re still one of my go-to cuts for fast, satisfying meals.
The Speed Factor
The number one reason thin pork chops are tough to master? They cook fast. We’re talking 2 to 3 minutes per side in a hot skillet. That’s fantastic for busy nights—but also risky, because just 30 seconds too long can take them from tender to tough.
There’s no coasting with thin chops. You’ve got to be present, focused, and ready to flip. Unlike thicker cuts that give you some buffer time, thin chops demand attention from the moment they hit the pan.
Lean Meat = Low Margin of Error
Pork is naturally lean, especially the loin cuts commonly sliced thin. That means less fat to keep things moist as they cook, and no built-in forgiveness if they’re left on the heat too long. There’s very little marbling in most thin chops, so you’re relying on technique—not fat—for tenderness.
This is why timing, temperature, and resting (yes, even for thin chops) make all the difference. Get those right, and you’ll be rewarded with a chop that’s tender, flavorful, and every bit as satisfying as its thicker counterpart—without the wait.
Choosing the Right Thin Pork Chop
Before you even fire up the pan, it’s worth taking a closer look at the chop itself. Not all thin pork chops are created equal—how they’re cut, how thick they are, and whether there’s a bone involved can all affect how they cook and taste. Here’s what I look for when choosing the right cut for a quick, flavorful sear.
Boneless vs Bone-In
If speed is your top priority, boneless thin pork chops are the clear winner. They cook more evenly and quickly, making them ideal for skillet or stovetop methods. They’re also easier to slice and portion when serving.
But if you’re after maximum flavor, don’t overlook bone-in chops. That little bit of bone brings a lot to the table—it helps insulate the meat and adds extra depth to the final flavor. Bone-in chops also tend to retain moisture better during cooking, which is a big win when working with thin cuts.
My advice? If you’re new to cooking thin chops or want something super fast and simple, go boneless. But if you’re looking to elevate your flavor game and don’t mind an extra minute or two of cooking, go bone-in.
Pro tip: Consider pairing your thin pork chops with complementary ingredients, such as Cocoa Oil, known for enhancing the natural flavors of meats.
Pre-Cut vs Hand-Sliced
Most grocery stores sell pre-packaged thin pork chops, but they’re not always consistent in thickness—and that matters. Uneven chops will cook at different rates, leading to one being perfect while another turns dry.
If you have the option, ask your butcher to hand-slice chops to a consistent thickness. I recommend aiming for ¼ to ½ inch thick. That’s the sweet spot: thick enough to develop a nice crust and retain some moisture, but still thin enough to cook quickly.
For batch prep, I often buy a full pork loin and slice it myself at home. It’s more affordable, you get full control over thickness, and you can freeze the extra chops for future meals. Thin pork chops might be small, but choosing the right one makes a big difference.
Prep Tips Before Cooking
Getting thin pork chops right isn’t just about the cooking—what you do before they hit the pan makes all the difference. A few simple prep steps can be the key to golden crusts, juicy centers, and big flavor in every bite. Here’s how I prep mine like a pro.
Pat Dry for Better Browning
This one’s non-negotiable: always pat your pork chops dry with paper towels before seasoning. Surface moisture is the enemy of browning. If the chops are damp, they’ll steam instead of sear—and that means you’ll miss out on the beautiful golden crust that adds so much flavor and texture.
This is especially important with thin chops, where you only get a couple of minutes per side to develop color. Dry meat + hot pan = crisp, caramelized perfection.
Seasoning That Sticks
Thin pork chops cook quickly, so you want the seasoning to go on early and stick well. I recommend seasoning right after patting dry—don’t wait. The salt will begin drawing moisture back to the surface if left too long, so get them into the pan soon after.
Here’s my go-to base rub:
- Kosher salt
- Cracked black pepper
- Garlic powder
- Smoked paprika (for depth)
You can also add a pinch of brown sugar or chili flakes for extra complexity. Gently press the seasoning into the meat so it clings well.
If you’re using a marinade, stick with short times (20–30 minutes) and make sure to dry the surface again before cooking.
Optional: Light Dredge in Flour
For an extra layer of crispiness, especially if you’re pan-frying in butter or oil, try a light dredge in all-purpose flour. It gives the chops a subtle crust and helps lock in moisture.
Here’s how to do it:
- Season the chops first.
- Lightly coat in flour—shake off excess.
- Let them sit for a couple of minutes to let the flour adhere before searing.
This technique is especially good if you’re serving chops with a pan sauce, as the flour helps thicken it right in the skillet.
Prepping thin pork chops only takes a few minutes, but every step counts when the cook time is this short. Treat the prep with the same care as the cooking, and you’ll taste the difference.
Cooking Time Guide
When it comes to thin pork chops, time isn’t just a detail—it’s everything. With such a narrow window between juicy and dry, knowing exactly how long to cook your chops can make or break the meal. Here’s a clear breakdown of what to expect depending on thickness, style, and cooking method.
Average Searing Time
For standard ¼- to ½-inch thick chops, the sweet spot is:
- 2 to 3 minutes per side
- Medium-high heat in a preheated skillet (cast iron works best)
You’ll want the pan hot before the chops go in—if they don’t sizzle on contact, wait a few more seconds. Once in the pan, don’t move them too early. Let them develop a golden-brown crust before flipping.
Avoid overcrowding the skillet. Cook in batches if needed so each chop has full contact with the heat.
For Breaded or Thicker Cuts
If you’re using breaded chops or cuts closer to ¾ inch:
- Add 1–2 extra minutes per side, depending on thickness
- Optionally, finish in a 375°F (190°C) oven for 5–6 minutes to cook through without overbrowning the crust
Breaded chops also benefit from slightly lower heat when pan-frying to avoid burning the coating before the inside is fully cooked.
Signs of Doneness
Don’t just rely on the clock—use your eyes and touch, too.
Here’s what to look for:
- Golden crust on both sides
- No visible pink in the center when sliced
- Internal temp of 145°F (63°C) for safety (use a meat thermometer if you have one)
If you don’t have a thermometer, press the chop gently with tongs—it should feel firm but still have a little bounce. Let it rest for 3–5 minutes after cooking to let the juices settle before slicing.
With thin pork chops, precision is your best friend. Just a minute too long, and you’re in dry territory—so stay alert and trust your senses.
Temperature Targets
When cooking thin pork chops, getting the temperature just right is essential—there’s no room for guesswork. Since they cook so fast, even a 5-degree difference can mean the difference between juicy and dry. Here’s how to make sure your chops hit the sweet spot, every single time.
Internal Temperature
According to USDA guidelines, pork is safe to eat when it reaches an internal temperature of 145°F (63°C) followed by a short rest. This applies to all cuts, including thin chops.
For thin cuts, this is even more important—they don’t have enough mass to hold moisture if overcooked. A digital instant-read thermometer is the best tool in your kitchen for getting this exactly right.
To check:
- Insert the thermometer into the thickest part of the chop, away from bone or pan contact.
- Be quick—thin chops continue to cook fast even after flipping.
Carryover Cooking
Because thin pork chops retain heat quickly, you can actually remove them from the heat source when they hit around 140°F (60°C). While resting, they’ll continue to rise 5°F or so, reaching the perfect 145°F without overshooting.
This technique is called carryover cooking, and it’s a chef’s best friend when working with lean, quick-cooking proteins like pork.
Rest Time
Even with thin chops, a 3–5 minute rest after cooking is non-negotiable. This short pause allows the juices inside the meat to redistribute, so they don’t all spill out the moment you cut in.
You can tent the chops loosely with foil while they rest if your kitchen is cold, but they’ll usually retain enough heat on their own. The result? Juicier, more flavorful bites—every time.
Temperature control is the backbone of great pork chops. Master this, and you’ll never serve a dry chop again.
Step-by-Step Cooking Instructions
Thin pork chops are quick to cook, but that doesn’t mean you can wing it. Whether you’re going for a classic skillet sear, a hands-off oven finish, or a modern twist with the air fryer, here’s how to cook thin chops like a pro—from start to finish.
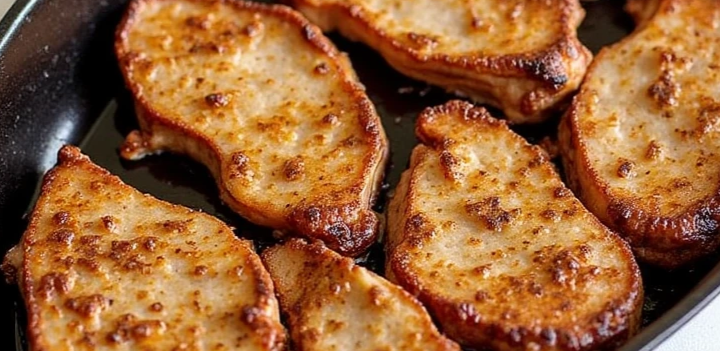
Pan-Searing (Best Method)
This is hands-down my favorite way to cook thin pork chops. It’s fast, flavorful, and gives you that golden crust you just can’t get in the oven.
- Preheat a skillet over medium-high heat for 2–3 minutes. Cast iron or stainless steel work best.
- Add a thin layer of neutral oil (like canola or vegetable) and swirl to coat the pan.
- Lay the seasoned, dry pork chops into the pan—don’t overcrowd.
- Gently press down with a spatula for 10 seconds to ensure full contact.
- Cook for 2–3 minutes undisturbed. When a golden crust forms, flip.
- Cook the other side for another 2–3 minutes, until internal temp hits ~140°F.
- Transfer to a plate and rest 3–5 minutes before serving.
You’ll get juicy chops with crispy edges and loads of flavor—fast.
Oven Method (Alternative)
Oven-baking works well for breaded chops, or if you’re cooking a big batch at once and don’t want to stand over a pan.
- Preheat oven to 400°F (200°C).
- Line a baking sheet with parchment or foil, and lightly grease it.
- Arrange chops in a single layer—not touching.
- Bake for 8–10 minutes, flipping halfway through.
- Check internal temperature with a thermometer—target 145°F, then rest.
If breaded, you can finish with a quick broil (1–2 minutes) for extra crunch.
Broiling or Air Frying
If you want super crispy edges and fast results, these methods are your best bet. Great for weeknights or no-fuss prep.
Broiling (oven):
- Preheat broiler and position rack 6 inches from heat.
- Place seasoned chops on a foil-lined pan.
- Broil for 2–3 minutes per side, until golden and sizzling.
- Rest before serving.
Air Fryer:
- Preheat to 400°F if required.
- Lightly oil chops or use cooking spray.
- Cook in a single layer for 6–8 minutes, flipping halfway.
- Confirm doneness with a thermometer.
Each of these methods brings something a little different to the table, but all can deliver perfectly cooked, juicy thin pork chops—just choose the one that fits your night.
Calorie & Nutrition Breakdown
Thin pork chops don’t just cook fast—they can also fit beautifully into a balanced, protein-rich meal. Whether you’re counting macros or just trying to lighten things up, here’s what you’re working with nutritionally in a typical serving.
Nutrition Table (Per 1 Thin Pork Chop, ~3 oz Cooked)
| Portion Size | Calories | Protein | Fat | Carbohydrates |
| 1 thin chop (~3 oz) | ~180 kcal | ~22g | ~10g | 0–2g |
This is for a basic seared chop using a light amount of oil and no breading. Keep in mind, if you’re adding sauces, dredging in flour, or using thick marinades, those numbers can increase.
Tips for Lower Calories
If you’re looking to keep your meal on the lighter side without sacrificing flavor, here are some smart chef-level adjustments:
- Use olive oil spray instead of tablespoons of oil. A light mist is often all you need for good sear without extra fat.
- Skip the breading, or try using almond flour for a gluten-free, lower-carb crust that still crisps nicely.
- Serve with roasted or steamed vegetables like broccoli, zucchini, or cauliflower instead of heavy sides like mashed potatoes or pasta.
Thin pork chops are naturally lean and protein-rich, so with a little planning, they can fit into nearly any diet—from low-carb to Mediterranean to everyday healthy eating.
Flavor Variations to Try
One of the reasons I love thin pork chops is how incredibly versatile they are. Their quick cook time and neutral flavor make them the perfect blank canvas for bold, sweet, spicy, or savory additions. Here are some of my favorite flavor upgrades that take just a few extra minutes but make a big impact.
Garlic-Herb Butter
This classic combination turns simple chops into something restaurant-worthy. Pair it with freshly grilled vegetables or even indulge in another BBQ favorite: brisket. Discover how to achieve succulent brisket perfection on the grill (follow our complete guide on cooking brisket).
- While the chops rest, add a pat of butter to the hot pan along with minced garlic, chopped parsley, thyme, or rosemary.
- Let it melt and sizzle for 30 seconds, then spoon the butter over the chops just before serving.
It adds richness, aroma, and a glossy finish—all in one easy step.
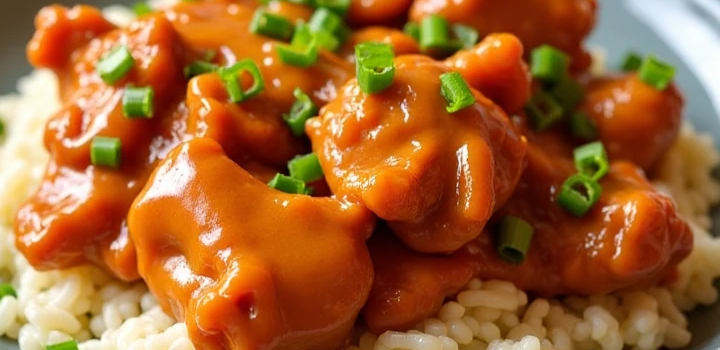
Honey Mustard Glaze
For something sweet, tangy, and just a little sticky, this one’s a crowd-pleaser.
- In a small bowl, mix 1 tablespoon Dijon mustard, 1 tablespoon honey, and a splash of apple cider vinegar.
- Brush the mixture over the chops during the last minute of cooking, or right after flipping.
- Let it caramelize slightly in the pan—watch carefully so it doesn’t burn.
The sugars will create a beautiful, lacquered finish that tastes amazing with roasted veggies or rice.
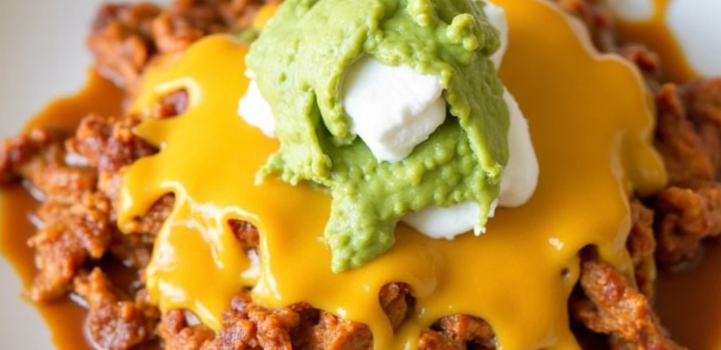
Spicy Cajun Rub
If you’re craving something bold and smoky, a dry rub is the way to go.
- Combine paprika, cayenne, garlic powder, onion powder, oregano, and a pinch of brown sugar.
- Rub generously over both sides of the pork chops before searing.
- This works especially well in a cast iron skillet, where the rub gets dark and crisp.
Pair with corn, rice, or creamy slaw for a Southern-style plate.
Asian-Inspired Soy-Ginger Marinade
For a quick, umami-packed twist:
- Whisk together soy sauce, grated fresh ginger, garlic, a splash of sesame oil, and a little brown sugar.
- Marinate the chops for 20–30 minutes (even 10 minutes makes a difference).
- Pat dry before cooking, then drizzle with reserved marinade or reduce it into a sauce in the pan.
Serve with stir-fried vegetables or jasmine rice for a quick takeout-style dinner at home.
These flavor profiles are flexible—feel free to mix, match, or build your own based on what’s in the pantry. Thin pork chops don’t need much, but with the right finishing touch, they become something truly memorable.
Storage & Reheating
Thin pork chops are quick to cook, but they also make excellent leftovers—if you store and reheat them properly. Because of their lean nature, thin chops can dry out fast when reheated, so a little care goes a long way to keep them moist and tender the second time around.
How to Store
Once the chops have cooled to room temperature (within about 2 hours of cooking), transfer them to storage using the following methods:
- Refrigerate: Place in an airtight container with a bit of the pan juices or sauce to lock in moisture. They’ll keep well for up to 4 days.
- Freeze: For longer storage, wrap individual chops in foil or parchment, place them in a freezer-safe bag, and freeze for up to 3 months. Label with the date for easy tracking.
If you’re planning to reheat only one or two at a time, store them in single portions for convenience.
Reheating Without Drying Out
Thin pork chops are especially sensitive to reheating, so the goal is gentle heat and added moisture:
- Stovetop method (best option): Add a splash of broth, water, or even a bit of oil to a small skillet. Place the chop in the pan and cover with a lid. Heat on low for 3–5 minutes, flipping once. The steam helps rehydrate the meat while keeping it tender.
- Oven method: Wrap the chops in foil with a spoonful of liquid, and heat in a 300°F (150°C) oven for about 10–12 minutes.
- Microwave (only if necessary): Use low power and cover with a damp paper towel. Heat in short 20-second intervals to avoid overcooking.
Avoid dry heat and high temps during reheating—once pork chops are overcooked, there’s no going back. But if you reheat them with a bit of moisture and patience, they’ll taste almost as good as when you first pulled them off the stove.

Understanding Pork Chop Thickness: Why Size Really Does Matter
Let’s clear something up—when it comes to pork chops, thickness changes everything. The difference between a juicy, flavorful chop and a dry, disappointing one often comes down to a matter of millimeters. In professional kitchens, we talk about cut thickness as a starting point for strategy, and it’s just as relevant at home.
Why Thickness Affects Everything
The thinner the chop, the less time you have to get it right. A ¼-inch chop might take only 2 minutes per side, while a thicker ¾-inch cut gives you more wiggle room before the meat overcooks. That means:
- Thinner chops cook faster—great for speed, but dry faster, too
- Thicker chops let you build a better crust and develop more flavor without rushing
- Searing, resting, and temperature timing all behave differently depending on the thickness
In short: thinner requires precision, thicker gives forgiveness. Neither is better—they just need different handling.
Custom Thickness at the Butcher
If you’ve got access to a good butcher or meat counter, here’s my advice: ask for ½-inch chops, especially if you’re cooking for guests or prepping ahead. Half an inch is the sweet spot where you still get the speed of a thin chop, but enough depth to prevent accidental overcooking.
Even better, ask for all chops to be cut to uniform thickness. Consistency matters more than you’d think—uneven cuts mean uneven cooking. That’s one reason restaurant chops often turn out more reliably juicy: everything hits the pan at the same thickness, so everything finishes at the same time.
Don’t Confuse Thin with Cheap
A lot of folks overlook thin pork chops because they seem too simple, too fast, or “cheap.” But thin doesn’t mean lesser—it just requires smarter cooking. With the right prep, heat, and timing, a thin chop can deliver big flavor, crisp edges, and mouthwatering juiciness.
Think of it like espresso: small, strong, and quick—but only good if you do it right.
So whether you’re slicing your own or picking up a pack at the store, remember: thickness is a decision, not a default. Make it with intention, and you’ll get better results every time.
Common Mistakes to Avoid
Thin pork chops are fast, flexible, and flavorful—but only when you treat them right. Over the years, I’ve seen (and made) plenty of mistakes with this cut. Luckily, most of them are easy to fix once you know what to watch for. Here are the most common slip-ups—and how to avoid them.
Overcooking
This is hands-down the number one problem people run into with thin chops. Because they’re lean and cook in minutes, even 30 extra seconds can push them from juicy to dry.
What to do instead:
- Watch your cook time like a hawk—2–3 minutes per side is usually enough.
- Pull them off the heat when the internal temp hits 140°F (60°C), then let carryover cooking finish the job.
- Don’t multitask too hard—these need your attention.
If your pork chops turn out dry and tough, overcooking is almost always the reason.
Skipping Rest Time
It’s tempting to serve them hot off the pan—but cutting in too soon is a big mistake. Without a short rest, all the juices you’ve worked to preserve will just run out onto the plate, leaving you with dry meat.
Always rest your chops for 3–5 minutes, tented loosely with foil if needed. It’s a small pause with a big payoff in tenderness and flavor.
No Thermometer
Trying to cook thin pork chops without a thermometer is like driving without a speedometer—it’s possible, but risky. Visual cues help, but they’re no match for accuracy.
A digital instant-read thermometer gives you confidence every time. You’ll know exactly when you’ve hit 145°F (63°C) and avoid the dreaded overcook.
They’re inexpensive, easy to use, and worth every penny if you cook meat even semi-regularly.
Avoid these three pitfalls, and you’ll go from “hit-or-miss” to consistently juicy, golden, flavorful pork chops—without breaking a sweat.
FAQ – Thin Pork Chops Edition
What’s the best way to cook thin pork chops without drying them out?
The best way to cook thin pork chops is quickly over medium-high heat, such as pan-searing for 2–3 minutes per side. Use a thermometer and rest the meat after cooking to lock in moisture.
Can I bake thin pork chops instead of frying them?
Yes—baking thin pork chops at 400°F for 8–10 minutes works well, especially for breaded versions. Just watch the cook time carefully to avoid overcooking.
How long do thin pork chops take to cook?
In a hot skillet, thin pork chops cook in 5–6 minutes total. Add a minute or two if breaded or slightly thicker. Always check for doneness with a meat thermometer.
What temperature should thin pork chops be cooked to?
USDA recommends cooking pork to an internal temperature of 145°F (63°C), followed by a 3–5 minute rest.
Are boneless or bone-in thin pork chops better?
Boneless thin pork chops cook faster and more evenly, but bone-in chops offer more flavor and stay juicier if cooked with care.
Can I cook thin pork chops in an air fryer?
Absolutely! Air frying thin pork chops at 400°F for 6–8 minutes produces a crisp texture without extra oil. Flip halfway through for even browning.
Why do my thin pork chops always turn out tough?
The most common reason is overcooking. Thin pork chops dry out quickly, so it’s important to monitor both time and temperature closely.
What are some good marinades for thin pork chops?
Quick marinades with soy sauce, garlic, mustard, vinegar, or citrus add flavor fast. Limit marinating time to 30 minutes to avoid over-softening the meat.
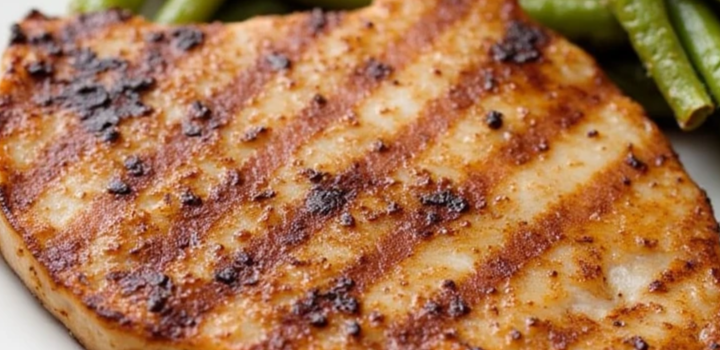
Can I grill thin pork chops?
Yes, but watch them closely. Grill thin pork chops over medium-high heat for 2–3 minutes per side. High heat and a quick flip are key. To complement your grilled pork chops, consider grilling corn in the husk. This enhances the overall barbecue experience by providing a sweet and smoky contrast to the savory chops (read our guide on grilling corn).
Should I season thin pork chops before cooking?
Always. Seasoning thin pork chops right after patting them dry ensures the flavors stick and builds that golden crust during cooking.
How do I get a good crust on thin pork chops?
Start with dry chops, use medium-high heat, and press them lightly into the pan during the first few seconds. Avoid moving them until it’s time to flip.
Can I bread thin pork chops?
Yes. A light dredge in flour or breadcrumbs adds texture. Just reduce heat slightly to prevent burning before the inside cooks through.
Are thin pork chops healthy?
Yes—thin pork chops are naturally lean and rich in protein. Skip heavy breading and pan-fry with minimal oil for a healthier meal.
Can I freeze thin pork chops?
Definitely. Freeze uncooked or cooked thin pork chops in airtight packaging for up to 3 months. Thaw in the fridge overnight before reheating or cooking.
Do I need to rest thin pork chops after cooking?
Yes—even thin pork chops benefit from a 3–5 minute rest. It helps the juices redistribute and keeps the meat moist and flavorful.