Cooking Turkey in an Electric Roaster
Cooking Turkey in an Electric Roaster: The Ultimate Guide

Arianne Nemna
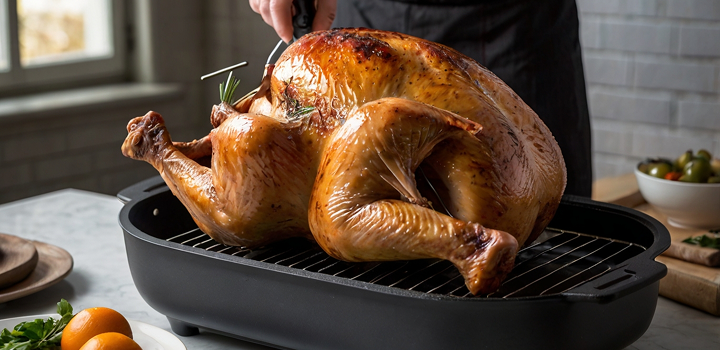
There’s something deeply satisfying about a perfectly roasted turkey—golden on the outside, juicy at the center, and rich with flavor. But getting there, especially on busy holidays, can feel overwhelming when the oven is already working overtime. That’s where the electric roaster comes in. Compact, reliable, and surprisingly efficient, it’s one of the best tools for preparing a large bird without monopolizing your kitchen. Whether you’re roasting your first turkey or trying to simplify your usual method, this guide walks you through every step of the process using an electric roaster—from setup to carving—with precision and confidence.
Why Use an Electric Roaster?
Benefits Over Traditional Oven Roasting
Electric roasters offer a few distinct advantages that can make the process smoother, especially during crowded cooking days. The most obvious benefit is that they free up your main oven, giving you space to bake sides, desserts, or anything else without rearranging your schedule. But beyond logistics, roasters also provide a controlled, enclosed cooking environment. Heat circulates more evenly because of the compact design, and moisture retention is naturally higher—making it easier to keep the turkey from drying out.
In addition to better moisture control, electric roasters are easy to use and require less babysitting. Once preheated and sealed, the roaster maintains its temperature well and cooks more consistently than many home ovens, which often fluctuate. For first-timers, this predictability makes the entire experience far less stressful.
| Feature | Electric Roaster | Traditional Oven |
| Oven space usage | Frees main oven for other dishes | Occupies oven fully |
| Heat distribution | Enclosed, even due to small chamber | May have hot/cold spots |
| Moisture retention | High (lidded cooking) | Lower, requires basting or tenting |
| Monitoring needed | Minimal (set-and-forget capable) | Frequent basting/checks recommended |
| Setup and cleanup | Simple plug-in, removable insert | Larger cavity, more difficult to clean |
How Much Faster?
A fully thawed turkey in an electric roaster cooks faster than in a standard oven, thanks to the more concentrated heat environment. While traditional ovens typically require around 15 minutes per pound at 325°F, a roaster can reduce that time to approximately 10 to 13 minutes per pound.
That means a 16-pound turkey could be ready in just under three hours instead of four, especially if unstuffed and preheated properly. Roasters also recover lost heat more quickly if you do open the lid briefly, unlike ovens, where opening the door can cause major fluctuations in internal temperature.
| Turkey Weight | Oven Cook Time (15 min/lb) | Roaster Cook Time (10–13 min/lb) |
| 12 lb | ~3 hrs | ~2 to 2.5 hrs |
| 16 lb | ~4 hrs | ~2.5 to 3.5 hrs |
| 20 lb | ~5 hrs | ~3.5 to 4.25 hrs |
The reduced cooking time is helpful, but it’s still essential to use a thermometer to confirm doneness, as visual cues can be misleading in an enclosed environment.
Choosing & Setting Up Your Roaster
Size and Capacity
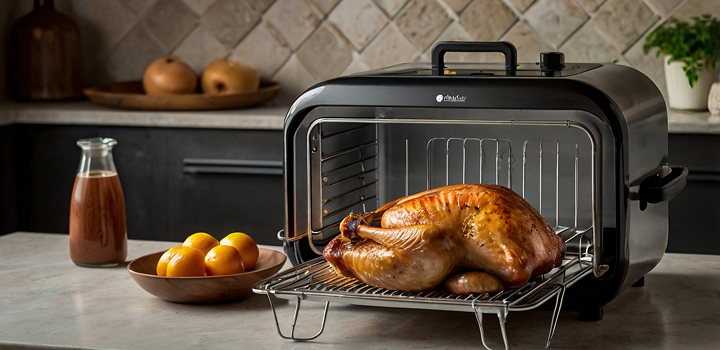
Before cooking, the first step is making sure your electric roaster is large enough to fit the turkey comfortably. Most standard electric roasters range from 16 to 24 quarts in size. A 22-quart roaster can typically hold up to a 24-pound turkey without issues. That’s more than enough for most holiday meals, and it still leaves room for air circulation around the bird, which is crucial for even cooking.
The turkey should never touch the sides or the lid of the roaster. Contact with the walls or top can cause uneven cooking or prevent proper browning. If you’re working with a particularly large turkey, consider measuring the cavity of the roaster before purchasing or thawing your bird.
| Roaster Size | Max Turkey Capacity | Notes |
| 16-quart | Up to 18 lbs | Ideal for smaller gatherings |
| 18–20 quart | Up to 20–22 lbs | Most common size for standard use |
| 22–24 quart | Up to 24 lbs+ | Best for large birds and meal prep flexibility |
Preheating and Temperature Controls
Proper preheating is crucial for texture and food safety. Most electric roasters should be preheated with the lid on for 15 to 20 minutes before the turkey goes in. I always recommend starting at 450°F to promote better skin color and crisping. After the initial phase, the heat should be lowered to 325°F for the remainder of the cook.
Many roasters have basic temperature dials, so it’s a good idea to double-check the actual internal temperature with a thermometer placed inside the roaster during preheat. Some models run slightly cooler or hotter than indicated.
A two-phase roasting method works best in electric units:
| Phase | Temp (°F) | Duration | Purpose |
| Initial Sear | 450 | 30 minutes (max) | Start skin browning and heat buildup |
| Main Roast | 325 | Remainder of time | Cook through without drying out |
Browning Tips
One of the most common concerns with electric roaster turkey is pale or rubbery skin. Because the roaster’s lid traps steam, browning doesn’t occur as naturally as in an open oven. To work around this, a few simple techniques can make a dramatic difference.
First, preheating to a higher initial temperature, as mentioned above, helps encourage browning in the first half hour. Second, brushing the turkey with melted butter or oil before roasting can aid in crisping. A butter and herb mixture under the skin not only adds flavor but helps dry out the surface layer so it can brown more effectively. For an even deeper golden finish, you can apply a browning sauce or use a high-heat safe glaze during the final 30 minutes with the lid partially ajar.
If maximum crisping is the goal, some cooks opt to transfer the turkey to the oven for 10 minutes under the broiler after cooking. However, with the right setup and preparation, excellent browning is entirely possible inside the roaster itself.
Prepping the Turkey
Preparing a turkey for the electric roaster is more than just taking it out of the package. The way you thaw, season, and potentially brine your bird will directly impact the texture, moisture, and overall success of the final dish. Here’s how to get your turkey fully prepped and ready for a perfect roast.
Thawing & Trussing
Frozen turkeys must be completely thawed before going into the electric roaster to ensure safe and even cooking. There are two safe methods for thawing:
- Refrigerator method: This is the most reliable and recommended technique. Place the turkey, still in its original packaging, breast-side up in a tray to catch any drips. It will take approximately 24 hours for every 4–5 pounds of bird. For example, a 16-pound turkey will take 4 full days to thaw in the fridge.
- Cold water bath: If you’re pressed for time, submerge the turkey in its original packaging in a sink or cooler full of cold water, changing the water every 30 minutes. Allow about 30 minutes of thawing time per pound. A 16-pound bird will take around 8 hours.
Once fully thawed, trussing is essential for even roasting. Use butcher’s twine to tie the legs together and tuck the wing tips under the back. This helps the turkey cook uniformly and prevents drying out in thinner areas like the wings.
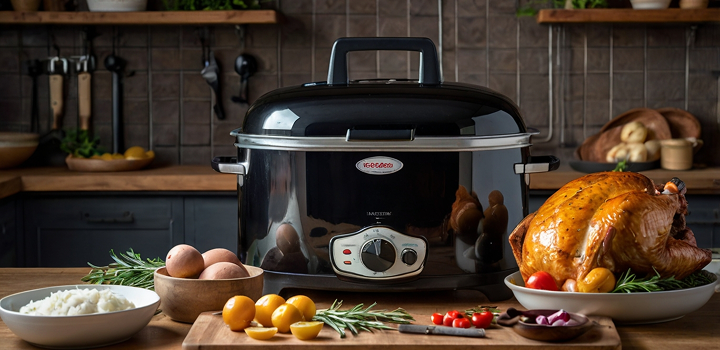
Seasoning & Herb Butter
A well-seasoned turkey starts from the inside out. Before adding butter or spices, pat the bird dry with paper towels to promote browning. Then, work your hands gently under the skin of the breast and thighs to create pockets for flavor.
I recommend using softened herb butter—a mix of unsalted butter, chopped fresh rosemary, sage, thyme, garlic, and lemon zest. Spread this generously under the skin to baste the meat from the inside as it roasts.
Inside the cavity, add aromatics like onion halves, halved lemons, whole garlic cloves, and a few sprigs of fresh herbs. This will lightly perfume the bird from within as it cooks.
Sprinkle salt and black pepper generously on the skin and lightly inside the cavity. Avoid stuffing with bread stuffing at this stage—do that only if you’re planning to roast the bird longer and monitor temps closely.
Optional Brining
If you’re aiming for a turkey that’s exceptionally moist and flavorful, brining is worth the effort. You can choose between a wet brine or a dry brine.
- Wet brine involves soaking the bird in a saltwater solution (typically with sugar, herbs, citrus, and spices) for 12–24 hours in the fridge. Use a large food-safe container or brining bag.
- Dry brine involves rubbing salt (optionally with herbs and spices) directly onto the skin and under it. Leave the bird uncovered or loosely covered in the refrigerator for up to 24 hours.
Brining helps the muscle fibers absorb more water and flavor, reducing the chance of drying out during roasting. Always rinse off excess brine and pat the turkey dry before seasoning and cooking.
Cooking Process Step-by-Step
Cooking a turkey in an electric roaster follows the same principles as oven roasting, but with faster, more consistent results due to the compact, enclosed environment. To get that perfect golden skin and juicy meat, timing and temperature are everything.
High-Heat Start
Begin by preheating the electric roaster to its maximum temperature—usually around 450°F. This first blast of high heat helps to crisp up the skin and lock in moisture. Once the turkey is placed breast-side up on the rack inside the roaster, close the lid and roast for 30 minutes undisturbed.
If your model doesn’t reach 450°F, go as high as it allows and extend this phase slightly to get similar results.
Lower and Roast
After 30 minutes, reduce the temperature to 325°F–350°F for the remainder of the cooking time. The rule of thumb is 15–20 minutes per pound for an unstuffed turkey and 16–22 minutes per pound for a stuffed bird.
Use the table below to estimate cooking time:
| Turkey Weight | Approximate Time (Unstuffed) | Approximate Time (Stuffed) |
| 12 lbs | 3 to 4 hours | 3.5 to 4.5 hours |
| 16 lbs | 4 to 5 hours | 4.5 to 5.5 hours |
| 20 lbs | 5 to 6 hours | 5.5 to 6.5 hours |
| 24 lbs | 6 to 7 hours | 6.5 to 7.5 hours |
Avoid lifting the lid during roasting unless absolutely necessary—it lets out valuable heat and steam.
Temperature Monitoring
The most critical factor in turkey doneness is internal temperature, not cooking time. Use a digital probe thermometer inserted into the thickest part of the thigh (not touching bone) and another probe into the breast. The turkey is safely cooked when:
- Thigh reads 165°F
- Breast reads 165°F
- Stuffing (if used) reaches 165°F
Most electric roasters have a lid design that traps heat and moisture well. With a probe thermometer, you can monitor progress without lifting the lid, which helps keep cooking even and efficient.
If the bird is browning too quickly, you can tent the breast area with foil mid-cook to prevent over-darkening.
Resting & Carving
After hours of careful roasting, one of the most crucial yet overlooked steps is letting the turkey rest. This pause allows juices to redistribute throughout the meat, resulting in tender, moist slices. Carving also requires intention, the right tools, and a bit of technique.
Ideal Rest Time
As tempting as it is to carve immediately, resist. Once the turkey reaches a safe internal temperature (165°F in the thigh and breast), remove it from the electric roaster and tent it loosely with aluminum foil.
Let the bird rest for at least 15 to 20 minutes. During this time, the residual heat continues to gently cook the meat while the proteins reabsorb juices that otherwise would spill out on the cutting board. This short waiting period dramatically improves flavor and texture.
Place the turkey on a carving board with grooves to catch any released juices. You can use this liquid later to enrich your gravy.
Carving Best Practices
Carving isn’t just about slicing—it’s about maximizing both presentation and yield. Start with a sharp carving knife or chef’s knife and a stable carving board with a non-slip base or a damp towel underneath.
Here’s the ideal approach:
- Separate the legs and thighs first. Use a slicing motion to cut through the skin between the leg and breast. Pull the leg outward until the joint is exposed, then cut through the joint cleanly.
- Remove the breasts next. Make a long, confident cut just to the side of the breastbone, following the contour of the rib cage. Slice downward with the blade at a slight angle, removing the whole breast lobe intact. Then slice it crosswise into even, attractive slices.
- Don’t forget the wings. These can be pulled or gently cut off at the joint.
- Final touches: Remove any remaining dark meat from the thighs and carve into manageable pieces. Arrange everything on a warmed platter for serving.
Use the drippings and resting juices for gravy or to moisten meat as needed.
Common Issues & Troubleshooting
Even with preparation, electric roasting comes with its quirks. Whether it’s pale skin, overcooked meat, or uneven temps, knowing how to fix—or avoid—these problems can save your holiday dinner.
Skin Not Browning
Electric roasters excel at retaining heat and moisture, but that same moist environment can make it difficult to get a deeply browned, crisp skin. Unlike a dry-air oven, a roaster’s enclosed chamber acts more like a steam dome. If the bird isn’t properly prepped, the skin may come out pale or rubbery even if the meat is fully cooked.
The solution starts with initial heat. Always preheat your electric roaster to its maximum temperature (around 450°F) and roast the turkey uncovered for the first 30 minutes. This jumpstart allows the surface of the skin to sear and brown before moisture buildup begins. Make sure to pat the bird thoroughly dry before seasoning and placing it in the roaster. Even a thin layer of surface moisture can create a barrier that prevents crisping.
Minimizing lid lifts is another crucial detail. Every time you open the roaster, you release dry heat and replace it with steam. That steam will settle on the skin and prevent browning. If you’re still not getting the golden color you want after the turkey reaches the right internal temperature, consider a quick transfer to a hot conventional oven for 10–15 minutes at 425°F to finish the skin.
For a quick glance, here’s a summary:
| Issue | Why It Happens | How to Improve |
| Pale, rubbery skin | Too much moisture in roaster; lid opened too often | Start at 450°F, pat skin dry, minimize lid lifting |
| Lack of browning | No Maillard reaction due to steam buildup | High initial heat and dry skin prep |
| Uneven coloring | Overcrowding or poor air circulation inside roaster | Ensure airflow around bird, consider oven finish step |
Dry Turkey
Dryness is one of the most common complaints when roasting turkey, and electric roasters are not immune to the problem. The issue often comes down to timing, internal fat content, and carryover heat. If the internal temperature rises much above 165°F, especially in the breast, the meat fibers begin to contract aggressively, squeezing out moisture.
One major cause is letting the bird cook too long after reaching safe temperatures. Turkey continues to rise in temperature even after the heat source is turned off, especially if left covered in the hot roaster basin. That’s why it’s critical to remove the turkey right as it hits 165°F in the thigh and breast—not after.
Another contributing factor is the absence of internal moisture. If the bird wasn’t brined, or if you skipped the herb butter under the skin, there’s nothing to help retain water during the long cooking process. These steps may seem optional but make a dramatic difference in juiciness.
Sometimes, the turkey is carved too quickly after cooking. When that happens, the hot juices haven’t had time to settle back into the muscle fibers, and they’ll rush out the moment the knife cuts in. Allowing the turkey to rest for 15–20 minutes before carving helps preserve that moisture.
If you do end up with dry slices, don’t panic. Warm broth, turkey drippings, or gravy spooned over the meat before serving can revive even slightly dry portions and add flavor at the same time.
Temperature Inconsistencies
In an electric roaster, hot spots or improper monitoring can cause parts of the bird to overcook while others stay underdone.
Solutions:
- Use a digital probe thermometer and insert it before roasting. This lets you monitor temperature without lifting the lid.
- Insert one probe in the thickest part of the thigh and another in the center of the breast. For stuffed birds, check the stuffing too—it must reach 165°F.
- Avoid overcrowding the roaster. If vegetables or foil barriers block heat circulation, some areas may cook slower.
If you find cold spots after initial cook time, return the turkey to the roaster at 350°F and continue until all zones reach food-safe temperatures.
Temperature Inconsistencies
Even though electric roasters are designed to provide consistent heat, it’s not uncommon to encounter uneven cooking—especially with larger birds. The thickest parts of the thigh may lag behind the breast, or the stuffing might take longer to heat through. These differences can lead to undercooked zones or overdone sections.
The most effective solution is using a probe thermometer inserted before cooking begins. You’ll want to place one probe into the thickest part of the thigh—just inside the leg without touching bone—and another into the center of the breast. If your turkey is stuffed, a third probe into the center of the stuffing is critical. This way, you can monitor the progress in real time without lifting the lid, which would let out heat and disrupt the internal temperature balance.
If your electric roaster doesn’t support probe placement, use a high-quality digital instant-read thermometer—but be strategic about when you open the lid. Each check costs you valuable cooking heat. Wait until the estimated cook time is nearly up before testing. If you discover that one area lags behind, return the turkey to the roaster and continue cooking at 350°F until the lowest temp area reaches 165°F.
Pay attention to positioning as well. If the turkey is off-center or resting unevenly on the rack, some sections may be closer to the heating element. Always position it breast-side up and centered on the rack, with enough space for air to circulate.
Side Dishes & Serving Suggestions
A turkey roasted in an electric roaster doesn’t just save oven space—it creates opportunity. With the right approach, you can prepare complementary dishes directly in the same unit, use every drop of flavor from drippings, and plan for leftovers that go well beyond sandwiches.
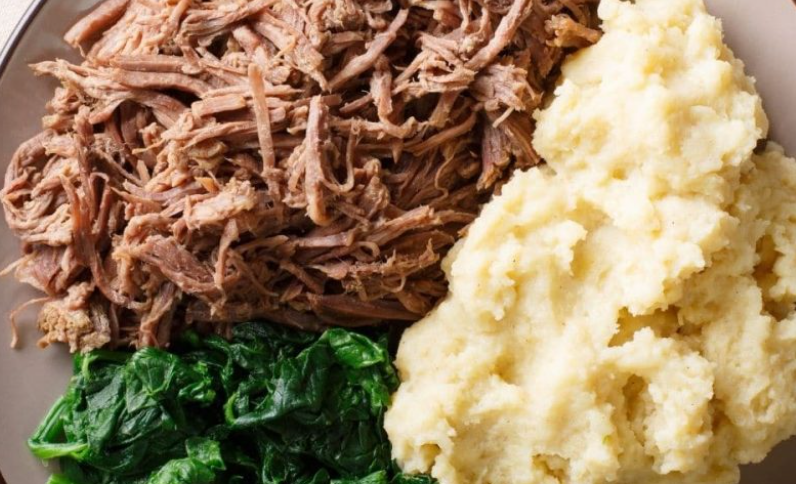
Easy Pan-Sides
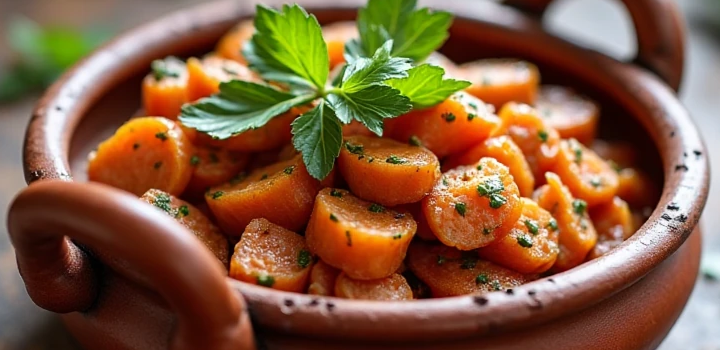
While the turkey roasts on its rack, the lower pan area becomes a rich, hot environment perfect for adding flavor to root vegetables. Cubed carrots, chunks of potato, parsnips, celery root, sweet potatoes, or even whole garlic cloves can be placed directly beneath the roasting rack in a shallow layer.
As the turkey cooks, fat and juices drip down, basting the vegetables naturally. They roast in the accumulated drippings and steam, gaining both flavor and color. If adding vegetables, make sure they’re cut into uniform pieces to cook evenly, and avoid overfilling the pan to maintain proper air circulation.
By the time the turkey is done, you’ll have a rich medley of soft, savory vegetables—no extra pots needed.
Gravy from Drippings
One of the best parts of roasting turkey in any setting is the flavorful drippings left behind. In an electric roaster, these collect below the rack, and they’re ideal for making gravy.
Once the turkey is removed and resting, carefully ladle or pour the liquid into a heatproof measuring cup or fat separator. Allow it to settle for a few minutes so the fat rises to the top. Skim or pour off excess fat, leaving behind the deeply flavorful juices.
Transfer the juices to a saucepan on the stovetop. Bring to a simmer, then whisk in a slurry of flour and cold water or a butter-flour roux to thicken. Let it cook until smooth and glossy, seasoning with salt and pepper to taste. A splash of white wine or a dash of poultry seasoning can elevate the flavor even further.
This method creates a rich, homemade gravy in minutes—and it’s a perfect use for those juices that would otherwise go to waste.
Make-Ahead & Use Leftovers
Planning ahead doesn’t stop at the main meal. Proper storage and creative reuse of leftovers extend the effort of roasting a turkey into several more meals.
Once cooled, carve the remaining meat off the bones and transfer it to airtight containers. Store in the refrigerator for up to four days or freeze for up to two months. Always refrigerate leftovers within two hours of cooking to ensure food safety.
Turkey bones and leftover drippings are ideal for homemade stock. Simmer with onion, carrots, celery, herbs, and water for several hours to create a rich base for soups and sauces.
As for the meat itself, consider these satisfying uses:
| Leftover Use | Description |
| Turkey soup | Use homemade stock, add shredded meat and noodles |
| Turkey sandwiches | Classic with cranberry and stuffing, or spicy panini |
| Turkey salad | Toss chopped turkey with mayo, mustard, celery |
| Turkey hash | Sauté with potatoes, onions, and herbs |
| Turkey enchiladas | Roll with cheese and sauce, bake until bubbling |
Each dish gives new life to your roast and keeps your hard work from going to waste.
15+ FAQ – Your Electric Roaster Turkey Questions Answered
1. Can I cook a frozen turkey directly in the electric roaster?
No. A frozen or partially frozen turkey must never be cooked directly in a roaster or any oven. The outside will reach a high temperature while the center remains dangerously undercooked, risking bacterial contamination. Always thaw the bird fully in the refrigerator or a cold water bath before roasting.
2. How long does it take to cook a turkey in an electric roaster?
The average time is 15 to 20 minutes per pound for an unstuffed turkey at 325°F. For example, a 16-pound bird usually takes 4 to 5 hours. However, actual cook time depends on the turkey’s starting temperature, whether it’s brined or stuffed, and the specific brand of roaster. Use internal temperature as your true indicator.
3. Do I need to add water to the bottom of the electric roaster?
No, do not add water. The turkey will release its own juices as it roasts, which collect at the bottom. Adding water will steam the turkey instead of roasting it, resulting in soggy skin and diluted flavor.
4. Can I stuff the turkey before roasting it in the electric roaster?
Yes, but it requires extra attention. Stuffing must reach 165°F for safety, which means the rest of the turkey may become overcooked if not monitored closely. If you’re stuffing, use a thermometer probe inside the stuffing and consider starting with it slightly warm to shorten cook time.
5. How do I get crispy skin in an electric roaster?
Begin roasting at a high temperature (around 450°F) for the first 30 minutes with the lid closed. This initial heat promotes browning. Dry the turkey skin well before seasoning and avoid lifting the lid. If necessary, finish in a conventional oven at 425°F for 10–15 minutes to achieve deeper browning.
6. Should I baste the turkey during roasting?
Basting is optional but often unnecessary in an electric roaster. The closed lid traps moisture efficiently, and frequent basting means lifting the lid, which disrupts consistent heat and can increase cooking time. If you do baste, limit it to once or twice max.
7. Can I cook vegetables with the turkey in the roaster?
Yes, root vegetables like carrots, potatoes, parsnips, and sweet potatoes can be placed beneath the rack. They’ll roast in the drippings and soften beautifully. Make sure the pan isn’t overcrowded so air circulation remains effective.
8. Is brining worth it for turkey in a roaster?
Brining adds flavor and improves moisture retention, which can be especially helpful in electric roasting where the skin doesn’t dry as much. Either a wet or dry brine enhances juiciness, especially in the breast. Just remember to pat the turkey dry before roasting for better skin texture.
9. How do I know when the turkey is done?
Use a meat thermometer inserted into the thickest part of the thigh and breast. The turkey is done when both register 165°F. If stuffed, the center of the stuffing must also reach 165°F. Don’t rely on pop-up timers—they’re not always accurate.
10. Why is my turkey cooking faster than expected in the roaster?
Electric roasters are more efficient than traditional ovens due to their enclosed heat design and smaller volume. They often cook turkeys up to 30% faster. Start checking the internal temperature earlier than you would in a conventional oven to avoid overcooking.
11. Can I use a cooking bag inside the roaster?
It’s not recommended. Cooking bags are designed for oven use, not enclosed roasters. They may interfere with heat flow or melt against heating elements. The electric roaster already creates a moist cooking environment that renders bags unnecessary.
12. What size turkey fits in a standard electric roaster?
Most standard electric roasters (18–22 quart capacity) can handle turkeys up to 24 pounds. If your bird is on the larger side, make sure the lid closes completely and that air can still circulate. If the turkey touches the lid, consider roasting the breast separately.
13. How do I use the drippings for gravy?
After roasting, remove the turkey and let the drippings settle in the roaster pan. Skim off excess fat, then transfer the remaining liquid to a saucepan. Bring to a simmer, add a flour or cornstarch slurry, and whisk until thickened. You can enrich the flavor with wine, herbs, or turkey stock.
14. Can I carve the turkey in the roaster pan?
It’s better to transfer the turkey to a cutting board to rest and carve. The roaster pan retains a lot of heat, making carving difficult and potentially unsafe. Let the bird rest 15–20 minutes, then carve on a stable surface with good lighting and space.
15. What’s the best way to store and reheat leftover turkey?
After carving, refrigerate leftovers within two hours in shallow, airtight containers. Use within four days. For reheating, gently warm slices in a covered dish with a splash of broth or gravy at 300°F until heated through. Avoid microwaving on high, which can dry the meat.