Pierogi in the Slow Cooker
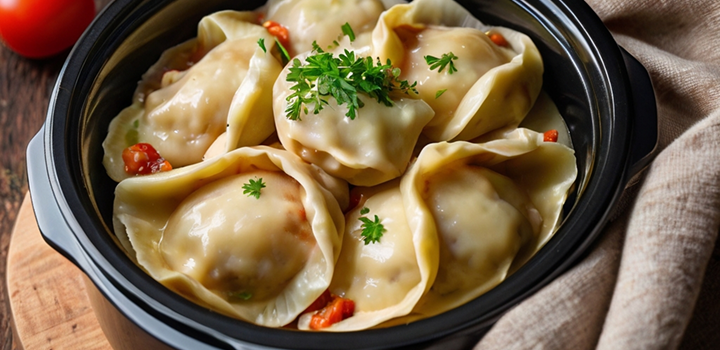
Pierogi in the Slow Cooker: A Slow Simmered Twist on a Classic Comfort

Arianne Nemna
There’s something deeply comforting about a warm pierogi — the soft dough, the hearty filling, the way each bite feels like a hug. I’ve spent years testing different pierogi methods in my kitchen, but once I tried using a slow cooker, I was hooked. It turns out, slow cooking pierogi not only simplifies the process but also deepens the flavor in ways boiling just can’t match. If you’re a beginner or just looking to simplify your favorite Eastern European dish, this method may become your go-to.
- Why Make Pierogi in a Slow Cooker?
- Choosing the Right Pierogi for the Slow Cooker
- Preparing a Flavorful Base
- Layering and Cooking Techniques
- Turning Pierogi into a Complete One-Pot Meal
- Finishing Touches for Flavor and Texture
- Serving Suggestions That Elevate the Dish
- Storage, Freezing, and Make-Ahead Strategies
- Customizing Pierogi in the Slow Cooker
- Common Issues and Easy Fixes
- 15+ Frequently Asked Questions
Why Make Pierogi in a Slow Cooker?
Rethinking Traditional Cooking for Modern Kitchens
Traditional pierogi preparation can be time-consuming and requires close attention at the stovetop. With a slow cooker, you hand off much of the work to gentle, even heat. The dough absorbs flavor slowly, and the filling stays intact without splitting or drying out. It’s ideal for multitaskers and busy home cooks.
Texture and Flavor Benefits of Slow Cooking
When cooked low and slow, pierogi develop a pillow-soft outer layer while soaking up the aromatic liquid you surround them with. They’re less likely to tear than when boiling, and unlike pan-frying, there’s no risk of uneven browning or burnt spots. The slow cooker keeps the structure stable while infusing deep savory notes.
When to Choose the Slow Cooker Over Boiling or Pan-Frying
Use a slow cooker when you want pierogi to be part of a larger, rich dish—perhaps layered with onions, mushrooms, or slow-simmered cabbage. It’s also the method of choice if you’re feeding a crowd or planning ahead for a dinner party. Unlike stove methods, slow cookers maintain their heat without active monitoring.
Choosing the Right Pierogi for the Slow Cooker
Fresh, Frozen, or Homemade: What Works Best?
Frozen pierogi hold their shape very well in moist environments and are a convenient option if you’re not making your own. Homemade ones, if properly sealed and slightly chilled before cooking, also work beautifully. Fresh store-bought pierogi are fine too but tend to be softer, so reduce cooking time to avoid sogginess.
Stuffing Options and How They Hold Up in Moist Heat
Dense fillings like mashed potato or ground meats hold best in the slow cooker. Cottage cheese and farmer’s cheese also do well, provided they’re not overly watery. Sauerkraut can add a nice tang, but it should be well-drained and combined with something starchy to hold together.
Potato and Cheese vs. Sauerkraut vs. Meat Fillings
- Potato and Cheese pierogi absorb broth flavors wonderfully and become extra creamy.
- Sauerkraut versions develop a deeper sour note but must be well-balanced with fat.
- Meat-filled pierogi become especially tender, with the meat fibers further breaking down and becoming rich.
Dough Considerations: Thickness, Sealing, and Integrity
A slightly thicker dough works better in a slow cooker. It should be well-kneaded and fully sealed to prevent any tearing during the cook. Pierogi that are pinched too loosely or have air bubbles tend to unravel. If making from scratch, allow the dough to rest before rolling to improve elasticity.
Preparing a Flavorful Base
Broth, Cream, or Butter — What to Pour In and Why
The base liquid is essential for both flavor and texture. A light chicken or vegetable broth gives a clean finish, while cream or sour cream-based sauces offer richness. Melted butter adds a golden undertone and helps the pierogi avoid sticking to the bottom. For meatier recipes, beef broth pairs nicely with onion-heavy fillings.
Building Umami with Onions, Garlic, and Mushrooms
Onions should be sautéed until golden or fully caramelized before adding them to the slow cooker. Garlic can be sliced or crushed. Mushrooms such as cremini or shiitake bring a deep umami character and should be browned beforehand to develop their flavor fully. These ingredients create a savory depth that balances the starchiness of the pierogi.
Caramelized vs. Raw Vegetables in Slow Cooking
Caramelized vegetables add sweetness and body to the base liquid, while raw vegetables retain a fresher, sharper bite but don’t release as much flavor. For pierogi, go with caramelized onions and browned mushrooms for best results.
Balancing Liquids to Avoid Soggy or Dry Results
A common mistake is using too much liquid. You need just enough to cover the bottom layer and create gentle steam—typically about one cup per batch of 12 pierogi. If the liquid level is too high, pierogi can become waterlogged. Too low, and they risk drying out or burning. Monitor visually without lifting the lid by using a transparent lid, or check halfway and adjust with warm broth.
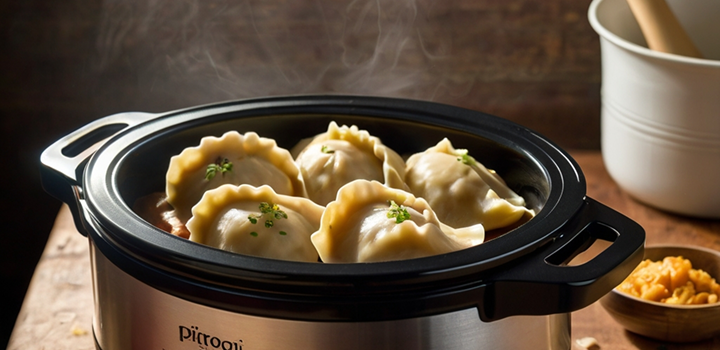
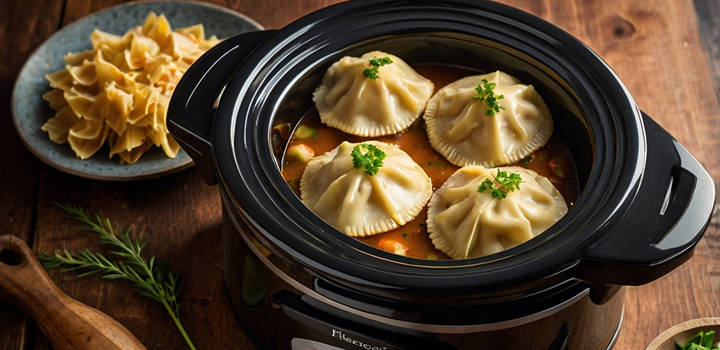
Layering and Cooking Techniques
Best Practices for Layering Ingredients in the Pot
Start by buttering or lightly oiling the base of the slow cooker to prevent sticking. The first layer should be a bed of cooked onions, mushrooms, or a small amount of the sauce base—this prevents direct contact between the pierogi and the hot surface. Next, lay the pierogi in a single layer with minimal overlap. Add more sautéed vegetables or cooked meat if desired, then pour just enough broth or cream sauce to moisten but not submerge. Continue layering this way if you have a larger batch.
When to Add Sauerkraut or Cooked Sausage
If you’re including sauerkraut, add it after the first layer of pierogi, ideally combined with onions or caraway seeds. For precooked sausage like kielbasa, slice it and add on top or between layers, so it imparts flavor as it warms. Avoid raw sausage, as it may not cook evenly or release too much grease into the sauce.
Recommended Heat Settings and Cooking Times
Use the LOW setting on your slow cooker for best results. This typically takes 3 to 4 hours for frozen pierogi and 2 to 3 hours for fresh or homemade ones. If you’re in a hurry, the HIGH setting can reduce cook time by about 30%, but the texture may be less tender and slightly more prone to sticking. Never leave pierogi in the cooker for more than 5 hours, as the dough will overhydrate and lose its structure.
Stirring, Lifting, or Leaving It Alone — What’s Safe?
It’s tempting to peek, but resist lifting the lid during cooking, especially in the first 2 hours. Each lift releases accumulated steam and extends cooking time. Stirring is not recommended once pierogi are layered, as they are fragile and prone to tearing. Instead, gently tilt the cooker or ladle liquid over the top if you feel moisture isn’t distributing evenly.
Turning Pierogi into a Complete One-Pot Meal
Adding Protein — Kielbasa, Bacon, or Beans
Sliced kielbasa adds a smoky depth that complements potato and cheese pierogi well. Precook bacon until slightly crisp before layering, as it won’t crisp further in the moist slow cooker environment. For a vegetarian option, canned white beans or lentils provide extra body and absorb the surrounding flavors. Make sure proteins are fully cooked before adding, as the low temperature won’t adequately cook raw meat or legumes.
Seasonal Vegetables That Pair Well with Pierogi
In colder months, root vegetables like carrots, parsnips, or turnips pair beautifully with hearty pierogi fillings. In spring, add a handful of spinach or green peas near the end of cooking for color and brightness. Autumn is ideal for cabbage, mushrooms, and caramelized onions. Always sauté firmer vegetables before adding so they don’t remain undercooked in the slow cooker.
How to Adjust Quantity for Family-Sized Meals
The average slow cooker fits about 12 to 18 pierogi, depending on size and shape. For larger families, double the ingredients and use a 7–8 quart cooker. Stack layers with care and ensure enough liquid reaches the lower levels. If cooking for fewer people, reduce liquid and filling amounts, but maintain seasoning levels to avoid blandness.
Finishing Touches for Flavor and Texture
When and How to Add Dairy (Sour Cream, Cheese, Cream Sauce)
Dairy should be added in the final 15 to 30 minutes of cooking to prevent curdling. Stir in sour cream gently and evenly, or dollop it on top before serving. Grated cheese melts nicely over the top in the last few minutes, especially if you briefly uncover the pot to allow some evaporation and slight thickening. Cream-based sauces can be thinned with a splash of broth or milk before mixing in.
Crispy Toppings: Breadcrumbs, Fried Onion, or Herbs
For added texture, prepare crispy toppings separately. Toasted breadcrumbs in butter or olive oil, fried onions, or chopped fresh herbs like dill or parsley work well. Sprinkle them just before serving to keep them from getting soggy.
Timing Garnishes Right to Avoid Mushiness
Add garnishes only after turning off the slow cooker and plating the dish. This preserves the crunch and freshness. Avoid garnishing while the cooker is still steaming, as that moisture will quickly ruin any crisp textures.
Boosting Flavor After Cooking Without Overpowering
A quick drizzle of browned butter, a dash of vinegar, or a squeeze of lemon can dramatically lift the final flavor. Use restraint—just enough to brighten without masking the natural richness. Fresh herbs or a spoonful of sautéed mushrooms added last-minute also enhance aroma and complexity.
Serving Suggestions That Elevate the Dish
Traditional and Modern Accompaniments
Classic accompaniments for pierogi often include caramelized onions, sour cream, or a spoonful of mushroom gravy. For a more modern twist, pair them with pesto, horseradish cream, or a drizzle of hot honey. Slow-cooked pierogi absorb surrounding flavors, so choose sides that offer contrast—bright, acidic, or herbaceous elements work well to cut through the richness.
How to Plate Slow-Cooked Pierogi for Entertaining
Use a shallow bowl or rimmed plate to hold both the pierogi and a spoonful of its cooking broth or sauce. Arrange pierogi in overlapping layers, slightly fanned out, and top with reserved sautéed vegetables or garnishes. If serving buffet-style, keep them in a warm slow cooker insert placed on a warming tray, making sure there’s just enough liquid to prevent drying.
Pierogi as a Side vs. Main Dish Strategy
When served as a side, limit to 2 or 3 pierogi per guest, pairing them with roast meats or seasonal salads. For a main dish, 5 to 7 pierogi are ideal, especially when paired with hearty garnishes like sausage, braised greens, or thick cream sauces. Adjust portions according to whether the filling includes protein or just starch.
Pairing with Beverages — From Kvass to White Wine
A glass of chilled kvass or light lager complements classic potato and cheese pierogi. For more luxurious versions with creamy sauces or mushroom bases, a dry Riesling or unoaked Chardonnay works well. Herbal infusions or sparkling mineral water with lemon also make good non-alcoholic matches. Choose drinks that balance salt and fat with brightness or fizz.
Storage, Freezing, and Make-Ahead Strategies
Refrigeration — How Long Is Too Long?
Cooked pierogi with sauce can be safely refrigerated for up to 3 days. Make sure they’re stored in a sealed container with a bit of cooking liquid or sauce to prevent them from drying out. Let them cool fully before sealing to avoid condensation, which can turn them soggy.
Freezer-Friendly Prep — Best Containers and Timing
To freeze, let cooked pierogi cool completely and layer them with parchment paper between rows. Use a freezer-safe glass container or a heavy-duty plastic box with a tight seal. Add a splash of sauce to help preserve moisture. Store for up to 2 months. Avoid freezing dairy-based sauces, as they can separate upon reheating.
Reheating Pierogi Without Losing Texture or Moisture
The best method is to reheat in a covered skillet with a few spoonfuls of broth or cream over low heat. Let them steam gently without stirring to avoid breaking them. Alternatively, use the microwave in a covered dish with a damp paper towel, reheating on medium power in short intervals. Avoid oven reheating, which dries out the dough and hardens the filling.
Customizing Pierogi in the Slow Cooker
Vegetarian and Vegan Options Without Flavor Loss
Vegetarian pierogi fillings like sauerkraut, mushrooms, or potatoes hold up beautifully in the slow cooker when paired with savory vegetable broths and caramelized onions. For vegan versions, swap in plant-based butter or olive oil and use oat cream or cashew cream to finish. Build flavor early using garlic, leeks, or miso in the base so richness develops even without meat or dairy.
Gluten-Free Dough Adjustments for Slow Heat
Gluten-free pierogi doughs made with rice or tapioca flours tend to be more fragile. Make sure they’re well-sealed and slightly thicker than regular dough. Let them chill before cooking to help them hold shape. In the slow cooker, reduce cook time slightly and avoid crowding the pot. To prevent sticking, coat them lightly in oil or broth before layering.
International Flavor Profiles: Indian, Italian, and More
Pierogi are incredibly adaptable. Use curry-spiced potatoes or paneer for an Indian twist, or ricotta-spinach filling with marinara for an Italian-style dumpling. Match the broth or sauce accordingly — coconut milk for Southeast Asian flavors, or tomato-garlic base for Mediterranean fusion. Add fresh herbs, aromatics, and regional vegetables during the last hour for layered results.
Common Issues and Easy Fixes
Preventing Overcooked or Broken Dumplings
Overcooking pierogi makes them fall apart. To avoid this, use low heat and keep total cook time within 2.5 to 3 hours if using fresh or thawed pierogi. Frozen pierogi can go a little longer, but watch the texture. Don’t stack too many layers — keep them in a single or double layer to minimize pressure.
Avoiding Blandness with Proper Layering and Seasoning
Start by seasoning your cooking base thoroughly. Salt the broth, sauté the vegetables, and add aromatics early. Taste the base liquid before adding pierogi — it should already be flavorful. If needed, stir in a splash of vinegar or mustard halfway through to enhance depth, or a sprinkle of paprika or nutmeg at the end to sharpen.
What to Do When There’s Too Much Liquid
If the result is too watery, remove the lid for the last 30 minutes of cooking or ladle out some liquid into a saucepan. Simmer it down with a thickener like cornstarch slurry, then return it to the cooker. This concentrates flavor and improves texture. Another option is to blend part of the cooked vegetables into the broth to create a natural thickener.
15+ Frequently Asked Questions
How long does it take to cook pierogi in a slow cooker on low?
Fresh or thawed pierogi usually take 2.5 to 3 hours on low. Frozen pierogi need 3 to 4 hours. Avoid cooking too long, as this can cause them to split or go mushy.
Can you put pierogi in the slow cooker without any liquid?
No. A small amount of liquid is essential to create steam and prevent sticking or burning. Use broth, cream, or a combination — just enough to coat the bottom and cover halfway up the pierogi.
Do you need to thaw frozen pierogi before slow cooking?
Not necessarily. Frozen pierogi can go in directly but may require slightly more time. If you’re layering multiple ingredients, thawing can help keep texture more consistent.
Is it safe to leave pierogi unattended in the slow cooker?
Yes, as long as the temperature is set to low and there’s enough liquid. Don’t leave it for more than 4 hours if using delicate homemade pierogi.
Can you cook pierogi in the slow cooker with kielbasa together?
Yes. Add sliced kielbasa early in the layering process. It adds fat and flavor to the base and cooks well alongside pierogi.
What’s the best way to prevent pierogi from sticking together?
Coat them lightly in oil or broth before layering, and try not to stack them tightly. Stirring isn’t recommended mid-cook, so layer mindfully at the start.
How do you make crispy toppings if pierogi are soft-cooked?
Make toppings separately — fry breadcrumbs, onions, or bacon in a skillet and add just before serving. Never add them to the slow cooker early.
Can I reheat leftover slow-cooked pierogi?
Yes. Reheat gently on the stovetop with a bit of butter or broth. Microwave works too, but cover them to retain moisture and avoid drying out.
How long do cooked pierogi last in the fridge?
Up to 3 days if stored in an airtight container. Reheat thoroughly before serving.
Can you freeze slow-cooked pierogi after cooking?
Yes, but they may soften a bit. Freeze in a single layer with parchment in between, and reheat in the oven or stovetop with butter.
How much liquid should I add to the slow cooker?
Enough to cover the base and partially submerge the pierogi. Roughly 1 to 1.5 cups depending on the pot size. Don’t drown them or they’ll get soggy.
What’s the best temperature setting — low or high?
Always use low heat for pierogi. High heat can cause them to fall apart or stick. Slow, gentle cooking gives the best texture.
Can I make a creamy sauce for pierogi directly in the cooker?
Yes, but add cream toward the end of the cook time to prevent curdling. Let it simmer gently for the final 20–30 minutes.
Are there any pierogi fillings that don’t work well in a slow cooker?
Delicate or loose fillings like cottage cheese or egg can become watery or leach into the broth. Stick to firmer, well-sealed fillings for best results.
How do you thicken the broth if it’s too watery?
Use a cornstarch or flour slurry added at the end. Alternatively, mash some cooked potatoes or vegetables into the liquid to create body.